Search for: Search Button

PowerPoint presentations in a window not full screen
PowerPoint presentations don’t have to be full-screen, that’s the default and normal way to show a deck, but a window option is also there. A windowed presentation lets you display the slides in other software like virtual cameras or desktop capture.
Go to Slide Show | Setup Slide show and choose ‘Browsed by an individual (window)’.

The options are the same in PowerPoint for Windows or Mac.
Start the slide show (Slide Show | From Beginning or From Current Slide) as usual except now it appears in a resizable window.
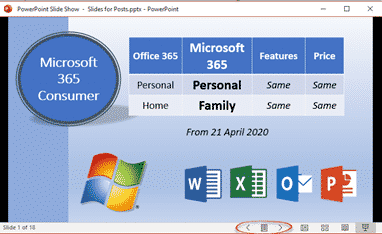
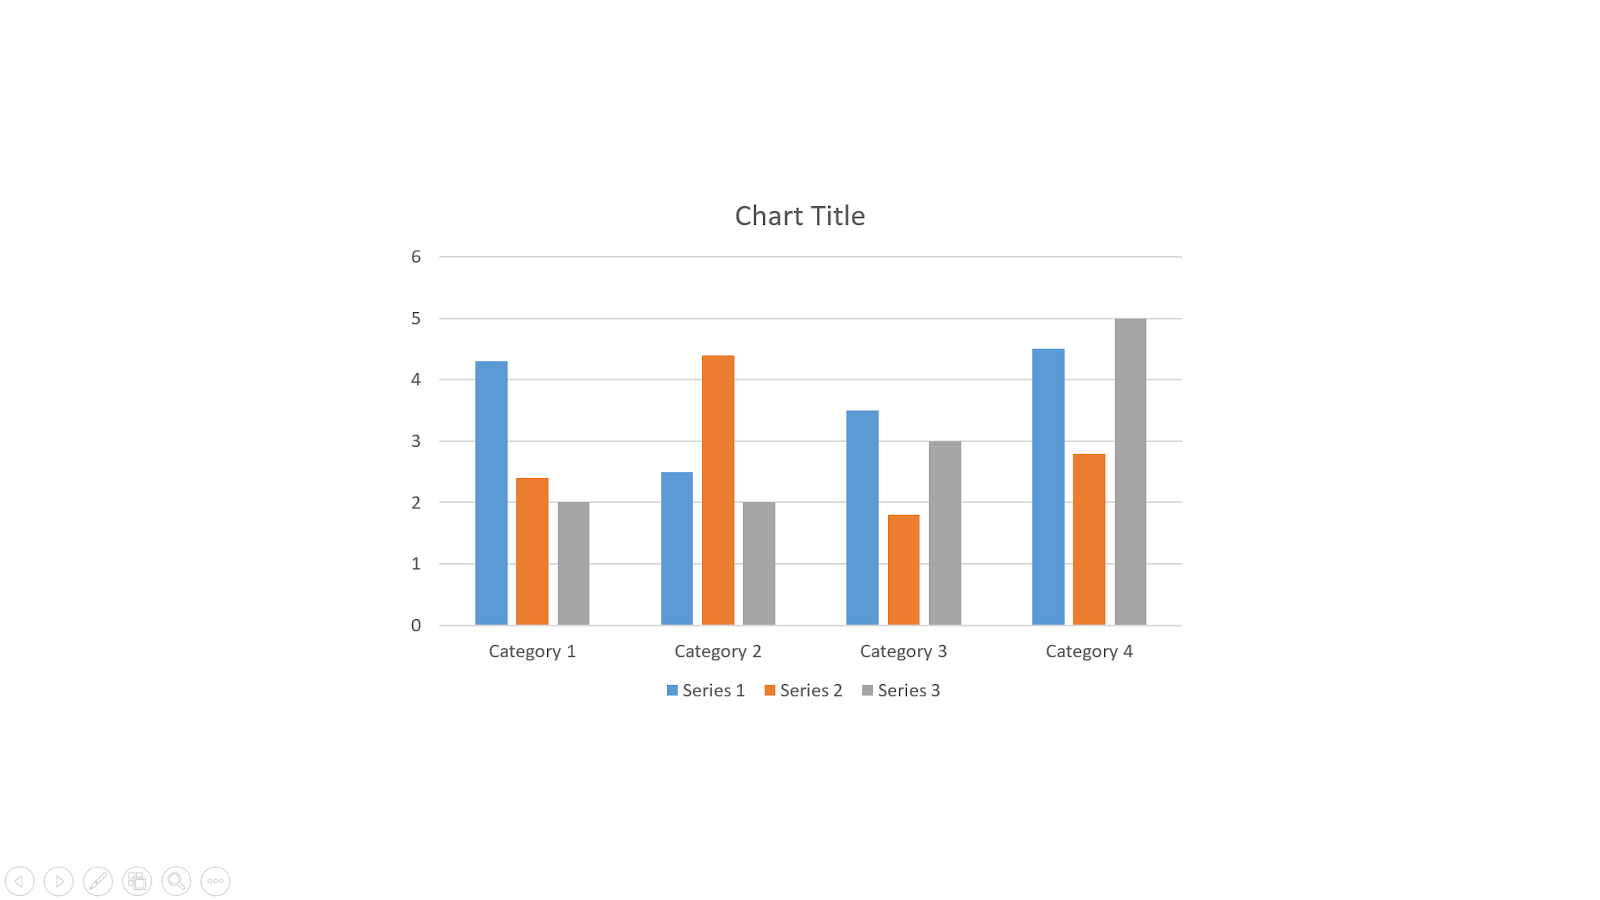
Windowed presentation controls
There are back and forward slide buttons on the bottom status bar (see above).
Click on the icon between those two buttons to see some more options.

The same options appear if you right-click in the presentation while windowed.
- Next / Previous
- Go to Slide – choose a slide from the flyout list.
- Go to Section – for decks in Sections
- Zoom In / Zoom Out
- Print Preview and Print
- Edit Slides
- Full Screen
It would be really nice if Presenter View could appear in a second window – but alas it’s not an option. That would let the use control the presentation properly while the slides appear in another window (which could be visible via a third-party tool).
Switching Full Screen and window slide show
Starting from a windowed presentation means you can switch between Full Screen and the window presentation without showing the entire PowerPoint menus etc. It’s a little neater and more professional.
Go to Full Screen from the menu option.
In Full Screen mode press Escape to return to the windowed presentation.
Why use a windowed PowerPoint presentation?
Having the slides in a resizable window gives you options not available when the deck is taking up the whole screen.
Perhaps you’re demonstrating some software? Have the presentation in one window and the software in another? See A better Side-by-Side document view for Windows and Mac to see how to use windows controls in Windows or Split View on a Mac.
A windowed presentation can be selected as an input option for a virtual camera or other service which lets you choose to display a selected running program. Full screen PowerPoint can’t be selected but the same slide can be chosen from a windowed presentation.
Blur and Virtual Background choices for any online meeting
Clever tricks with Zoom
Adding Virtual Background or blurred video to Teams
About this author

Office-Watch.com
Office 2021 - all you need to know . Facts & prices for the new Microsoft Office. Do you need it? Office LTSC is the enterprise licence version of Office 2021.
Office 2024 what's known so far plus educated guesses. Microsoft Office upcoming support end date checklist.
Latest from Office Watch
- Translate automatic or manual in Outlook
- Microsoft Mesh makes “magical” online meetings
- Why are Teams and Office divorcing?
- Pivotby – Excel’s new faster PivotTables
- More Excel on the web improvements
- All about editing an incoming Outlook message
- What “Update License” means on Microsoft 365 menus
- Excel’s warning about dates and centuries
- Write Excel formulas fast with free Copilot
- Easter images and icons in Microsoft Office
- Credit Card 💳 symbol in Word, Excel, PowerPoint and Outlook
- Yes, there will be a new version of Microsoft Office
- All about Office 2024 for Windows and Mac (so far)
- In person vs virtual event option coming to Outlook
- Checklists now in Microsoft Word
- Start Grouping in Excel for better looking sheets
- Three more Word features reach the web version
- Web link previews in Word for web
- Turn Excel into an AI / LLM wonder
- Don’t trust any text message
PowerPoint Tips Blog
Helping you with presenting, PowerPoint, and speaking
Using a window instead of full screen for Slide Show view
October 28, 2015 by Ellen Finkelstein 8 Comments
- You’re doing a webinar and need to access the webinar interface
- You want to show a web page or application at some point in your presentation
- In response to an unexpected question, you want to show another presentation, spreadsheet or document
One thing I’ve done for a while is to display the presentation in a window. Here’s what I did (until I discovered an easier way):
- Click the Slide Show tab.
- Click the Set Up Slide Show button.
Now, when you go into Slide Show view, PowerPoint opens in a window instead of full-screen. You can maximize the window but you’ll still have access to your taskbar, so it will be easy to get to other programs, including your browser. Ideally, you should be able to configure the taskbar so that it doesn’t appear unless you move your cursor down at the bottom of the screen (which is where the taskbar usually is).
In fact, you can resize the PowerPoint window to any size you want. The window is excellent for comparing animation in 2 presentations, for example, because you can place 2 windows side-by-side.
Reading view is another way to get there
One of the problems with this setting is that it’s easy to forget and if you want to switch from a window to full-screen, you have to go back into the dialog box, which is a few clicks.
Just click it to open your presentation in a window.
The next time you need access to multiple applications, try Reading View!
Can you think of situations where this would be helpful to you? Leave a comment! And if you think others you know might find this post useful, please use the Share buttons below.
Related posts:
- View your slide show in a smaller window so you can see another presentation or program
- Display a quarter-size slide show view
- Add notes in PowerPoint in Slide Show view
- How to zoom into a slide and choose another slide in Slide Show view–PowerPoint 2013
8 Leave a Reply
Great tip. Thanks.

Great tip. Have used Alt-Tab up until now.

I have wanted to do that on numerous occasions.
Thanks Ellen, that’s a great tip

Can anyone see a way of showing Presenters View and slide show in two separate windows? At home it is easy as have 2 screens so can run through a presentation with Presenter View on one screen and Slide show on other. But when away and only have laptop I have not yet found a way of splitting the screen to see my notes in Presenters View, and the show. I thought this might be the answer, but can’t make it work! Can you? I have just upgraded to Office 2016.

This might work for you Don. Ensure you have ticked the “use presenter view” box under the slide show tab. The other thing you need is for the monitor to be in “extend” mode instead of “duplicate”. If it is a PC, press “windows” button with the “p” button to get a pop up which allows you to click on “extend”. good luck.

Super helpful tips! Thank you! This is a life saver for me!

Yes – great tip. using the 2nd option: Reading View. Having a teleconf today during which I have to present from a ppt. Problem for me is sharing the window for the slide but not the notes and still being able to access the window/s. This option goes someway to help me navigate better. My notes are on another screen so that solves that side for now but I would like to share ppt main slides only and only have notes on view for me using one screen. Yet to crack that one on teleconferencing.

You can’t show both Slide Show view (or Reading view) and Presenter view on one screen at the same time as far as I know. I sometimes use Splashtop to use my tablet as a second monitor. This article gives some other options, too. https://www.neweggbusiness.com/smartbuyer/over-easy/how-to-use-your-tablet-as-a-second-monitor/ . You can also buy an inexpensive, small 2nd monitor that clips on to a laptop. I haven’t done that myself but have seen it done.
Tips & How-To , Uncategorized
Solved: powerpoint not full screen on projector.
By P2023Projectors
November 27, 2023
We've got the solution to your PowerPoint woes! If you're struggling with your presentation not displaying in full screen on the projector, fret not.
In this article, we'll guide you through the steps to fix this issue. From adjusting display settings to updating your PowerPoint software, we've got you covered.
Say goodbye to those pesky projection problems and get ready to captivate your audience with a flawless presentation.
Let's dive in and solve this together!
Check the Display Settings
First, we need to adjust the display settings to ensure that Powerpoint is shown in full screen on the projector. When troubleshooting common display issues with Powerpoint presentations, it's important to start by checking the display settings. Incorrect display settings can result in the presentation not being shown in full screen mode on the projector, causing frustration and hindering the effectiveness of your presentation. To fix this issue, follow these troubleshooting tips.
First, make sure that the display resolution on your computer matches the native resolution of the projector. This can usually be adjusted in the computer's settings or display control panel. Additionally, check the aspect ratio settings to ensure they match the projector's specifications.
Next, verify that the display mode is set to extend or duplicate. Sometimes, the projector might be set as the primary display, causing Powerpoint to appear on the computer screen but not on the projector. Changing the display mode will allow the presentation to be shown on both screens simultaneously.
Lastly, ensure that the display settings in Powerpoint are configured correctly. Go to the 'Slideshow' tab and click on 'Set Up Slide Show.' Make sure the 'Show type' is set to 'Presented by a speaker (full screen).' Also, check the 'Resolution' settings and select the appropriate option for your projector.
Adjust the Resolution Settings
Adjusting the resolution settings is crucial to ensure that Powerpoint is displayed in full screen on the projector. When the resolution settings aren't properly adjusted, it can result in a distorted or cropped display, making it difficult for the audience to see the content clearly.
To adjust the resolution settings, follow these steps:
- Step 1: Open the Display Settings
- Go to the Control Panel and click on 'Display' or right-click on the desktop and select 'Display settings.'
- This will open the Display settings window .
- Step 2: Adjust the Screen Resolution
- In the Display settings window, locate the 'Resolution' drop-down menu.
- Click on the drop-down menu and select a resolution that's compatible with the projector.
- It's recommended to choose the native resolution of the projector for the best display quality.
By adjusting the screen size, you can ensure that the Powerpoint presentation is displayed in full screen on the projector.
However, if you're still experiencing issues, it may be necessary to troubleshoot the connection between the computer and the projector. This can involve checking the cables, verifying the video output settings, or restarting both the computer and the projector. Troubleshooting connection issues can help resolve any further display problems and ensure a seamless presentation experience.
Use the Correct Display Mode
To ensure a full-screen display of your Powerpoint presentation on the projector, we need to use the correct display mode. Display troubleshooting is crucial in resolving issues with Powerpoint not being displayed in full screen on the projector. One common problem is the incorrect display mode being selected. When connecting your computer to a projector, it's important to check if the projector is compatible with your display mode. Some projectors only support specific display resolutions and refresh rates.
To use the correct display mode, start by connecting your computer to the projector using the appropriate cables. Then, navigate to the display settings on your computer. In Windows, you can do this by right-clicking on the desktop and selecting 'Display settings.' On a Mac, go to 'System Preferences' and click on 'Displays.' In the display settings, choose the display mode that matches the native resolution and refresh rate of the projector.
Update Your Powerpoint Software
Let's make sure our Powerpoint software is up to date to ensure smooth projection.
To do this, we need to check for any available updates and install the latest version.
Check for Updates
Before our presentation, we need to ensure that we've updated our Powerpoint software. Checking for updates is crucial as it ensures that we've the latest features and fixes any bugs that may interfere with our presentation.
To update our Powerpoint software, follow these steps:
- Open Powerpoint and click on the 'File' tab.
- Select 'Account' from the options on the left side of the screen.
- Click on 'Update Options' and choose 'Update Now' from the drop-down menu.
Updating our Powerpoint software can resolve many issues, including problems with displaying the presentation in full screen on the projector. It's an essential troubleshooting step to ensure a smooth and successful presentation.
Keeping our software up to date will also help us take advantage of any new features that can enhance our presentation experience.
Install Latest Version
We need to install the latest version of Powerpoint software. Updating your Powerpoint software can often solve issues with Powerpoint not displaying in full screen on a projector.
It's important to keep your software up to date to ensure compatibility with projectors and to access the latest features and bug fixes.
To install the latest version, follow these troubleshooting steps:
1) Open Powerpoint and click on the 'File' tab.
2) Select 'Account' and click on 'Update Options.'
3) Choose 'Update Now' to check for and install any available updates.
It's also worth noting that common projector issues, such as incompatible display resolutions or incorrect input settings, can also cause Powerpoint not to display properly.
Check the Projector's Aspect Ratio
Let's now talk about the points related to checking the projector's aspect ratio.
One common reason for Powerpoint not being full screen on a projector is an incorrect aspect ratio.
It's important to ensure that the aspect ratio of the projector matches the aspect ratio of your Powerpoint presentation.
Incorrect Aspect Ratio
The incorrect aspect ratio of the projector can cause Powerpoint not to display in full screen. When the aspect ratio of the projector isn't properly set, it can result in the image appearing stretched or distorted on the screen.
To troubleshoot this issue, follow these steps:
- Check the projector's aspect ratio settings:
- Access the projector's menu settings and locate the aspect ratio option.
- Ensure that the aspect ratio matches the resolution of your Powerpoint presentation.
- Adjust the image settings on the projector:
- Use the projector's remote control or buttons to adjust the image size, position, and aspect ratio until it fills the screen properly.
- Experiment with different aspect ratios to find the one that best fits your Powerpoint slides.
Adjusting Screen Resolution
To adjust the screen resolution, access the menu settings of the projector and locate the aspect ratio option. Adjusting the screen resolution can help resolve compatibility issues between your PowerPoint presentation and the projector. One common issue is when the aspect ratio of the projector does not match the aspect ratio of your presentation. This can result in a distorted or improperly displayed image on the screen. By adjusting the screen resolution to match the projector's aspect ratio, you can ensure that your presentation will be displayed correctly and in full screen on the projector. Here are some troubleshooting tips for adjusting the screen resolution:
Ensure the Projector Is Set as the Primary Display
To ensure the projector is set as the primary display, we must first check the computer's display settings. Here are the troubleshooting steps to follow:
- Connect the projector to the computer using the appropriate cable.
- Ensure that both ends of the cable are securely connected.
- If using an HDMI cable, make sure the computer's HDMI port is functioning properly.
- Access the display settings on your computer.
- On Windows, right-click on the desktop and select 'Display settings.'
- If multiple displays are detected, click on the 'Identify' button to determine which display is the projector.
- Set the projector as the primary display by selecting it and checking the box that says 'Make this my main display.'
- On Mac, go to Apple menu > System Preferences > Displays.
- If multiple displays are detected, drag the white bar to the projector's screen to make it the primary display.
Reset the Powerpoint Preferences
To resolve the issue of PowerPoint not displaying in full screen on the projector, let's now address the subtopic of resetting the PowerPoint preferences. Sometimes, the preferences within PowerPoint can become corrupted or misconfigured, causing display issues. By resetting the preferences, we can troubleshoot and potentially fix the problem.
To reset the PowerPoint preferences, follow these steps:
- Close PowerPoint completely.
- Hold down the Windows key and press 'R' to open the Run dialog box.
- Type '%appdata%\Microsoft\PowerPoint' and press Enter.
- Locate the 'PowerPoint' folder and rename it to 'PowerPoint.old'.
- Restart PowerPoint.
By renaming the PowerPoint folder, you're essentially creating a backup of your preferences. When PowerPoint restarts, it will create a new folder with default preferences. This can help resolve any issues related to misconfigured settings.
After resetting the preferences, open your PowerPoint presentation and try displaying it on the projector again. Hopefully, this will solve the problem and allow your presentation to be shown in full screen.
Frequently Asked Questions
How do i check the display settings on my computer.
To check the display settings on our computer, we can start by checking the graphics options in the control panel. If we're having trouble with the display, troubleshooting the graphics settings might help resolve the issue.
What Should I Do if Adjusting the Resolution Settings Doesn't Solve the Issue?
If adjusting resolution settings doesn't solve the issue, we can try alternative solutions. Troubleshooting steps may include checking the cable connections, updating display drivers, or using a different presentation software.
How Can I Determine the Correct Display Mode for My Powerpoint Presentation?
To determine the correct display mode for a PowerPoint presentation, we can explore the display mode options in PowerPoint and troubleshoot any display issues that arise. This will ensure an optimal presentation experience.
Is It Necessary to Update My Powerpoint Software to Fix the Problem?
No, updating our PowerPoint software may not be necessary to fix the problem. Troubleshooting PowerPoint display issues can involve checking powerpoint software compatibility with the projector and adjusting display settings accordingly.
How Do I Check the Aspect Ratio of the Projector?
To check the aspect ratio of the projector, we can navigate to the display settings on the projector. Ensuring the aspect ratio compatibility between the projector and PowerPoint can help troubleshoot display issues.
In conclusion, there are several steps you can take to solve the issue of PowerPoint not being displayed in full screen on a projector.
By checking and adjusting the display and resolution settings, using the correct display mode, and updating the PowerPoint software, you can ensure that the presentation is displayed properly.
Additionally, checking the projector's aspect ratio and setting it as the primary display can also help resolve the issue.
Finally, if none of these steps work, resetting PowerPoint preferences may be necessary.
By following these steps, you can ensure a seamless and full-screen presentation experience.
Solved: Projector Makes Buzzing Noise
Solved: kodak carousel projector not advancing.
- All Templates
- Infographics
How To Make Powerpoint Full Screen? A Complete Guide With Pictures
- October 4, 2023
While presenting a PowerPoint presentation, the slides do not appear full screen and often leave blank spaces. Though the full screen does not add any extra value, it embellishes the overall appearance of your presentation. The presentation appears most defined and crisp in full screen.
So, how to make PowerPoint Fullscreen? Users will get different slide size options by clicking the Slide Size tab. The Widescreen (16:9) option made my PowerPoint slide Fullscreen. Users must explore the options and see which makes their slide Fullscreen.
Follow the steps stated below to get a detailed idea of keeping the slides fullscreen in PowerPoint presentations.
How To Make Powerpoint Full Screen? Step-by-Step Guide
Well, there are two methods you can use to keep the slides full-screen while presenting them. You can follow any of the processes and get full-screen slides.
[Note: I have attached demo pictures. The tasks are done in PowerPoint 2013. You can follow the steps in any PowerPoint version. The interface is quite the same for all the versions. ]
Method 1: Setting the Aspect Ratio
There is a default aspect ratio setting for the PowerPoint slide. In this process, we will adjust the aspect ratio as per the device so that no blank space appears.
- Step 1: Open the PowerPoint
First, Launch the PowerPoint app and create your slides. To launch, press the “ Window ” key and search for PowerPoint. Click the PowerPoint Icon to open the software.
Picture: A normal PowerPoint Slide
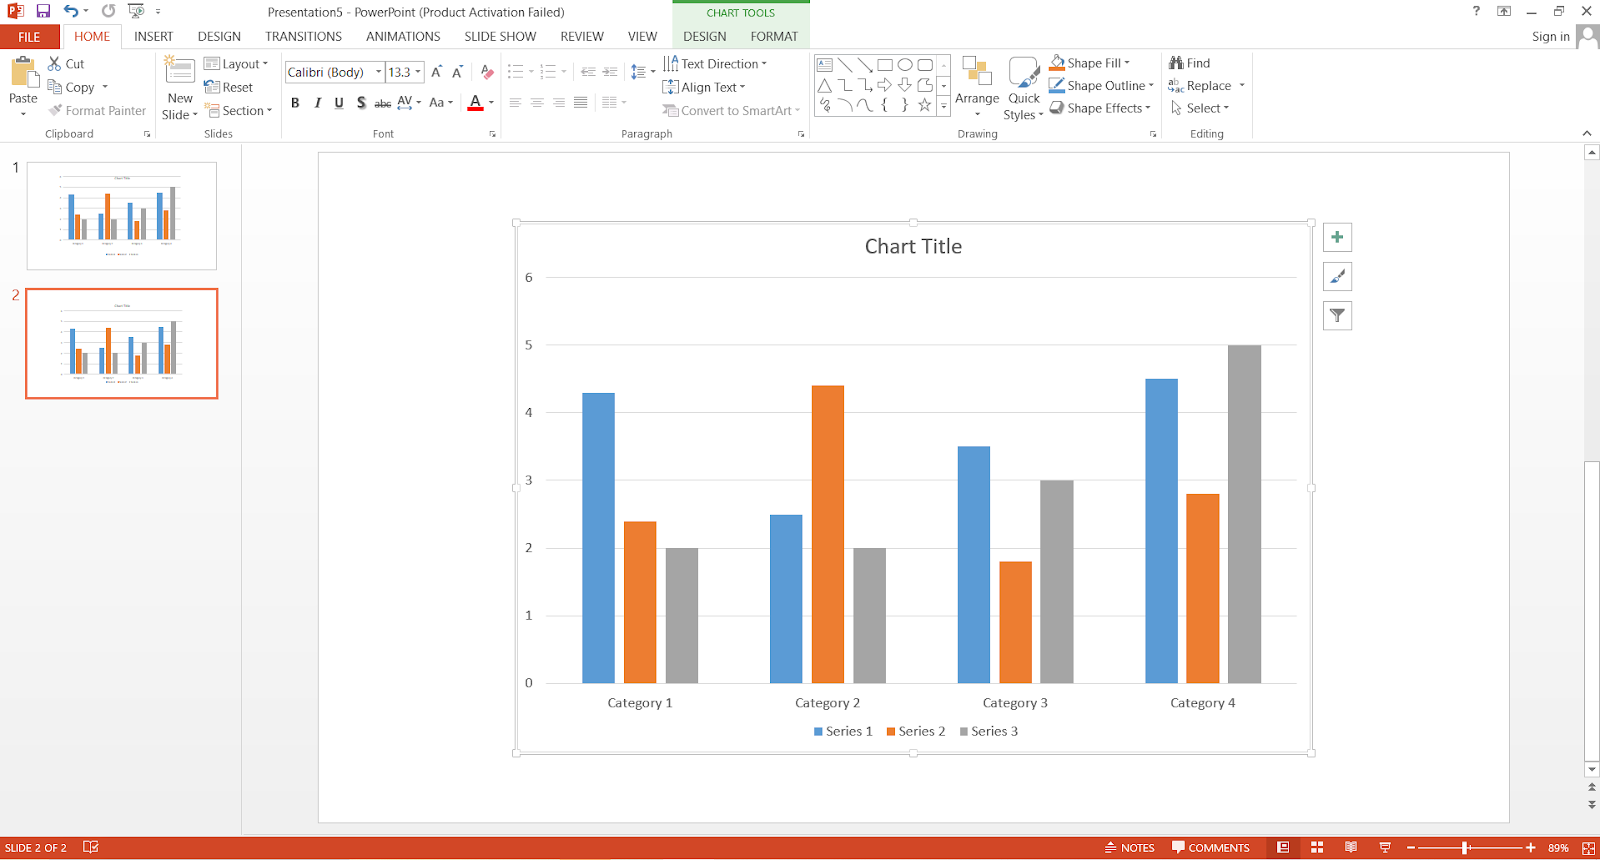
- Step 2: Open The Design Tab
Now, go to the design tab and click it. Once you click the design tab, you will see a toolbar named slide size .

Picture: Design and Slide Size tab
- Step 3: Go for the Slide Size Option
Click the slide size option. Upon clicking, you will see three options: Standard (4:3), Widescreen (16:9), and Custom Slide Size .

Picture: Slide Size Options
- Step 4: Click the Options to Determine which keep the Slides Full Screen
Click any options (4:3 or 16:9) and then go to the toolbar below called Slide Show . Click the slide show button and see if the slide appears Full Screen.
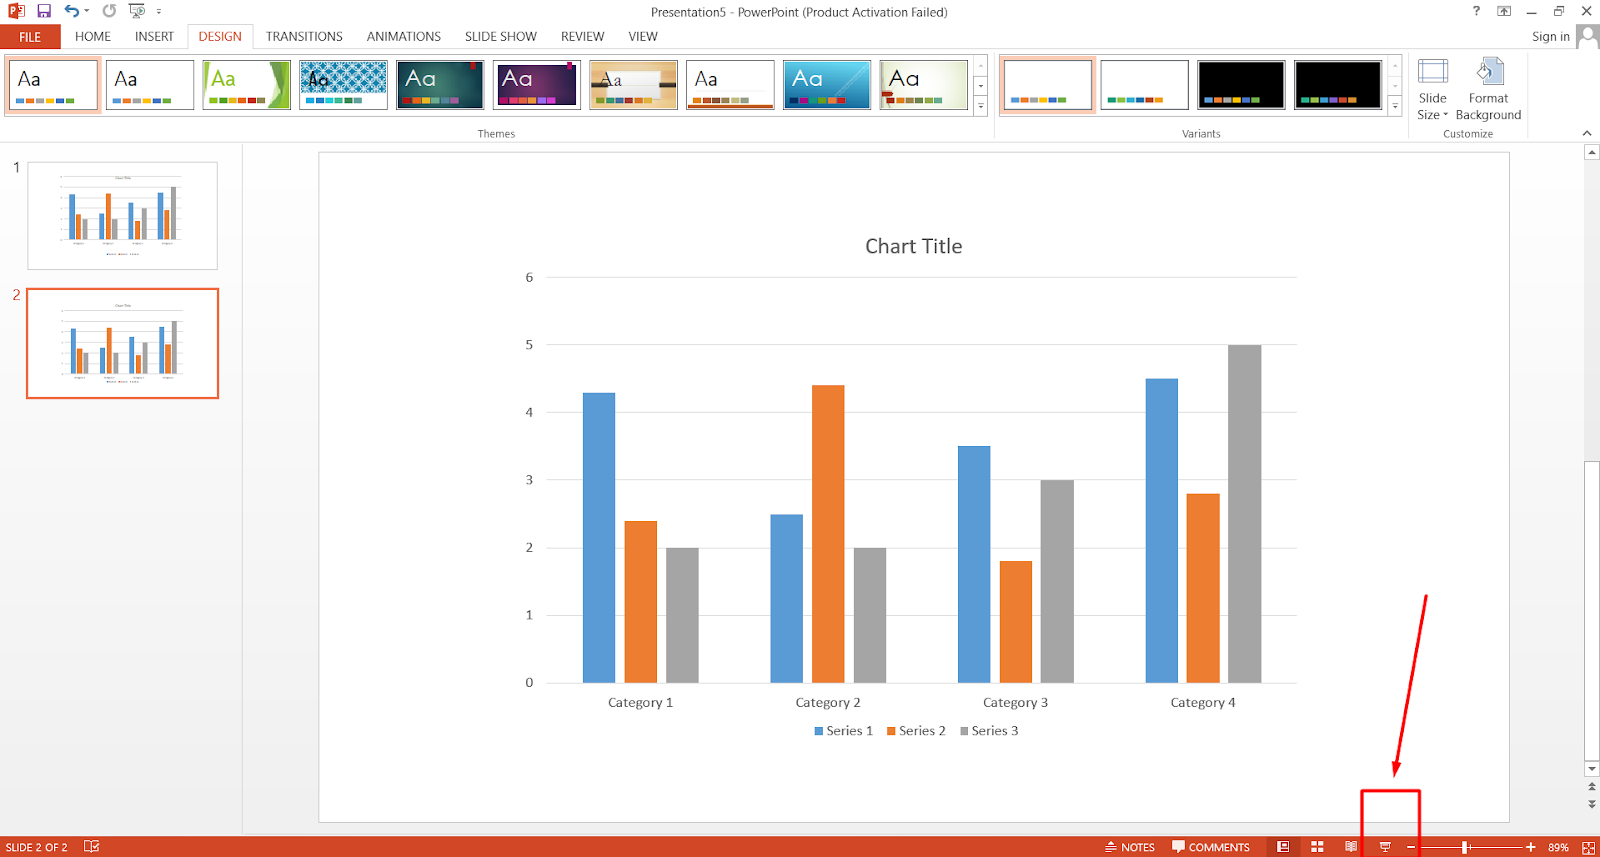
Picture: The Slide Show Tab
- Step 5: The Widescreen (16:9) Worked for me
On my device, when I click the Standard (4:3) size, there remain blank spaces, and the slide does not appear full-screen. But when I click the Widescreen (16:9) option, the slide does appear full-screen.
Picture: Upon clicking the Standard (4:3) size, there remain black spaces
Picture: Upon Clicking the Widescreen (16:9), there remain no blank spaces
- Step 6: If Nothing Makes Your Slide Full Screen, Go For Custom Slide Size
You must determine which size creates a full-screen appearance on your device and determine the size accordingly. You can also customize the slide size through the Custom Slide Size . When I clicked the Widescreen option, the slide size was: width: 10.333 inches, height: 7.5 inches.
- Step 7: Now, Return Back
Double-click or press ESC to return from the full screen.
You can follow the YouTube link below for a better understanding:
Method 2: Through the Slide Master Option
Apart from the aspect ratio setting, there is another way that we will discuss in the following steps.
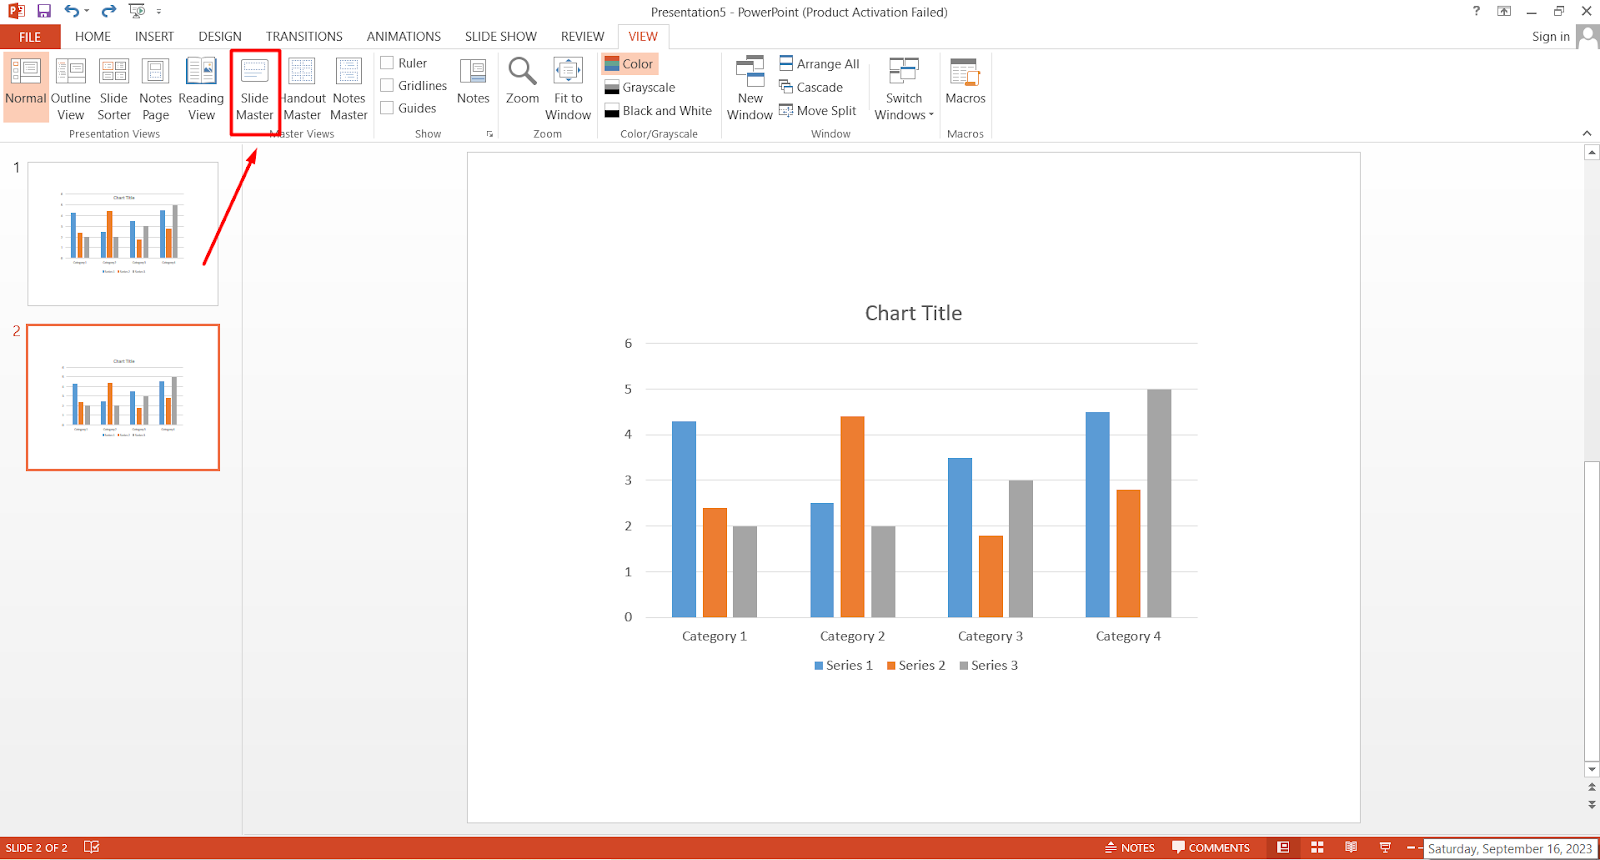
- Step 1: Find The View Option
Click the View option from the toolbar.
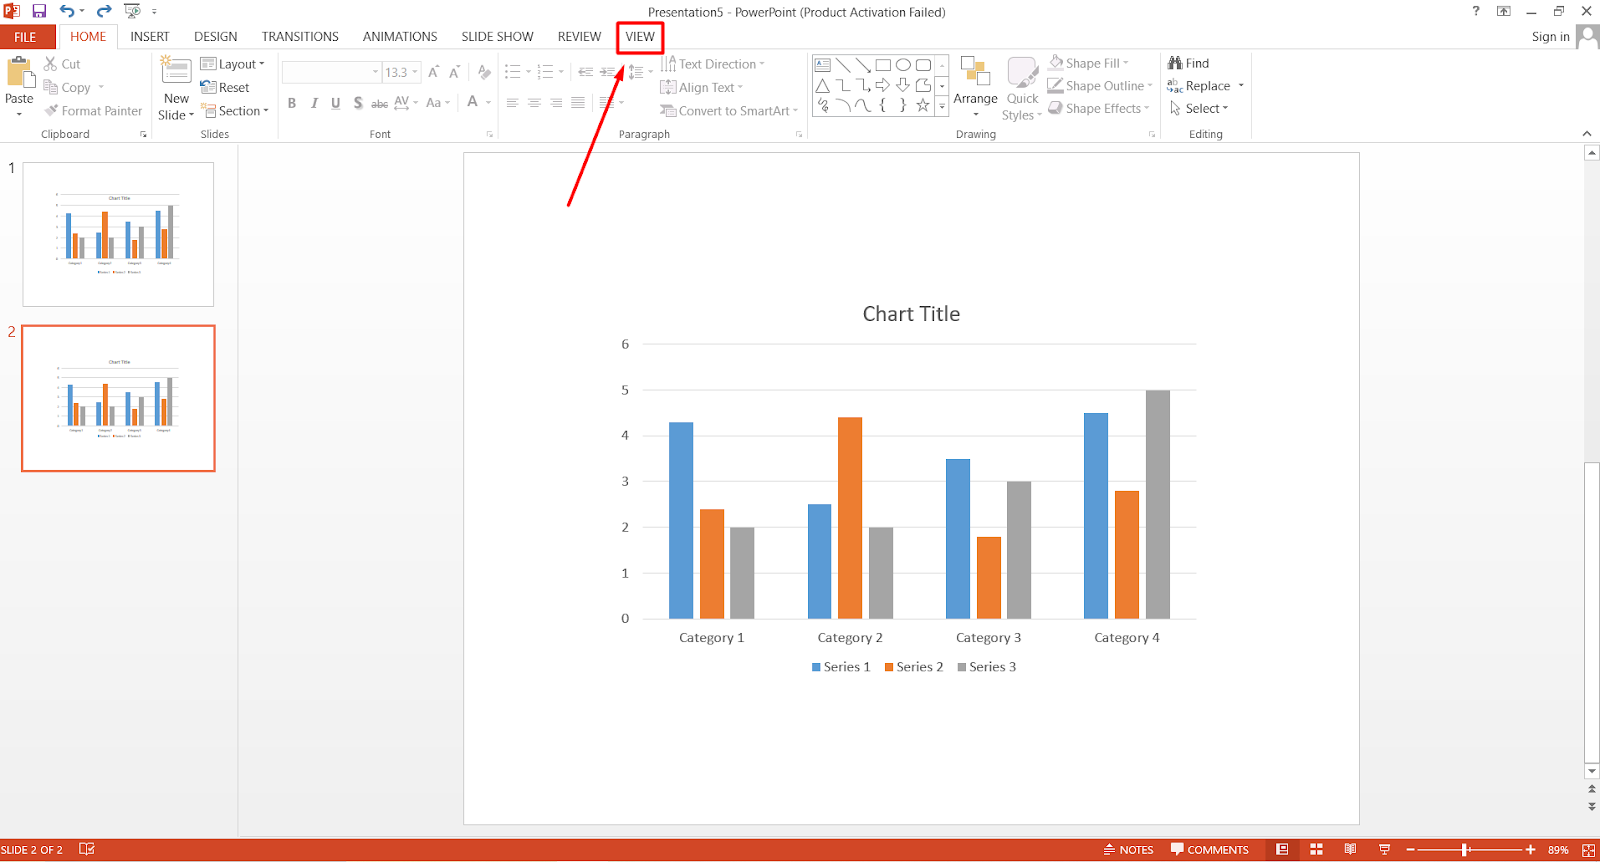
Picture: View option
- Step 2: Click View Option and Look for the Slide Master
When you click the View option, you will see an option named Slide Master . Click on the option.
Picture: Slide Master option
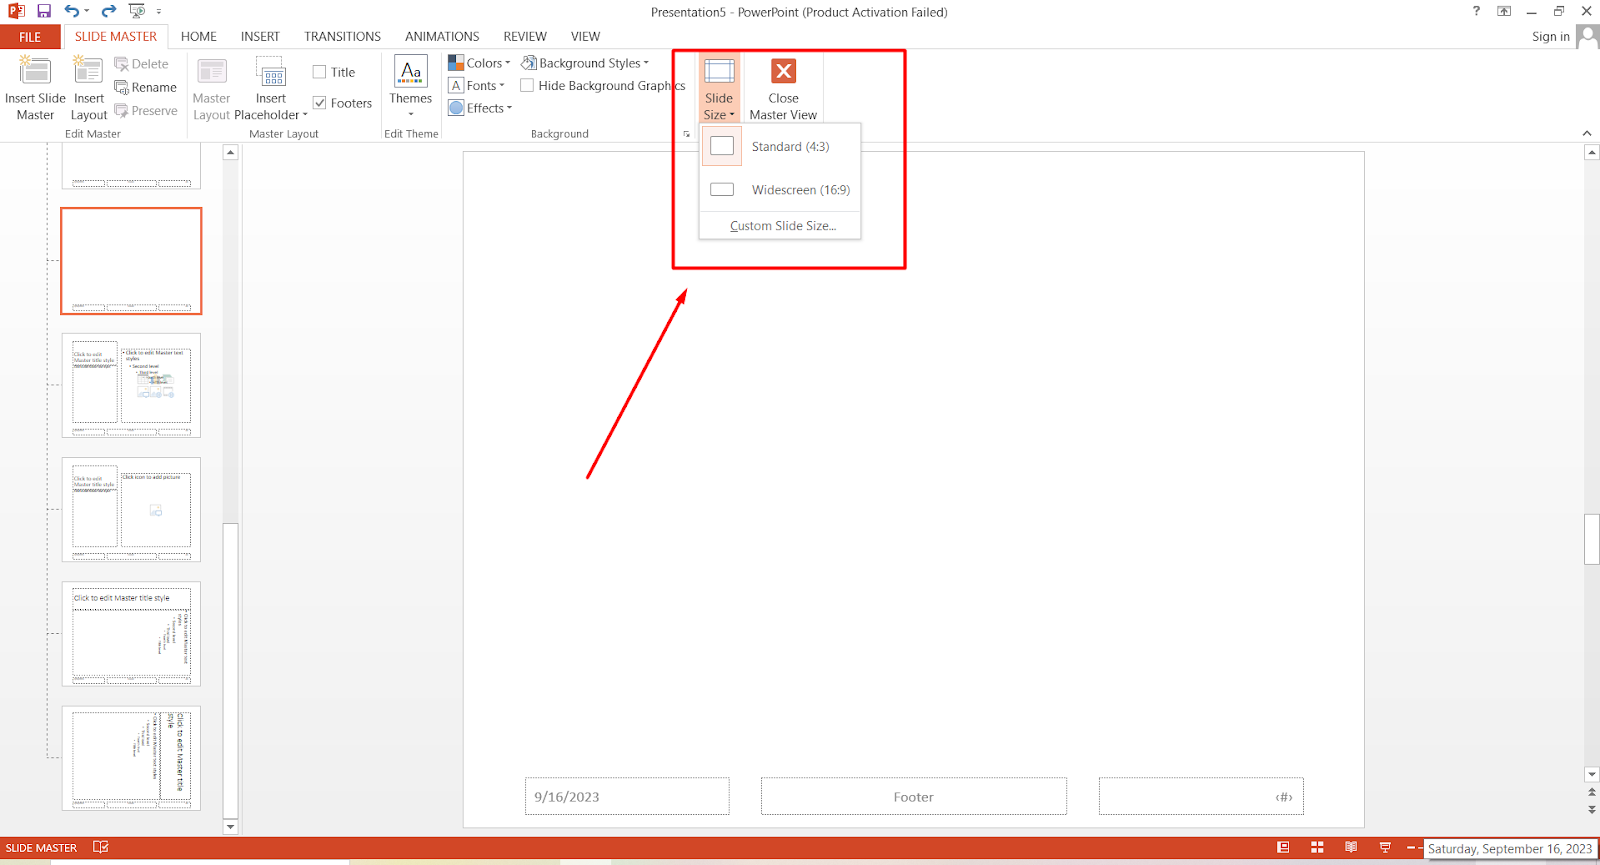
- Step 3: Find the Slide Size Option
Now, click the Slide Master, and another option will refer to Slide Size .

Picture: Slide Size
- Step 4: Explore The Slide Size Options
Again, when you click on the slide size , there will be three options: Standard (4:3), Widescreen (16:9), and Custom Slide Size. You will get the full-screen view if you choose the Widescreen (16:9) option. You have to select a suitable option for your device.
Picture: The slide appeared full screen upon choosing the Widescreen (16:9) option.
- Step 5: Return To Your Home Page
[Note: To see whether the slide appears full screen, click a taskbar placed below in the screen, named Slide Show.]

Picture: Slide show option
The audience does not care whether you are in a windowed or full screen while presenting. Yet the full-screen mode has some perks of its own. First things first, the full-screen mode looks way more satisfying and presentable.
You can open two windows side by side, where there will be a full-screen presentation in one window. And in another window, you can keep your notes. This way, your notes remain unshared.
Leave a Reply Cancel reply
Your email address will not be published. Required fields are marked *
Save my name, email, and website in this browser for the next time I comment.

- Login / Register
Username or email address *
Password *
Lost your password? Remember me
No account yet?
Free All-in-One Office Suite with PDF Editor
Edit Word, Excel, and PPT for FREE.
Read, edit, and convert PDFs with the powerful PDF toolkit.
Microsoft-like interface, easy to use.
Windows • MacOS • Linux • iOS • Android

- Articles of PPT
How to Make PowerPoint Full Screen (Step by Step)
Making your PowerPoint presentation full screen is a simple but effective way to create a focused and engaging experience for your audience. By maximizing content visibility and eliminating distractions, you can ensure that your message is received loud and clear.
Whether you're a seasoned presenter or a beginner, this article will walk you through the steps of making your PowerPoint full screen, so you can deliver a polished and professional presentation with ease.
Part1: How to Make PowerPoint Full Screen Easily
Creating a PowerPoint presentation in full-screen mode is a simple process, and I'll provide a step-by-step tutorial below.
Step 1: Open Your PowerPoint Presentation
Launch Microsoft PowerPoint and open the presentation you want to view in full-screen mode.

Step 2 : Enter SlideShow Mode
To enter full-screen mode, you can use any of these methods:
Click on the "Slide Show" tab in the ribbon at the top of the window and then click "From Beginning."
Press the F5 key on your keyboard.
Alternatively, you can press the Shift + F5 keys to start the slide show from the current slide.

Step 3: Navigate Through Your Presentation
While in full-screen mode, you can use various methods to navigate through your slides:
Click your mouse or press the Spacebar or Enter key to advance to the next slide.
Press the Backspace or Left Arrow key to go back to the previous slide.
Use the keyboard's number keys to jump to a specific slide. For example, press "3" to go to slide 3.
Step 4 : End the Slide Show
To exit full-screen mode and return to normal editing mode, you can:
Press the Esc key on your keyboard.
Right-click anywhere on the screen and select "End Show."

And that's it! Your PowerPoint presentation should now be in full-screen mode, and you can easily navigate through your slides using the provided methods.
Part2: How to Make PowerPoint Full Screen on Projector
Making a PowerPoint presentation full screen on a projector is a common requirement for meetings and presentations. Below, I'll provide a step-by-step tutorial on how to achieve this.
Step 1: Connect Your Projector
Connect your projector to your computer using the appropriate cables (HDMI, VGA, etc.). Ensure that both the projector and your computer are powered on.
Step 2: Configure Display Settings
Right-click on your desktop and select "Display settings."
In the Display settings window, you'll see two displays - your computer screen and the projector (or second display).

Make sure the "Multiple displays" dropdown menu is set to "Duplicate" or "Second screen only" depending on your preference. "Duplicate" will mirror your computer screen on the projector, while "Second screen only" will use the projector as the main display.

Step 3 : Open Your PowerPoint Presentation
Launch Microsoft PowerPoint and open the presentation you want to display.
Step 4 : Enter SlideShow Mode
Step 5 : Navigate Through Your Presentation
While in full-screen mode, you can navigate through your slides as explained in Part 1 of this tutorial.
Step 6 : End the Slide Show
By following these steps, you should be able to make your PowerPoint presentation full screen on a projector.
Part3: The Shortcut Key for Starting the Slideshow
Here are the shortcut keys for starting a PowerPoint slideshow from both the beginning and the current slide on both Windows and macOS:
F5: Start the slideshow from the beginning.
Shift + F5: Start the slideshow from the current slide.
Play Slideshow from Beginning:
Shift + Command + Return: Start the slideshow from the beginning.
Fn + Shift + F5: Start the slideshow from the beginning.
Play Slideshow from Current Slide:
Shift + Command + Return: Start the slideshow from the current slide.
These shortcut keys allow you to quickly initiate a PowerPoint slideshow, whether you want to begin from the start or the current slide, and they work on both Windows and macOS platforms.
Part4: Best Alternative — WPS Office

Microsoft Office has been the market leader in office productivity software for decades, offering robust applications such as Word, Excel, and PowerPoint. However, with the rise of cloud-based solutions and the increasing demand for cost-effective options, free alternatives like WPS Office have gained popularity.
Why should you choose WPS Office as an alternative to Microsoft Office?
Here are the answer:.
● Free to use Word, Excel, and PPT. Powerful PDF toolkit
● Rich template store, which contains various free and paid templates for Word, PPT, and Excel
● Rich functions
● The light weight of the product is only 200M, and it occupies a small amount of computer memory. It is suitable for Win7, 10, and 11
● The MAC version of WPS Office is very powerful. Microsoft office ignores the experience of mac users, which can be made up by wps office
● Support online documents (WPS AirPage), multi-person collaborative editing
● WPS office also supports Linux systems, Android, and ios systems. To use WPS office products on different systems, you only need to log in to the same account, and all files can be synchronized
Creating a PowerPoint-like presentation with WPS Office and utilizing features like image-based storytelling, progressive image reveal, comparison slides, and virtual tours is a great way to engage your audience. Here's a step-by-step tutorial on how to make PowerPoint-style presentations with WPS Office:
Step 1 : Open WPS Presentation and creating a New Presentation

Step 2: Create Your Presentation
Create your presentation in WPS Presentation, including your slides, images, and content. You can use the features like image-based storytelling, progressive image reveal, comparison slides, and virtual tour to enhance your presentation as per your requirements.
Image-Based Storytelling
To create image-based storytelling slides:
Insert images into your slides that correspond to different parts of your story.

Add text, captions, or descriptions to explain the images.

Use transitions and animations to make the storytelling engaging.

Progressive Image Reveal
To create slides with progressive image reveals:
Add your main image to the slide.

Duplicate the slide.

On the duplicated slide, use an object (e.g., a shape) to cover part of the image.
Add animations to the object (e.g., "Appear" animation) and set delays for each slide to reveal the image progressively.

Comparison Slides
To create comparison slides:
Use tables or split your slide into multiple sections to show comparisons side by side.

Add text and graphics to highlight the differences or similarities between the elements you're comparing.

Step 3 : Save Your Presentation
After creating your presentation, make sure to save your work to avoid losing any changes. Click on 'File' in the top menu, then select 'Save' or 'Save As' to save your presentation file.

Step 4: Full Screen Mode
To view your presentation in full-screen mode:
Click on the "Slide Show" option in the top menu.
Select "From Beginning" to start the presentation from the beginning.

Step 5: Press "Esc" on your keyboard to exit full-screen mode.
You feel WPS Office is the best choice for you and want to download? Don’t worry, below is step by step how to download WPS Office:
Step 1: Visit the WPS Office website: wps.com .
Step 2: Click “ Free Download” button

Step 3: Select the place you want to save WPS Office -> Save

Step 4: Double click on the WPS Office file in your Download file, click “Run” and follow the on-screen instructions to install

Step 5: After complete, you can enjoy all the power of WPS Office
Use Word, Excel, and PPT for FREE, No Ads.
Edit PDF files with the powerful PDF toolkit.
Microsoft-like interface. Easy to learn. 100% Compatibility.
Boost your productivity with WPS's abundant free Word, Excel, PPT, and CV templates.
Frequently Asked Questions (FAQs)
Q: how to use the presenter view in powerpoint.
A: To use the presenter view in PowerPoint, follow these steps:
Connect your computer to a projector or external display.
Start your PowerPoint presentation.
Click the "Slide Show" tab in the PowerPoint ribbon.
Click "Presenter View."
The presenter view will display on your computer screen, showing the current slide, the next slide, speaker notes, and presentation controls.
Use this view to control your presentation while the audience sees only the slide.
Q: How can I resize an image while keeping the aspect ratio the same?
A: To resize an image while maintaining the aspect ratio in PowerPoint, follow these steps:
Select the image you want to resize.
Click and drag one of the corner handles of the image while holding down the Shift key on your keyboard.
This will resize the image proportionally, ensuring that the aspect ratio remains the same.
Q: How do I insert a page number in a WPS presentation?
A: To insert a page number in a WPS Presentation, follow these steps:
Click the "Insert" tab in the WPS Presentation toolbar.
Select "Page Number."
Choose the desired page number format and location (e.g., top or bottom of the slide).
The page number will be inserted into your presentation.
The article "How to Make PowerPoint Full Screen" provides a step-by-step guide for easily entering full-screen mode in PowerPoint, facilitating seamless presentations. Notably, WPS Office offers a robust alternative for creating PowerPoint presentations, with features such as image-based storytelling and progressive image reveal.With WPS Office, users can make their presentations captivating and engaging by following simple steps for entering full-screen mode. Download WPS Office now.
- 1. Top 5 Free Screen Recording Software for Windows
- 2. Best Screen Recorders for Linux System (A Complete Guide)
- 3. Full Form Of CV: Curriculum Vitae | How to Make a Professional CV
- 4. 3 Easy Ways to Record Your Screen on Windows 10
- 5. 3 Best Free Screen Recorders for Mac (in 2024)
- 6. How to Screen Record Using WPS Office: A Comprehensive Guide

15 years of office industry experience, tech lover and copywriter. Follow me for product reviews, comparisons, and recommendations for new apps and software.

Contribute to the Microsoft 365 and Office forum! Click here to learn more 💡
April 9, 2024
Contribute to the Microsoft 365 and Office forum!
Click here to learn more 💡
- Search the community and support articles
- Microsoft 365 and Office
- Search Community member
Ask a new question
PowerPoint presentation monitor won't go full screen
We have been using PowerPoint 2013 on Windows 8.1 on a laptop with a large flat screen TV to display the presentation for almost a year now and it hasn't given us any problems.
We went in to use it the other day using the same presentation files that have been used in the past, but this time the flat screen won't go full screen and also shows the bottom Windows command bar on the TV. There is a black six inch border around the presentation on the TV. I have gone through all the settings that I can find and nothing has changed. When we use the TV by itself it is full screen. It is only when connected to PC that it does this. The PC is set for the "PC only" and PowerPoint to use the Presentation Manager. When the presentation starts everything works, except the TV doesn't go full screen. Everybody says no one has done anything to the PC or TV.
What has happened?
How do we get back to full screen.
Report abuse
Let me help you with the issue.
You may change the display settings on your Windows and check if the resolves the issue.
http://windows.microsoft.com/en-IN/windows-8/get-best-display-monitor
Hope the suggestion provided is helpful.
Was this reply helpful? Yes No
Sorry this didn't help.
Great! Thanks for your feedback.
How satisfied are you with this reply?
Thanks for your feedback, it helps us improve the site.
Thanks for your feedback.
Replies (1)
Question info.
- Norsk Bokmål
- Ελληνικά
- Русский
- עברית
- العربية
- ไทย
- 한국어
- 中文(简体)
- 中文(繁體)
- 日本語
Suggestions or feedback?
MIT News | Massachusetts Institute of Technology
- Machine learning
- Social justice
- Black holes
- Classes and programs
Departments
- Aeronautics and Astronautics
- Brain and Cognitive Sciences
- Architecture
- Political Science
- Mechanical Engineering
Centers, Labs, & Programs
- Abdul Latif Jameel Poverty Action Lab (J-PAL)
- Picower Institute for Learning and Memory
- Lincoln Laboratory
- School of Architecture + Planning
- School of Engineering
- School of Humanities, Arts, and Social Sciences
- Sloan School of Management
- School of Science
- MIT Schwarzman College of Computing
- Q&A: Tips for viewing the 2024 solar eclipse
Q&A: Tips for viewing the 2024 solar eclipse
Press contact :.

Previous image Next image
On Monday, April 8, the United States will experience a total solar eclipse — a rare astronomical event where the moon passes directly between the sun and the Earth, blocking out the sun’s light almost completely. The last total solar eclipse in the contiguous U.S. was in 2017, and the next one won’t be until 2044.
If the weather cooperates, people across the United States — from northeastern Maine to southwestern Texas — will be able to observe the eclipse using protective eyewear. Those in the path of totality , where the moon entirely covers the sun, will have the best view, but 99% of people in the continental U.S. will be able to see a partial eclipse. Weather permitting, those on the MIT campus and the surrounding area will see 93 percent of the sun covered, with the partial eclipse starting at 2:15 p.m. and reaching its peak around 3:29 p.m. Gatherings are planned at the Kresge Oval and the MIT Museum , and a live NASA stream will be shown in the Building 55 atrium .
Brian Mernoff , manager of the CommLab in the Department of Aeronautics and Astronautics, is an accomplished astrophotographer and science educator. Mernoff is headed to Vermont with his family to experience the totality from the best possible angle — but has offered a few thoughts on how to enjoy the eclipse safely, wherever you are.
Q: What should viewers expect to see and experience with this solar eclipse?
A: When you’re watching TV (the sun) and your toddler, dog, or other large mammal (the moon) blocks your view, you no doubt move over a bit to try to get a partial or full view of the TV. This is exactly how the path of totality works for an eclipse. If you are exactly in line with the moon and sun, it will be completely blocked, but if you start moving away from this path, your view of the sun will start to increase until the moon is not in the way at all.
The closer you are to the path of totality, the more of the sun will be blocked. At MIT, about 93 percent of the sun will be blocked. Those in the area will notice that things around you will get slightly darker, just like when it starts to become overcast. Even so, the sun will remain very bright in the sky and solar glasses will be required to view the entirety of the eclipse. It really goes to show how incredibly bright the sun is!
Within the narrow path of totality, the moon will continue to move across the sun, reaching 100 percent coverage. For this short period of time, you can remove your glasses and see a black disk where the sun should be. Around the disk will be wispy white lines. This is the corona, the outermost part of the sun, which is normally outshone by the sun’s photosphere (surface). Around the edges of the black disk of the moon, right as totality begins and ends, you can also see bright spots around the edges, known as Bailey’s Beads, caused by sunlight shining between mountains and craters on the moon.
But that’s not all! Although you will be tempted to stare up at the sun throughout totality, do not forget to observe the world around you. During totality, it feels like twilight. There is a 360-degree sunset, the temperature changes rapidly, winds change, animals start making different sounds, and shadows start getting weird (look into “shadow bands” if you have a chance).
As soon as totality ends, and you start to see Baily’s Beads again, put your solar glasses back on as it will get very bright again very fast as the moon moves out of the way.
Q: What are the best options for viewing the eclipse safely and to greatest effect?
A: No matter where you are during the eclipse, make sure you have solar glasses. These glasses should be ISO-approved for solar viewing. Do not use glasses with scratches, holes, or other damage.
If you are unable to obtain solar glasses in time, you can safely view the eclipse using a home-made projection method , such as a pinhole camera or even projecting the image of the sun through a colander.
The best view of the eclipse will be from within the path of totality, but even if you are not within it, you should still go outside to experience the partial eclipse. Use the NASA Eclipse Explorer to find the start, maximum, and end times, and then find a nice spot outside — preferably with some shade — put on your glasses, and enjoy the show.
For a closer view of the sun, find a friend that has a telescope with the correct ISO-certified solar filter. This will let you see the photosphere (or chromosphere if it is an H-alpha scope) in a lot more detail. If you do not have access to a telescope, NASA plans to livestream a telescope view throughout the eclipse. [The livestream will be displayed publicly on a large screen in Building 55 at MIT, rain or shine.]
The only time you can look at or image the sun without a filter is during 100 percent totality. As soon as this period is done, glasses and filters must be put back on.
After the eclipse, keep your glasses and filters. You can use them to look at the sun on any day (it took me an embarrassing amount of time to realize that I could use the glasses at any time instead of lugging out a telescope). On a really clear day, you can sometimes see sunspots!
Q: How does eclipse photography work?
A: This year I plan to photograph the eclipse in two ways. The first is using a hydrogen-alpha telescope. This telescope filters out all light except for one wavelength that is given off by hydrogen. Because it blocks out most of the light from the sun’s surface, it allows you to see the turbulent upper atmosphere of the sun, including solar prominences that follow magnetic field lines.
Because this telescope does not allow for imaging during totality as too much light is blocked, I also plan to set up a regular camera with a wide-angle lens to capture the total eclipse with the surrounding environment as context. During the 2017 eclipse, I only captured close-ups of the sun using a regular solar filter and missed the opportunity to capture what was going on around me.
Will it work? That depends on if we get clear skies, and how many pictures of my 1.5-year-old need to be taken (as well as how much chasing needs to be done).
If you would like to take pictures of the eclipse, make sure you protect your camera sensor. The sun can easily damage lenses, sensors, and other components. Here are some examples of solar damaged cameras . The solution is simple, though. If using a camera phone, you can take pictures through an extra pair of solar glasses, or even tape them to the phone. For cameras with larger lenses, you can buy cardboard filters that slide over the front of your camera or even buy ISO-approved solar film and make your own.
Q: Any fun, unique, cool, or interesting science facts about this eclipse to share?
A: If you want to get even more involved with the eclipse, there are many citizen science projects that plan to collect as much data as possible throughout the eclipse.
NASA is planning to run several experiments during the eclipse , and researchers with MIT Haystack Observatory will also be using four different technologies to monitor changes in the upper atmosphere , both locally and across the continent.
If you are interested in learning more about the eclipse, here are two of my favorite videos, one on “ unexpected science from a 0.000001 megapixel home-made telescope ” and one on solar eclipse preparation .
Share this news article on:
Related links.
- Brian Mernoff
- AeroAstro Communication Lab
- Department of Aeronautics and Astronautics
Related Topics
- Space, astronomy and planetary science
- Aeronautical and astronautical engineering
- Earth and atmospheric sciences
- Photography
- Cambridge, Boston and region
- Science communications
Related Articles

MIT Haystack scientists prepare a constellation of instruments to observe the solar eclipse’s effects

Solar eclipse caused bow waves in Earth's atmosphere

Q&A: Richard Binzel on tips for observing the 2017 solar eclipse
Previous item Next item
More MIT News

MIT-Mexico Program fosters cross-border collaboration
Read full story →

With inspiration from “Tetris,” MIT researchers develop a better radiation detector

QS World University Rankings rates MIT No. 1 in 11 subjects for 2024

Tackling cancer at the nanoscale

A faster, better way to prevent an AI chatbot from giving toxic responses

Has remote work changed how people travel in the US?
- More news on MIT News homepage →
Massachusetts Institute of Technology 77 Massachusetts Avenue, Cambridge, MA, USA
- Map (opens in new window)
- Events (opens in new window)
- People (opens in new window)
- Careers (opens in new window)
- Accessibility
- Social Media Hub
- MIT on Facebook
- MIT on YouTube
- MIT on Instagram
Set a video to play full screen
Instead of playing a video as part of a slide in your presentation, you can play it so that it fills the entire screen.
Depending on the resolution of your original video file, the video might appear distorted when played full screen, so it's a good idea to preview it before giving your presentation to an audience.
In Normal view, select the video that you want to play full screen.
On the ribbon, on the Playback tab, in the Video Options group, select Play Full Screen .
(If you inserted a video file from YouTube or another web site, the full screen option may be unavailable. To work around this limitation, you would first have to download the file and then insert it from your computer .)
Note: If you position the video frame off the slide or hide the video frame, you must set the video to play automatically or by some other kind of control, such as a trigger . A trigger is something on a slide, such as a picture, shape, or button, that you can click to initiate an action. See Trigger an animation effect for details.
Preview the video
In Normal view, go to the slide that contains the video.
To preview the full-screen experience, on the ribbon, select Slide Show > From Current Slide . (This action opens your slide in Slide Show view.)
If necessary, select the "play" button on the video. It expands to full-screen size at that point.
On the ribbon, on the Playback tab, select Play Full Screen .
(If you inserted a video file from YouTube or another web site, the full-screen option may be unavailable. To work around this limitation, you would have to first download the file and then insert it from your computer .)
To preview the full-screen experience, on the ribbon, select Slide Show > Play From Current Slide . (This action opens your slide in Slide Show view.)
Insert and play a video file from your PC

Need more help?
Want more options.
Explore subscription benefits, browse training courses, learn how to secure your device, and more.

Microsoft 365 subscription benefits

Microsoft 365 training

Microsoft security

Accessibility center
Communities help you ask and answer questions, give feedback, and hear from experts with rich knowledge.

Ask the Microsoft Community

Microsoft Tech Community

Windows Insiders
Microsoft 365 Insiders
Was this information helpful?
Thank you for your feedback.
IMAGES
VIDEO
COMMENTS
See A better Side-by-Side document view for Windows and Mac to see how to use windows controls in Windows or Split View on a Mac. A windowed presentation can be selected as an input option for a virtual camera or other service which lets you choose to display a selected running program. Full screen PowerPoint can't be selected but the same ...
Report abuse. If you choose Slide Show>Set Up Slide Show and check Browsed by an individual (window), the presentation will appear in a moveable window instead of taking up the whole screen. Author of "OOXML Hacking - Unlocking Microsoft Office's Secrets", ebook now out. John Korchok, Production Manager. [email protected].
Press Command-Q to exit the Visual Basic Editor. From the Tools menu choose Macro > Macros. Select the Test macro and click Run. Your presentation should now be running in a window that you might be able to move to any screen. You can adjust the number of pixels by changing the Width and Height settings in the Macro.
Slide Show view occupies the full computer screen, exactly the way your presentation will look on a big screen when your audience sees it. Presenter view To get to Presenter view, in Slide Show view, in the lower left corner of the screen, click , and then click Show Presenter View (as shown below).
This guide provides instructions on how to set your PowerPoint (for Windows) application to play your slide show in a window, not in full screen. This is particularly useful if you are participating in a video call and might want to see the presentation, your notes, and the webinar interface.
Here's how to set your PowerPoint slide show to present within a window, rather than the default 'full screen' mode Microsoft applies. Like most Office 365 n...
Start presenting. On the Slide Show tab, in the Start Slide Show group, select From Beginning. Now, if you are working with PowerPoint on a single monitor and you want to display Presenter view, in Slide Show view, on the control bar at the bottom left, select , and then Show Presenter View.
Select the Slide Show tab. Select the Use Presenter View checkbox. Select which monitor to display Presenter View on. Select From Beginning or press F5. In Presenter View, you can: See your current slide, next slide, and speaker notes. Select the arrows next to the slide number to go between slides. Select the pause button or reset button to ...
Here's what I did (until I discovered an easier way): Click the Slide Show tab. Click the Set Up Slide Show button. In the Set Up Show dialog box, choose Browsed by an Individual (Window) Click OK. Now, when you go into Slide Show view, PowerPoint opens in a window instead of full-screen. You can maximize the window but you'll still have ...
Virtual presentations with one screen can benefit from using Reading View instead of full screen Slide Show view as it allows the presenter to also easily access the meeting controls and chat. Three ways to start Reading View From the View ribbon. Click on the button for Reading View in the Presentation Views section of the View ribbon.
What you've probably never noticed is the button labelled " Set Up Slide Show ". That's where you can change your presentation output format, logically enough. Click on it. A window with lots of options appears: It's the first section you want to focus on. Click and choose " Browsed by an individual (window) "….
Short how-to demo on presenting in slide show mode but without opening in the full screen, i.e. opening your slide show in partial screen. Especially useful ...
JS. JSRWilson. Replied on September 22, 2020. Report abuse. I'm on a PC right now but this might be workable on a Mac. Open online in edit mode and resize the window. Run the show which will open full screen. CTRL T to open a new Tab (adjust for Mac) Switch back to the show Tab.
By default, Presenter View opens in full screen mode on one screen while the slides open full screen on the other screen. The slides are always full screen and should be since you are sharing that screen with the audience. In the top right corner of the Presenter View you will see that you can click on the icon to move from full screen ode into ...
Step 1: Open the Display Settings. Go to the Control Panel and click on 'Display' or right-click on the desktop and select 'Display settings.'. This will open the Display settings window. Step 2: Adjust the Screen Resolution. In the Display settings window, locate the 'Resolution' drop-down menu.
Deliver your presentation on two monitors. On the Slide Show tab, in the Set Up group, click Set Up Slide Show. In the Set Up Show dialog box, choose the options that you want, and then click OK. If you choose Automatic, PowerPoint will display speaker notes on the laptop monitor, if available. Otherwise, PowerPoint will display speaker notes ...
Click the PowerPoint Icon to open the software. Picture: A normal PowerPoint Slide. Step 2: Open The Design Tab. Now, go to the design tab and click it. Once you click the design tab, you will see a toolbar named slide size . Picture: Design and Slide Size tab. Step 3: Go for the Slide Size Option.
To resolve this issue, please follow the steps below: 1. Open PowerPoint and click on the "Slide Show" tab in the ribbon. 2. Click on the "Set Up Slide Show" button in the "Start Slide Show" group. 3. In the "Set Up Show" dialog box, under the "Show type" section, select "Presented by a speaker (full screen)". 4.
Open Powerpoint. Step 2: Enter SlideShow Mode. To enter full-screen mode, you can use any of these methods: Click on the "Slide Show" tab in the ribbon at the top of the window and then click "From Beginning." Press the F5 key on your keyboard.
Presenter View lets you look at your presentation with your speaker notes on one screen (your laptop, for example), while the audience views the notes-free presentation on a different screen. When you are connected to a second display, Presenter View is shown automatically when you start the slide show. To start a presentation in Presenter View ...
We have been using PowerPoint 2013 on Windows 8.1 on a laptop with a large flat screen TV to display the presentation for almost a year now and it hasn't given us any problems. We went in to use it the other day using the same presentation files that have been used in the past, but this time the flat screen won't go full screen and also shows ...
The path of totality and partial contours crossing the U.S. for the 2024 total solar eclipse occurring on April 8, 2024. On Monday, April 8, the United States will experience a total solar eclipse — a rare astronomical event where the moon passes directly between the sun and the Earth, blocking out the sun's light almost completely.
Open the presentation that you want to play as a slide show. Do one of the following: To. Do this. Play your slide show from the first slide. On the Slide Show tab, click Play from Start. Play your slide show from the currently selected slide. Select the slide that you want to start the slide show from. On the Slide Show tab, click Play.
Set a video to play full screen. In Normal view, select the video that you want to play full screen. On the ribbon, on the Playback tab, in the Video Options group, select Play Full Screen. (If you inserted a video file from YouTube or another web site, the full screen option may be unavailable. To work around this limitation, you would first ...