How to Record A PowerPoint Presentation [2022 User Guide]
- Share on Facebook
- Share on Twitter
By Nikolay Kaloyanov
in How-To Tutorials
2 years ago
Viewed 542 times
Spread the word about this article:

If knowing how to record a PowerPoint presentation wasn’t necessary a decade ago, this isn’t how things stand today. The pandemic taught us a valuable lesson – if we don’t catch up with technology, we will fall short.
Fortunately, Microsoft’s app is the global leader in presentation software and provides you with all the required tools to create an excellent presentation you can show in front of your audience. But how to record a presentation on PowerPoint, and is it easy to do so?
Article overview: 1. What are the benefits of recording PowerPoint presentations? 2. How to record a PowerPoint presentation? 3. How to live stream a PowerPoint presentation? 4. Frequently asked questions

1. What are the benefits of recording PowerPoint presentations?
I am are pretty sure that if recording presentations weren’t helpful, PowerPoint wouldn’t offer it to its users. Well, we all know that’s not the case. Recording your PowerPoint slides can bring a ton of benefits. Let’s see which they are:
- Save time – regardless if you’re a lecturer or present in front of colleagues, having a video of your recording will save you many hours. Imagine speaking in front of your marketing team, but 2 members are on summer holidays. It’s fine. They’ll catch up later when they watch your PowerPoint recording.
- Focus on the presentation – usually, if you’re presenting in front of an audience, it’s typical to get asked many questions that you need to answer promptly. But that is a good reason to get distracted from your core information. Thus, it makes sense to record your presentation beforehand.
- Practice before presenting – the best way to carry out a great presentation is to spend some time at home, focusing on key details. When you record your PowerPoint slides, you can find areas of improvement and work on them.
2. How to record a PowerPoint presentation?
There are many tools that you can use to record a PowerPoint presentation. From Loom and Panopto, and even Apple’s basic Quicktime and Windows’ own recording tool. But here we will discuss none of the other options. Why? The answer is simple: PowerPoint has its own in-built, robust recording tool.
Unlike other options, PowerPoint’s recording feature enables you to record slide by slide. This effectively means you can create as many recordings as you like, until you like the playback version, and move on to the next slide.
Pro tip : PowerPoint doesn’t record slide transitions. You need to start recording each slide when it is opened and finish the recording before you move on to the next one.
Let’s see how to record a PowerPoint presentation with video and audio in just a few steps.
Step #1: Open your PowerPoint presentation
The first step is to open the PowerPoint presentation you wish to record. Ensure you have all the necessary slides and information on them. While this seems logical, there aren’t one or two cases when presenters have recorded wrong or unfinished slides, which leads to a disappointing outcome.
Step #2: Prepare your video and audio devices
Before you start the recording, you should check your camera and microphone. Try to make a sound check and see if your camera works properly.
Step #3: Select the slides you wish to record
PowerPoint gives you the option to record a presentation right from the beginning, or from a specifically selected slide.
- Pick “ From Beginning ” (1) from the Record tab of the Ribbon if you wish to start from the first slide.
- Pick “ From Current Slide ” (2) from the same tab in case you would like to start from a selected slide (which isn’t the first one).
- Click the Record button (3) which is positioned in the top right corner, between the Comments and Share buttons. It starts the recording from the slide you have currently selected.

Step #4: Start the recording
Once you click on one of the options, you are ready to start narrating your PowerPoint presentation. You will see a countdown timer, after which you can start narrating slides.

Step #5: Manage your PowerPoint recording
You have probably seen a couple of other options aside from the recording one. Let’s see which they are:
- Timer with a grey/red light – if you are recording your narration, you will see a timer and a small circle with a red light that indicates you are recording. If you pause, the small circle indicator will become grey again and the timer will stop counting.
- Refresh icon – right next to the timer there is a refresh-like icon but it serves a different purpose – to re-take the recording. You have the option to record again the current slide or all slides.
- Start/Stop button – the big red button serves as a start/stop button for your recordings. Only stop the recording when you want to move on to the next slide.
- Pause button – if you would like to stop the slide recording, in order to drink some water or read your speaker notes, you can use the Pause button, and then resume the recording. Bear in mind you cannot pause and move to the next slide. You have to stop the recording, to indicate you have finished with the current slide.
- Camera button – clicking the camera button will work as a toggle on/off.
- Microphone Button – clicking the microphone button will work as a toggle on/off.
- Ellipsis – this is the place where you can select camera and microphone settings, as well as erase recordings from the current slide or all slides.

Step #6: Export your PowerPoint video recording
The last button from the menu is the Export setting. You can export your narration as an mp4 file in Full HD size by default. However, you can customize your export and get your narration in 4 sizes – 480p, 720p (HD), 1080p (Full HD – standard), and 4K. We don’t recommend Ultra HD exports.
Pro Tip : Exporting 4K PowerPoint presentation recordings doesn’t necessarily mean you will get better quality (unless you have 4K resources within your presentation) but it does guarantee a significantly larger file size – up to 4 times more than on standard Full HD recordings.

3. How to live stream a PowerPoint presentation?
If you have already honed your skills and would like to stream your PowerPoint slides directly to your audience, there are many ways to do so. We are going to cover two of them.
3.1. How to stream a PowerPoint presentation from OneDrive?
Microsoft has invested a lot of resources to make OneDrive a powerful cloud service, and so far they have been quite successful. Let’s see how to record a PowerPoint presentation in front of live audiences.
Step 1 – save your PowerPoint presentation in OneDrive.

Step 2 – open your PowerPoint slides from PowerPoint online.

Step 3 – go to Present Live from the Slideshow Ribbon tab.

Step 4 – share a live link with your audience.

3.2. Stream your PowerPoint presentation in Zoom

Zoom is one of the most popular conference call apps which has plenty of tools, including live streaming presentations. Since PowerPoint is the leading presentation program in the world, Zoom developers have created some amazing things, like PowerPoint presentation recording with a web camera on a transparent background. If you’re interested, you can check our guide on how to record a Zoom presentation .
Does PowerPoint have a screen recording?
PowerPoint has a screen recording window and you can select the area you would like to be recorded. Go to Record (from the Ribbon), then select Screen Recording , choose the area and start recording.
Can I view speaker notes while recording narration?
You are able to access your speaker notes if you have created them beforehand. To insert speaker notes, you have to go to View -> Notes Page and you will have a text box that you can utilize for speaker notes.
What format does PowerPoint use for video?
PowerPoint records videos in mp4 format. The default resolution is 1080p (Full HD).
Recording your PowerPoint presentations can make the difference between a successful and smooth speech and a bad narration. Being able to record each slide means you can get the best narration possible for your whole presentation.
And if you would like to stream your presentation live, there are more than enough options to do so – both via the online version of PowerPoint or via third-party apps like Zoom.
If you found this article helpful, you can also check some of our other PowerPoint tutorials:
- Add Audio to PowerPoint: The Quick Step-by-Step Guide
- Insert GIFs into PowerPoint – a 2022 Pocket Guide
- How to Convert Your PowerPoint Presentation into Google Slides ?

Add some character to your visuals
Cartoon Characters, Design Bundles, Illustrations, Backgrounds and more...
Like us on Facebook
Subscribe to our newsletter
Be the first to know what’s new in the world of graphic design and illustrations.
- [email protected]
Browse High Quality Vector Graphics
E.g.: businessman, lion, girl…
Related Articles
Character animator tutorials part 5: behaviors 1, how to add and show speaker notes on google slides, beginners guide to adobe character animator, how to design graphics for social media like a guru: tutorials & tips, how to learn animation at home: beginner’s guide to online courses, software and resources, enjoyed this article.
Don’t forget to share!
- Comments (0)
Nikolay Kaloyanov
Nikolay is a copywriter with vast experience in Technology, Marketing, and Design. When he isn't playing with words and crafting texts, he watches sports and asks questions. He is a funny person...until you put him on a diet.

Thousands of vector graphics for your projects.
Hey! You made it all the way to the bottom!
Here are some other articles we think you may like:

How-To Tutorials
How to record a zoom presentation and present in a virtual meeting.
by Nikolay Kaloyanov

Color Theory Basics For Non-Designers: Everything You Should Know
by Al Boicheva
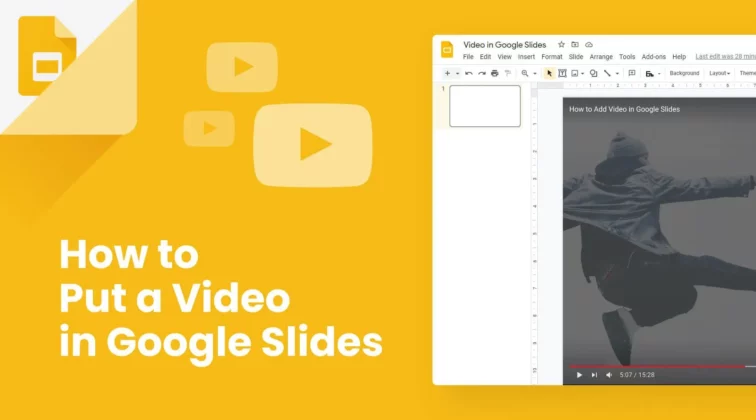
How to put a video in Google Slides? [Simple Guide]
Looking for design bundles or cartoon characters.
A source of high-quality vector graphics offering a huge variety of premade character designs, graphic design bundles, Adobe Character Animator puppets, and more.
How to Record a PowerPoint Presentation with Narration
Can be helpful in creating a dramatic narrative
Microsoft PowerPoint has a built-in recording tool that allows you to narrate your presentations using recorded audio. You can export and share recorded presentations as video files.
This tutorial covers everything about recording PowerPoint presentations on Windows and Mac computers.

Record PowerPoint Presentation with Narration
Open the PowerPoint file/presentation you want to record and follow the steps below.
Record PowerPoint Presentation on Windows
- Select the slide you want to start recording from on the slide thumbnail pane.

- Head to the Record tab on the ribbon and select the Record button to start recording from the current/selected slide.

To record from the first slide, select the down-facing arrow icon below the Record button and select From Beginning .

You can also record a presentation from the Slide Show tab. Select Slide Show on the ribbon and select Record , From Current Slide , or From Beginning .

That’ll open PowerPoint’s presentation recorder in a fullscreen window.
- Select the Record icon and start speaking after the three seconds countdown.

PowerPoint records the presentation window and captures your voice and webcam feed as you navigate the slides. Select the left-facing and right-facing arrows to move to the previous and next slides in the presentation.
Record PowerPoint Presentation in macOS
- Open the Slide Show tab and select Record Slide Show .

- Select the Record button on the toolbar to start recording your narration.

Use your keyboard arrow keys to move back and forth between slides. Press N or Space Bar to move to the next slide or animation in the presentation. Press P or Backspace to return to the previous slide or animation.
Select Tips in the top-left corner for more keyboard shortcuts and other presentation tips .

Note: The narration tool doesn’t record slide transitions. When moving between slides, wait for the destination slide to appear on the screen before speaking.
PowerPoint Recorder Control/Settings
You’ll find a handful of controls and options on the recording tool. We’ll show you how to use these controls to include voiceovers or audio recordings in your presentation.

Using Presentation Pointer Tools
PowerPoint provides several tools to mark up your slides when narrating your presentation. There’s a pen tool, eraser, laser pointer, and highlighter.
With the Pen tool, you can draw on slides during narration/recording. Press Ctrl + P (Windows) or Command + P (Mac) to use the pen tool. You can also select the Pen icon to convert the pointer to a pen.

The Laser pointer tool converts your cursor to an onscreen laser. Use the laser pointer to draw attention to something on a slide/presentation.
Press Ctrl + L (Windows) or Command + L (Mac) to use the laser pointer. There’s also a Laser pointer icon on the toolbar.

Pressing Ctrl + I (or selecting the Highlighter tool ) converts your cursor to a highlighter.

Use the Eraser tool to remove inks and highlight from slides. Select the Eraser icon or press Ctrl + E and select the ink to erase.

On macOS, select the Erase Pen icon (or press E ) to erase all drawings and highlights on the slide.

You can change the pointer tools ink from the color selection boxes. However, one major limitation is that you can’t change the size of these pointer tools.
Pause and Resume Your Recording
In Windows, press I on your keyboard or select the Pause button in the top-left corner to pause your recording.

Press I again or select the Record icon to resume the recording.

If you use a Mac, select the Pause icon in the top toolbar to pause the recording.

Unmute or Mute Microphone
Check that your microphone is unmuted before recording. Select the microphone icon in the bottom-right corner to mute or unmute your mic.

PowerPoint for Windows allows you to mute and unmute your microphone in real time while recording video/audio narrations. The macOS version of PowerPoint only lets you configure your camera and microphone settings before recording.
Switch Microphone or Camera
Want to record your presentation with an external microphone or camera? Press Ctrl + M or select the audio/camera settings icon in the top-right corner and choose your preferred microphone/camera.

In macOS, select the microphone icon to mute or unmute your microphone. Select the arrow-down icon next to the microphone or camcorder icons to switch input devices.

Enable and Disable Camera
The recorder displays your camera or webcam feed in the bottom-right corner of the presentation slides.
Select the camcorder icon to remove your webcam feed from the recording. Select the icon again to display your webcam feed in the presentation.

You can also use the Ctrl + K keyboard shortcut on Windows computers to enable or disable your camera.
On Mac computers, you’ll find the video control icon on the top toolbar.

Note: The recording tool greys out the camcorder icon if your microphone is turned off.
Enable or Disable Camera Preview
PowerPoint allows you to disable the camera preview without turning off your camera or webcam.
Press Ctrl + J (Windows) or select the Camera Preview icon in the bottom-right corner to disable or enable the camera preview.

End a Recording
Press S on your Windows keyboard or select the Stop icon to end the recording.

Replay or Preview Your Recording
When you end a narration, press V on your keyboard or select Replay to preview or watch the recording.

The recorded narration will include all pen inks, highlights, and laser pointer gestures made during the presentation.
You can also preview/replay the narration outside the recording tool. Open the Slide Show tab and choose to watch the playback From Beginning or From Current Slide .

PowerPoint allows you to preview the playback on individual slides. A speaker/audio icon appears in the bottom-right of PowerPoint slides with narrations.
Choose the slide you want to preview, hover your cursor on the speaker icon in the bottom-right corner, and select Play .

Delete Current Narration/Recording
Did you spot an error when previewing your presentation? Want to delete the current narration and start from scratch?
Select the Clear existing recordings icon and choose whether to Clear Recordings on Current Slide or Clear Recordings on All Slides .

On Mac, select the Bin icon to delete the entire narration/recording.

Close the Narration Tool
Select the X icon on the title bar to close the presentation narration tool and return to Powerpoint.

Select End Show in the top-left corner to close the recording tool on a Mac computer.

Delete Narrations from Slides
Want to delete the narration or timing on an individual slide or the entire presentation? Select the slide with the narration you want to delete and follow the steps below.
- Open the Record tab and select the down-facing arrow below the Record icon.
- Select Clear and choose to clear timing or narration on current or all slides.

Export Recorded or Narrated Presentation
You can export a narrated PowerPoint presentation as a video file. The video output includes ink strokes, recorded audio/video, laser pointer gestures, and webcam/camera recording.
- Open the Record tab and select Export to Video .

Alternatively, open the File menu, select Export on the sidebar, and select Create a Video .

- Choose the quality of the video export in the first drop-down box—Ultra HD (4K), Full HD (1080p), HD (720p), Standard (480p).

- Choose Use Recorded Timings and Narrations in the next drop-down box and select Create Video .

- Give the recorded presentation a file name and select Save .

Narrate Your PowerPoint Presentations
The Microsoft PowerPoint web app doesn’t have a recording tool. As a result, you can only record presentations with narrations using PowerPoint for Windows or Mac.
You might meet issues recording a slide show if you use an outdated version of PowerPoint. Also, the recording tool on older versions of PowerPoint has a different interface and lacks some controls. Update PowerPoint and restart your computer if you cannot record a slide show.

Sodiq has written thousands of tutorials, guides, and explainers over the past 4 years to help people solve problems with Android, iOS, Mac, and Windows devices. He also enjoys reviewing consumer tech products (smartphones, smart home devices, accessories, etc.) and binge-watching comedy series in his spare time. Read Sodiq's Full Bio
Read More Posts:

Leave a Reply
Your email address will not be published. Required fields are marked *
You’re using an older browser version. Update to the latest version of Google Chrome , Safari , Mozilla Firefox , or Microsoft Edge for the best site experience.
- eLearning Blog
- eLearning Basics
- Instructional Design
- Corporate Training
- Course Selling
- Manufacturing
- Products iSpring Suite iSpring Learn
- Use Cases Onboarding Compliance Training Induction Training Product Training Channel Partner Training Sales Training Microlearning Mobile Learning
- Company About Us Case Studies Customers Partnership Course Development Contact Us Academy Blog Webinars Guides
- Community Academy Blog Webinars Guides Experts on iSpring
- Language EN English Français Deutsch Español Italiano Nederlands Português Polski 中文 日本語 العربية Indonesia
- Shopping Cart
Free Online eLearning Conference | May 2nd–3rd
iSPRING DAYS 2024
Seize the human-centric future of learning
How To Record a PowerPoint Presentation With Audio

Table of Contents

3. Select Record from Beginning if you want to start right from the beginning of a presentation. Select Record from Current Slide if you want to record from a specific slide or wish to re-record a particular slide.

4. By default, PowerPoint records both video and audio. If you don’t need a video in your presentation, turn it off by clicking on the camera button. That way, the tool will only record your microphone along with the presentation file.

5. Click on the Record button to begin recording. PowerPoint will count down 3 seconds in the recording window to allow you to get ready, then you can start speaking.

6. Record your narration for a particular slide or the entire presentation. Use the directional arrow buttons to switch slides. You might want to make a one-second break when you go to the next slide, so that nothing will get cut out. Click on Pause if you want to stop and then resume speaking. When you finish, click on Stop in the recording window.

7. Save the file as a PowerPoint presentation. Then go to the File menu and click on Export . Select Create a Video .
For Mac users : You will be directed to the settings menu right after you click Export .

8. Set the desired video quality. Select Use Recorded Timings and Narrations to maintain slide timings for all of the slides. Then, click Create Video .
For Mac users : You can select the desired video format at this point. Once you’ve set the parameters, click Export .

9. Select the video format and the PC location where you want to save your video presentation with narration. Then, click Save .

Congratulations! Once the export process is complete, your video with the complete presentation will be ready.
How to add an existing audio recording to a PowerPoint presentation
Follow these steps if you have an existing audio file with narration that you’d like to add to your presentation.
1. On the main menu, click on the Insert tab.
2. On the sub-menu, select Audio .

3. Choose Audio on My PC .
4. Then, browse your audio files, select the narration, and click Insert .
How to Record PPT Presentations with Narration in iSpring Suite Max
MS PowerPoint allows you to export presentations with narration in a video format. However, PowerPoint does not offer any audio editing options, so it can be challenging to get good-quality sound and a clear recording without unnecessary breaks, volume differences, and other problems.
If you don’t have time to re-record your audio narration and want great quality with minimal efforts, you might need a more advanced tool like iSpring Suite Max. It works as a PowerPoint add-in and is extremely easy to use. iSpring Suite Max offers many audio recording and editing options for your slide show.
For example, you can synchronize narration with slide animations, remove background noise, and improve slide transitions in your PowerPoint file. You can even create voice-overs without ever recording your own voice by converting text to lifelike AI-generated speech.
Here’s a step-by-step guide on how to record presentations with narration in iSpring Suite Max:
Step 1. Install iSpring Suite Max
Download a free 14-day iSpring Suite Max trial and install it on your computer.
Step 2. Choose your presentation
Open your PowerPoint presentation and go to the iSpring Suite tab.

Step 3. Record slide show with audio narration
The next step will vary depending on your needs. iSpring Suite offers 3 recording options:
- Create a simple recording with preset parameters like noise removal and volume options
- Record audio that synchronizes with the PowerPoint slide and animation timings
Convert text to speech
Let’s look at each of these options.
Record audio with preset parameters
Follow this approach if you don’t have any animations or effects in your presentation and just want to add high-quality narration to your presentation.
1. Click on Record Audio in the top left corner of the menu.

2. Use the intuitive menu and record your narration.
Please note that you can apply some settings before recording. For example, you can set noise removal and volume, which will make your narration more comprehensible and easier to edit. Click on Options to set the desired parameters.

3. Once your recording is ready, click OK to save it.
Synchronize audio with animations
Use this approach if you have animations in your presentations and want them to appear at specific points during your speech.
1. Click Manage Narration.

2. Click Record Audio .

3. Now, you can start recording, save, or cancel the changes you’ve made, and preview your presentation. When you click Start Record , that button will change to Next Slide or Next Animation , offering you an easy transition between slides – as though you were delivering the lecture live using a projector. Each of your live clicks will automatically preserve those specific timings for slides and animations.

4. Click Save & Close to save your recording.
Use this approach if you don’t want to record your own voice or that of a voice-over artist, but need to record and play narrations for your presentations.
1. Click Manage Narration on the iSpring Suite Max toolbar.
2. Click the Audio button and choose Text to Speech .

3. Select the language, speaker, and type of voice.

4. Add the text that you wish to convert, and click the Insert button. Then you’ll be able to choose when to start playing narration: right after you open the slide or later.

5. Click Save & Close to save your recording.
Step 4. Save and export your presentation with audio narration
No matter which option you had selected earlier, you now have an audio file. Your next step is to export your presentation. Click Publish on the iSpring Suite toolbar.

Step 5. Publish your presentation
Select where you want to publish your presentation and in which format. You can either publish it as a video or in one of the different online formats. Select:
- Video – if you want to upload your presentation to YouTube.
- SCORM or xAPI – if you want to upload your presentation to an LMS and track learner progress as they study your presentation.
- HTML5 – if you want to upload your presentation to a website.
Then click Publish .

Congratulations! Your presentation with narration is ready.
Useful resources
We’ve selected some tutorials that can make you a more effective PowerPoint user.
- How to Record a Voice-Over for PowerPoint Presentations
- How to Create a Video Lecture
- How to Add Narration to a PowerPoint Presentation
- How to Create a Video Presentation
- How to Insert a YouTube Video into a PowerPoint Presentation
- How to Convert a PowerPoint Presentation to an MP4 Video on Windows and macOS
- The Ultimate Guide to Lecture Capture
Fast eLearning authoring toolkit
Have you ever searched for a way to create a course but found the tools and resources too complex to use? What if you could design and produce courses in a familiar environment like PowerPoint with full audio or video narration?
The eLearning authoring toolkit by iSpring allows you to create courses from within PowerPoint with just a few clicks. You can also convert your Word and PDF documents into interactive e-books.
Some of the other features include:
- Content Library
- Adaptive player
- Extensive LMS compatibility
- Video Editor
- Interactive assessments
- Screen recordings
- Conversion of PowerPoint slides into mobile-ready courses
- Combination of videos with slides
- Course localization in 42 languages with text-to-speech capabilities
There’s so much more you can do with the iSpring Suite 11 fast eLearning authoring toolkit.
Takeaways
Recording PowerPoint presentations with narration and audio is pretty easy if you follow our guide. And your recordings will sound great and synchronize with your animations perfectly when you use iSpring Suite Max.
The tool also allows you to:
- Create complex online courses
- Build engaging online quizzes
- Create interactive dialogue simulations
- Record video lectures
- Collaborate with your colleagues on simple courses and quizzes right in a browser
- Use over 81,000 ready-made eLearning assets (templates, backgrounds, characters, and icons)
Download a free 14-day iSpring Suite Max trial and start designing engaging learning content right away!
Fast course authoring toolkit
Create online courses and assessments in record time.

Content creator:
Helen Colman
She enjoys combining in-depth research with expert knowledge of the industry. If you have eLearning insights that you’d like to share, please get in touch .
You might also like this

Subscribe to our blog
Stay tuned to get our latest eLearning tips and tricks!
By clicking “Subscribe”, you agree to our Privacy Policy . All emails include an unsubscribe link, so that you can opt-out at any time.
We use cookies to give you the best possible experience on our website and also for analytics and marketing purposes. You can enable or disable optional cookies as desired. See our Cookie Policy for more details.
Manage your cookies
Essential cookies are always on. You can turn off other cookies if you wish.
Essential cookies
Analytics cookies
Social media cookies

How to Create an Animated GIF in Microsoft PowerPoint
I f you want to spruce up your PowerPoint presentation with animated GIFs, you’ve landed on the right article. Animated GIFs are a great way to captivate your audience and leave a lasting impression. In this tutorial, we’ll walk you through a step-by-step process of creating animated GIFs from a video, custom animations, and multiple slides. Let's dive in.
How to Create an Animated GIF From a Video in PowerPoint
The easiest way to create animated GIFs in PowerPoint is from a video. Here's how to go about it.
- Start with a blank slide—right-click on a slide, click Layout , and select Blank .
- Navigate to the Insert tab, click Media , select Video , and click This Device if the video is saved on your computer.
If your video fails to play, check out our guide on how to fix microsoft powerPoint not playing videos to fix the issue.
- With the video selected, navigate to the Playback tab and select Trim video .
You can also use the red & green clips or the reverse & forward buttons to adjust the video length.
Adding text or a callout to your video is a great way to add context and keep things interesting.
- Under the Insert tab, click Shapes , and select any of the shapes under Callouts .
- Drag your mouse on the slide to draw the callout, then move the yellow circle on the callout to point it in your desired direction.
- With the callout selected, you can change its Shape Fill and Shape Outline colors under the Shape Format tab.
- Double-click on the callout to add some text and format it with options under the Font group of the Home tab.
- When you’re all set to export the file, click File and Save As , or simply use the Ctrl + Shift + S shortcut to open the Save As dialog box.
- Choose a file location, enter a File name , select Animated GIF Format as the Save as type , and click the Save button when you’re done.
How to Create a Custom GIF From Animations in PowerPoint
Instead of extracting clips from videos to make a GIF, you can create one from scratch directly inside PowerPoint using animations. Here's how:
- Set a custom slide size for your GIF—navigate to the Design tab, select Slide Size , and Custom Slide Size .
- In the dialog box that appears, enter your custom dimensions and click OK . (For this example, we’ll stick with the default slide size.)
- Add the elements you want to animate onto the slide. These could be text, images, icons, or illustrations. (For this example, let’s use some icons from the PowerPoint library.)
- So under the Insert tab, click Icons .
- Select the icons you want to add to the slide and click Insert .
- After inserting the icons (or other graphics of your choice), you can adjust their size, colors, and positions. You can also add a drop shadow to any graphic to add depth and enhance its appearance.
- Now, it’s time to add the animations. You can apply some free cool animations to the elements from the built-in animation library. After adding your desired animations, the file is ready for export.
- To export the file, navigate to the File tab.
- Click Export and select Create an Animated GIF .
- Set the GIF quality
- Make the GIF transparent
- Set the duration spent on each slide
- Specify the slides to include in the GIF
- When you’re done, click the Create GIF button.
- In the dialog box that appears, choose a file location, enter a name for your GIF, and click the Save button.
How to Create a Custom GIF From Multiple Slides
Asides animations, you can create a custom GIF by looping through a bunch of slides. Let's walk through the steps:
- Add the content you want to include in the GIF onto the slides. (For this example, we’ll be using four stickers.)
- Arrange the content as desired on each slide.
- Navigate to the Export GIF settings, adjust the settings to fit your requirements, and click the Create GIF button.
How to Insert a GIF in Microsoft PowerPoint
- To insert a GIF in PowerPoint, drag and drop the file directly onto a slide. Or you can navigate to the Insert tab, click Pictures , and select This Device .
- Select your GIF and click the Insert button to add it to your slide.
- You can crop it, modify its appearance, and position it as you like.
Transform Your Presentations With Animated GIFs in PowerPoint
There you have it—everything you need to know to create animated GIFs in Microsoft PowerPoint. Take some time to practice these techniques and experiment with them to create the perfect GIFs for your presentation.
However, remember not to overdo it—using them sparingly and purposefully will have a greater impact. Alongside this, there are more ways to build engaging presentations in PowerPoint.

PowerPoint: How to Add Audio to Powerpoint on Windows 10 and Mac
Last Updated Thursday, August 31, 2023, at 5:00 am
Known Issue (August 14, 2023):
Some Windows 11 users are experiencing issues with PowerPoint exports when they are turned into .mp4 files. Visuals within the exported PowerPoint are appearing as flipped, or upside down. We are working with Microsoft to find a solution.
As a workaround, please convert the file as a .WMV file option and save it in My Media. The following are directions on how to convert a PowerPoint Presentation with audio to a .WMV file . For more support or to help troubleshoot issues, please reach out to the LTS Help Desk at [email protected] .
Microsoft PowerPoint offers features to record audio narration and export it as a video. PowerPoint records audio slide-by-slide rather than in one continuous file, allowing creators to easily re-record a slide if they make a mistake or need to change something later. Exporting as a video and uploading to Kaltura or Canvas for streaming is advantageous since it standardizes file types, doesn't require a download to view, is in a format that can be captioned, and allows viewers to navigate more efficiently.
A recent update has made the process comparable on a Mac, but the specifics vary. Windows 10 instructions follow; Mac users can click the link below to jump to the appropriate instructions.
- Instructions for Mac users
Windows 10 Instructions:
The following instructions explain how to add audio to your PowerPoint presentation on Windows 10 and export that PowerPoint as an MP4. The text instructions cover the same information as the embedded video below.
NOTE: If you have an older version of PowerPoint, you may need to update it to access the features described below. If you do not have PowerPoint, you can download it and other Microsoft Office products for free by going to office365.uwec.edu. If you have questions about updating or installing PowerPoint, contact the LTS Help Desk at [email protected] or 715-836-5711.
- Design your PowerPoint TIP: Use images and limit text to better engage viewers/listeners.
- Click Record Slide Show NOTE: Audio may start recording automatically if you have an older version of PowerPoint. It will still work, but this version offers reduced functionality.
- Record narration and avoid reading text on the slide out loud to viewers. Click the blue Replay button to listen to the recorded audio and ensure it was recording.
- Press [Escape] or the ‘X’ button located in the top right of the screen when the audio recordings are finished. You will see a speaker icon on slides that have audio.
- Select Export (steps 10-14 are shown in screenshot below).
- Select Create a Video .
- Optional: Select Full HD (1080p) for the video quality; it is unlikely a higher quality is needed.
- Select Use Recorded Timings and Narrations.
- Follow prompt/pop-up window to save the video in a memorable location.
- How to upload and share with Kaltura (Instructors should use Kaltura. Students will need to use it if the file is over 500 MB, which a PowerPoint probably won't be and they can use Canvas.)
- How to upload and share in a Canvas assignment (students)
- How to upload and share in a Canvas discussion (students) - the instructions refer to the "rich content editor" which is just the features in the top of the discussion post reply.
Elaboration on the Recording Features:
- Timing Feature – there is a rolling time feature for the individual slide and the overall presentation. Allows the speaker/presenter to monitor how long they are talking.
- Microphone Feature - Click on Settings and select Microphone and then the specific device to set up before recording.
- Replay Feature - Use to check that the audio is recording properly before starting additional slides.
- Clear Feature - Select Clear to delete/re-record audio.
- Don’t set the camera to record - Make sure this button has a diagonal slash through it to avoid the problem.
Mac Instructions:
The following instructions will teach you how to add audio to your PowerPoint presentation on a Mac and export that PowerPoint as an MP4. The text instructions cover the same information as the video embedded below.
NOTE: It is essential to have the Office 365 version of PowerPoint or you will not be able to save your PowerPoint as a video. If necessary, you can download it and other Microsoft Office products for free by going to office365.uwec.edu. If you have questions about updating or installing PowerPoint, contact the LTS Help Desk at [email protected] or 715-836-5711.
- TIP: Use images and limit text to better engage viewers/listeners.
- Click Record Slide Show
- TIP: Before you begin recording your full presentation, do a practice recording to verify your microphone and other settings are correct.
- NOTE: Avoid reading the text written directly on the slide; use the slide to elaborate on the material being presented.
- Stop speaking for a second to prevent the audio from cutting out as slides change. Resume speaking when the time starts moving again under the Current slide timing feature to the left of the recording button.
- Click Stop or Pause at the top of the screen and then End Show in the top left corner when all the audio recordings have been finished.
- Check the audio by clicking on Play from Start under the Slide Show tab or the presenter mode icon at the bottom of the screen.
- Edit the name of the file and where you would like to save the video following PowerPoint's prompts.
- Click Export
- Upload your mp4 video to Kaltura or Canvas to share it:
- How to upload and share to My Media (Instructors should use My Media. Students will need to use it if the file is over 500 MB, which a PowerPoint probably won't be and they can use Canvas.)
- How to upload and share in a Canvas discussion (students) - the instructions refer to the "rich content editor" which is the tool at the top of the discussion post reply.
Additional Video Tool Options
For more information about recording options available, click here to view a comparison of each tool's features.

Contribute to the Microsoft 365 and Office forum! Click here to learn more 💡
April 9, 2024
Contribute to the Microsoft 365 and Office forum!
Click here to learn more 💡
- Search the community and support articles
- Microsoft 365 and Office
- Search Community member
Ask a new question
Animations not working when recording in Powerpoint
I am a teacher and am trying to narrate my powerpoint slides for on-line teaching purposes. However, animations stop working when I try to record. I have run a repair on Office 365 and while this appeared to fix the problem initially, it reappears as soon as a recording is stopped. The only solution at the moment appears to be to run an office repair, and then try and completely narrate a powerpoint presentation in one go, without stopping, at the first attempt. Then repeat the process for subsequent powerpoints - which is obviously unrealistic.
I am using a Lenovo laptop with an i5-8250 CPU, Windows 10, 64 bit, (with automated updates turned on), and Office 365 ProPlus.
Windows 10 version is 1909 (build 18363.900)
Powerpoint version is 1908 (build 11929.20838)
Any assistance would be appreciated.
Thanks for your time.
Report abuse
Replies (3) .
- Microsoft Agent |
Hi tom3949,
Thank you for posting your concern here in Microsoft Community. I hope everything is well in spite of the trouble you're experiencing with animations in PowerPoint. Let's get this addressed.
To properly isolate this, we would like to know if the issue occurs to your other PowerPoint files with animation? Also, did you receive an error message or code when you tried recording?
Since repairing your PowerPoint application didn't fully resolve the issue, you may proceed with uninstalling your Office by using the Easy Fix tool provided in this article . Once done, please reinstall your Office and check if the problem persists.
You may also contact our Office 365 Support team to take advantage of your Office subscription and for further assistance.
To notify us and have us get back to you, simply reply to this post.
1 person found this reply helpful
Was this reply helpful? Yes No
Sorry this didn't help.
Great! Thanks for your feedback.
How satisfied are you with this reply?
Thanks for your feedback, it helps us improve the site.
Thanks for your feedback.
Hi, thanks for the response.
To answer your questions; yes this problem persists with all powerpoints, and no error message is displayed.
Running a repair on Office does seem to cure the problem but only initially. When you access 'record' mode you can move through slides and the animation appears fine. However, as soon as the 'record' button is used and the recording then stopped, all animations cease, (within record mode - for all powerpoint presentations). Animations are fine when just running a standard slide show.
I didn't want to do a complete reinstall of Office, but if that is what is needed I will try this when I get some time.
Thank you for this information. I understand that you are hesitant to uninstall your Office 365. However, this may resolve underlying issues with your PowerPoint application. Also, you may reach out our Office 365 Support team to thoroughly assist you with this concern since you're subscribed to Office 365 subscription.
Question Info
- Norsk Bokmål
- Ελληνικά
- Русский
- עברית
- العربية
- ไทย
- 한국어
- 中文(简体)
- 中文(繁體)
- 日本語
IMAGES
VIDEO
COMMENTS
I have a PowerPoint presentation with a few simple animations that work perfectly well in the usual slideshow view. However, when I attempt to record a voice-over the animations do not work, instead all objects that were animated appear on screen as soon as the slide appears. I used the same process to create a voiced-over PowerPoint ...
Report abuse. Hi Scott, You have an option to record your presentation with animations. PowerPoint automatically records the time you spend on each slide, including any animation steps that occur, and the use of any triggers on each slide. To isolate the issue, I would like to confirm some information. Please answer the following:
Let's see how to record a PowerPoint presentation in front of live audiences. Step 1 - save your PowerPoint presentation in OneDrive. Step 2 - open your PowerPoint slides from PowerPoint online. Step 3 - go to Present Live from the Slideshow Ribbon tab. Step 4 - share a live link with your audience.
This video will show you how to record a presentation in Microsoft PowerPoint to play automatically with the animations and transitions you have set. I'll al...
Learn how to record a PowerPoint Presentation with audio and video simply by using the build-in PowerPoint functionalities and tools. You will learn how to r...
The key to recording a great presentation with animations is simplicity. There are three types of animations: Entrance, Emphasis, and Exit. And while PowerPoint, especially, presents no shortage of options for each, we've found it's best to stay simple when recording a presentation with animations. Here are some of our favorite slide ...
Record narration and timings for your presentation in Microsoft PowerPoint to give it a professional and polished feel. Record narration and timings:1. Selec...
Select the Record button on the toolbar to start recording your narration. Use your keyboard arrow keys to move back and forth between slides. Press N or Space Bar to move to the next slide or animation in the presentation. Press P or Backspace to return to the previous slide or animation.
1. Create your PowerPoint as normal, with all your content and animations defined. 2. Once you are finished, click on Slide Show located on the top menu bar. 3. Click on "Record Slide Show". 4. Choose either "Start Recording from the Beginning" to record the entire presentation in a single pass, or choose "Start Recording from the Current Slide ...
To start recording the presentation, click the red dot on the top-left corner of the screen. To pause or stop recording, you can click the grey box near the Start button. In addition, you can only see the animation that you created once you start recording it. Let us know if you need further assistance to resolve your concern.
Click 'Record Slide Show' to open a dropdown menu. Select either of the options depending on whether you want to record from the first slide or any subsequent slides. A pop-up window will open. You can select whether you want to record both animations and narration or just narration. Preferably select both so that the animations align with ...
Step 2. Press Record in PowerPoint. To record narrations in PowerPoint, start off by finding the Slide Show tab on PowerPoint's ribbon. Click on the Slide Show tab to change the available options. On the Slide Show tab, click Record to start the recording process. Make sure that you start on the first slide in PowerPoint to record audio and ...
It appears that the recording reveals all animated objects at once (as it would appear in the PowerPoint file) although attendees could see the animations just fine during the call. I've submitted this as a bug to MS Teams, but for now, I'm going to return to sharing Presenter View during Teams meetings. 0 Likes.
1. Open your PowerPoint presentation. 2. Go to the Slide Show tab and click the Record Slide Show box. 3. Select Record from Beginning if you want to start right from the beginning of a presentation. Select Record from Current Slide if you want to record from a specific slide or wish to re-record a particular slide. 4.
Canva's free video presentation maker lets you record your voice and face as you present your slides online. You can also share your recordings with others, edit them with Canva's design tools, and access features like remote control and screen recording. Learn how to create engaging video presentations with Canva.
It sounds like you can do that directly in the latest version of PowerPoint. If you use the "Record Narration" Function you can record your own audio and webcam with the slides. You will appear in the lower right corner of the slide. Go through your slides and trigger any animations as you normally do, and you should be all set.
The easiest way to create animated GIFs in PowerPoint is from a video. Here's how to go about it. Start with a blank slide—right-click on a slide, click Layout , and select Blank .
I did a test in my environment with PowerPoint for Mac 16.46 version, which I created a PowerPoint presentation and add serval animations into different slide, then go to Slide show tab > Record Slide Show > Strat recording, the animations are working correctly on my mouse click. If my reproduce steps are different from yours, please point out ...
Design your PowerPoint TIP: Use images and limit text to better engage viewers/listeners. Click the Slide Show tab NOTE: Do not add audio under Insert and Record Audio; this method will not allow you to save your PowerPoint as a video since it does not synchronize timings to automatically move the slides with the audio.; Click Record Slide Show NOTE: Audio may start recording automatically if ...
Running a repair on Office does seem to cure the problem but only initially. When you access 'record' mode you can move through slides and the animation appears fine. However, as soon as the 'record' button is used and the recording then stopped, all animations cease, (within record mode - for all powerpoint presentations).