A presentation maker for every team
Give better presentations and visually communicate your ideas, projects, and everything you need. Miro’s online presentation maker helps you to gain the confidence to keep the momentum going.

Over 60M users love Miro.

Be presentation-ready in seconds
Make presentations in just a few clicks with Miro’s presentation creator. Choose one of the ready-made templates and edit it to suit your needs; no design experience is needed. We’ve got your back with a great selection of templates.
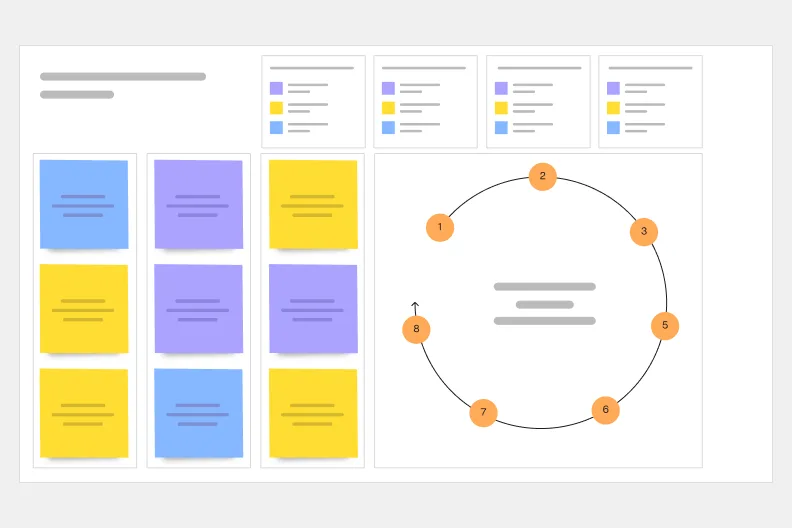
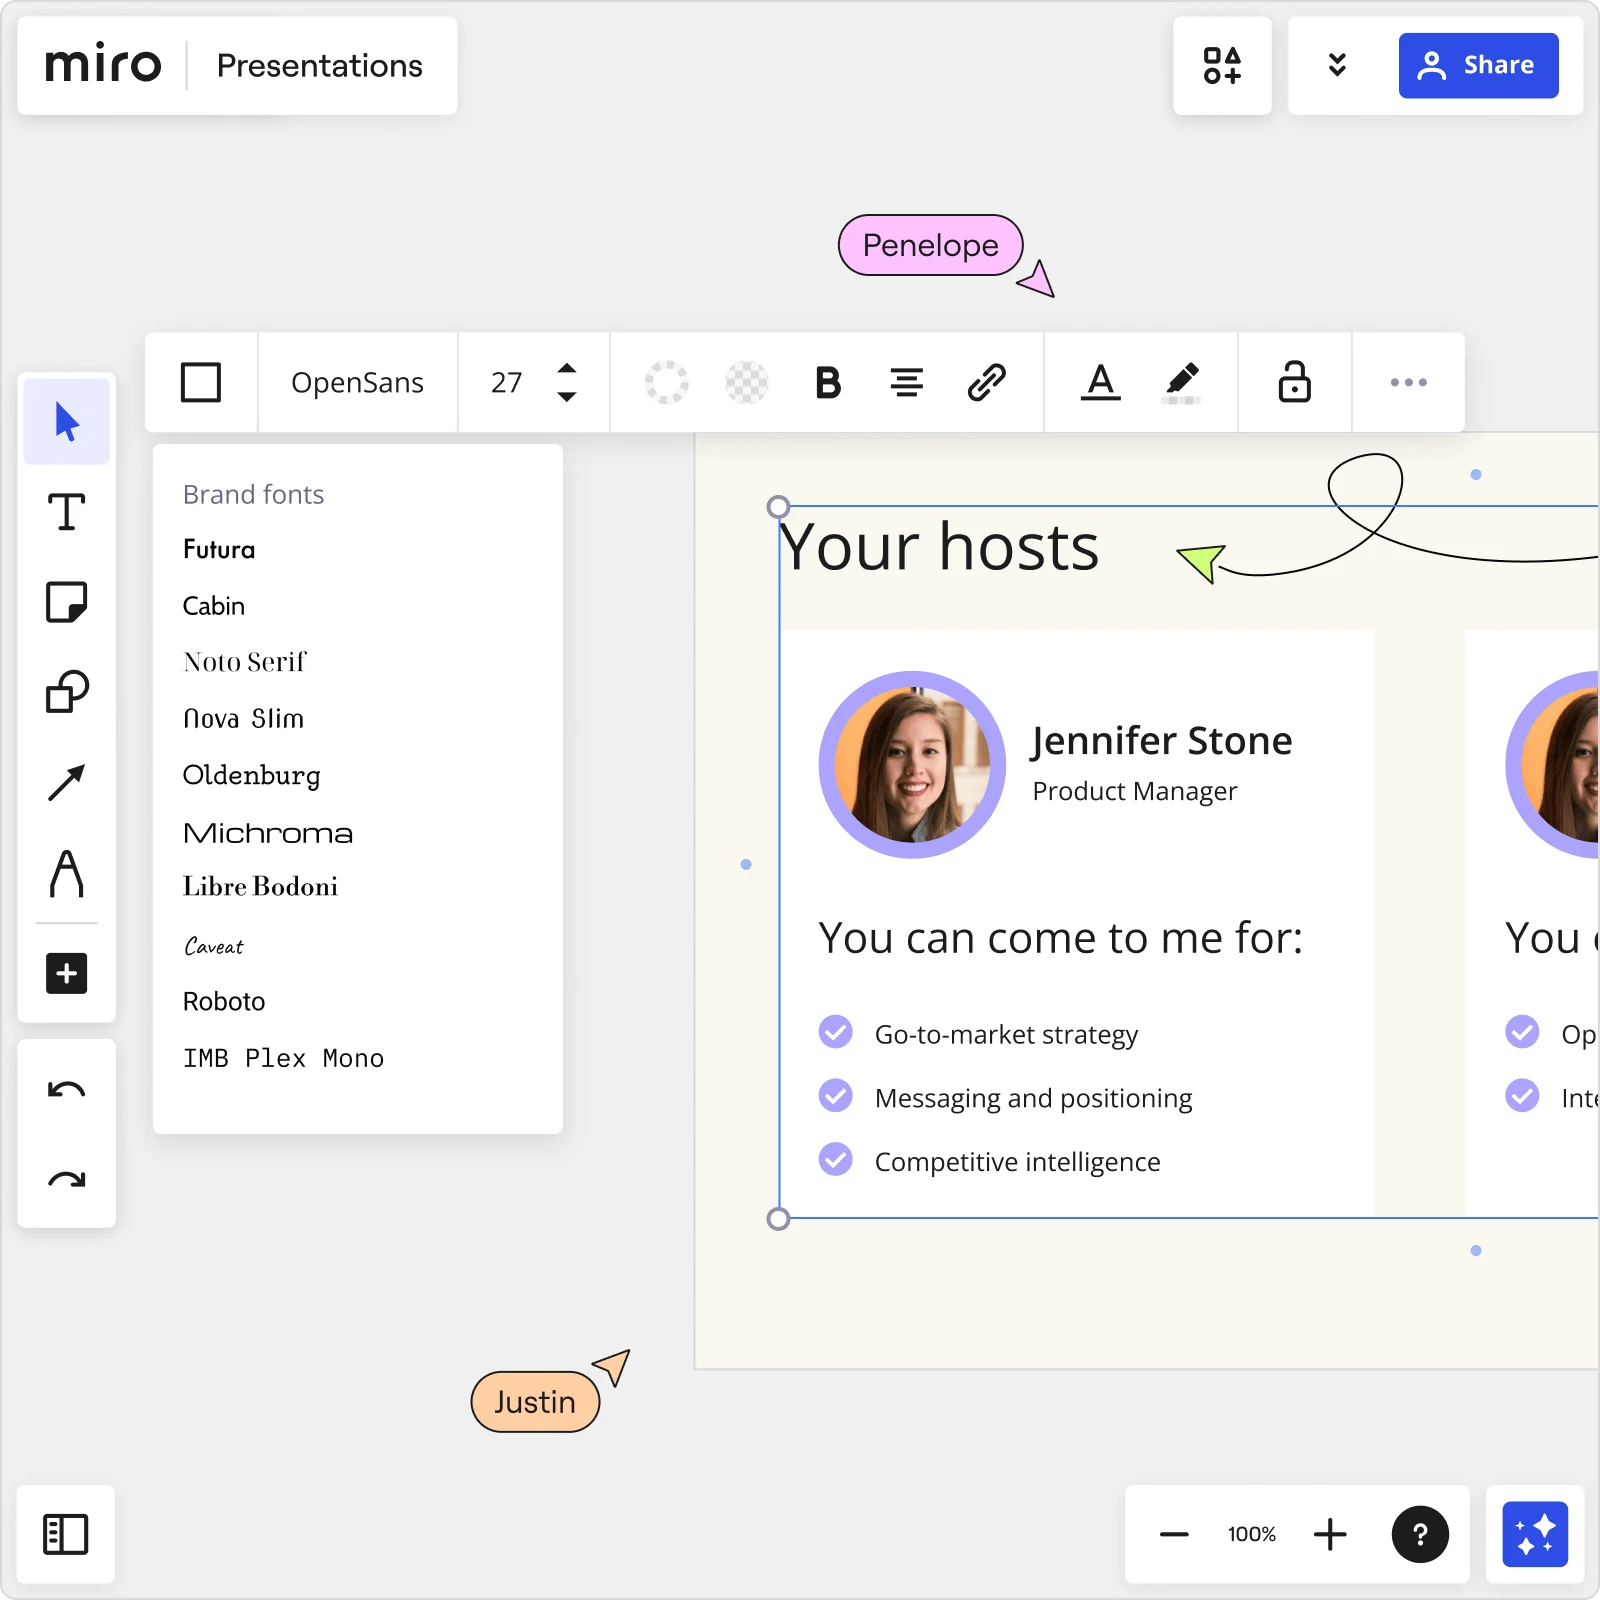
Layouts that fit your needs
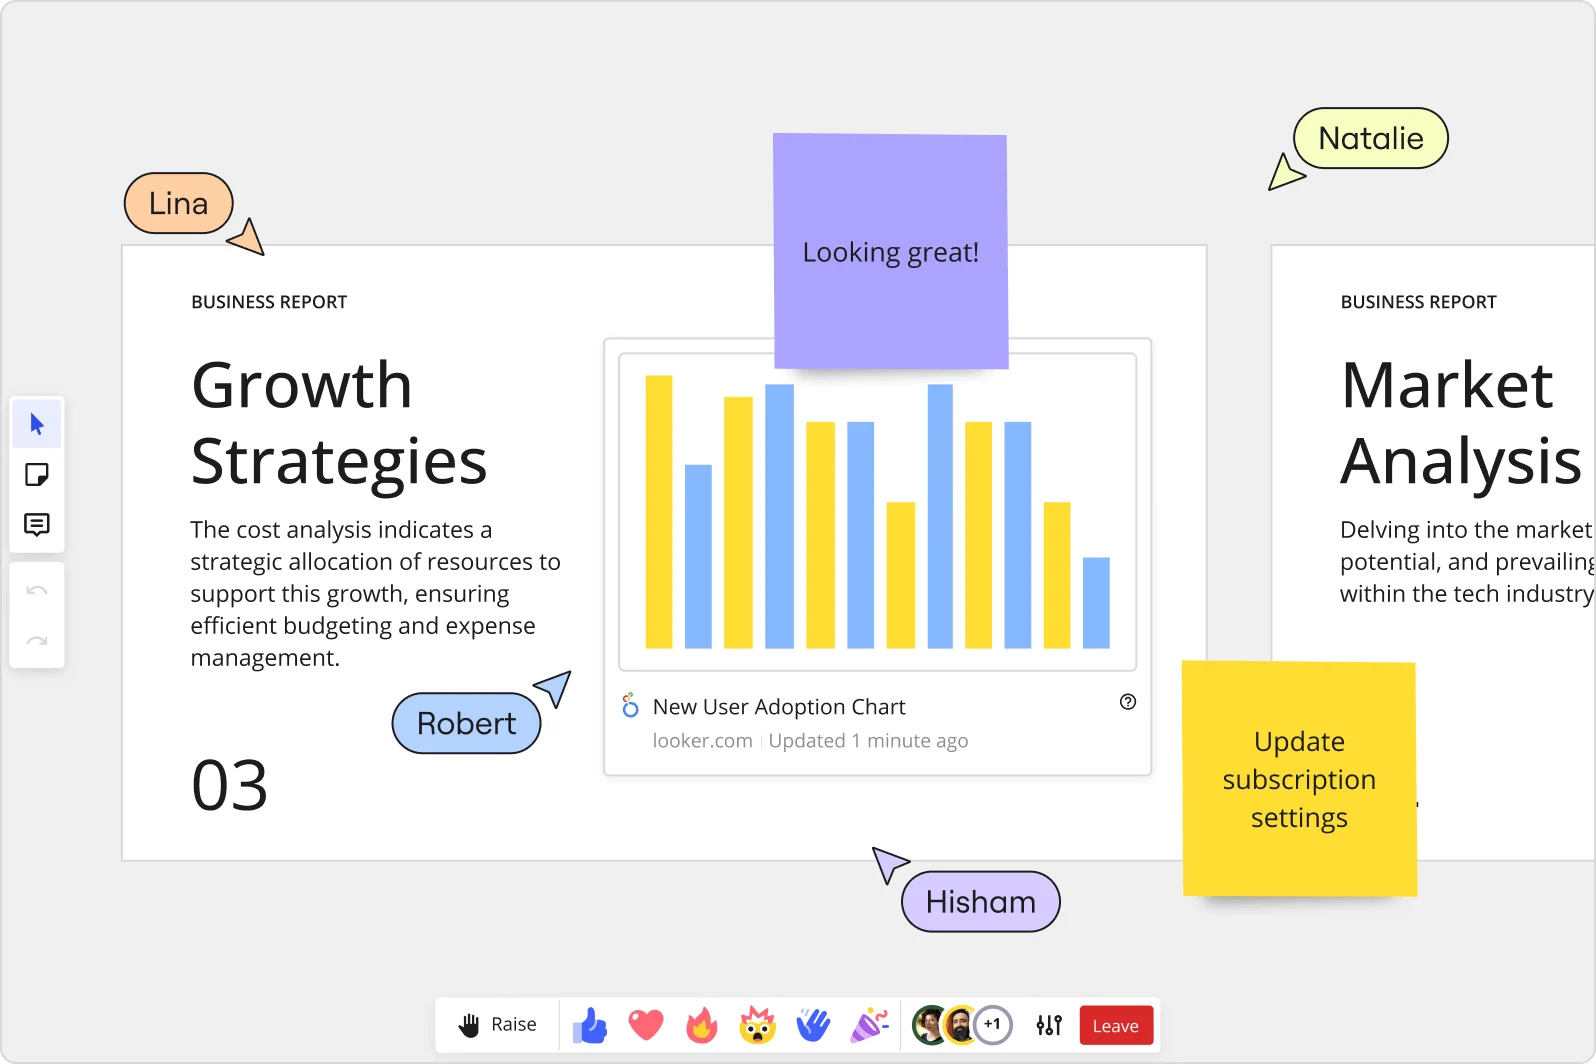
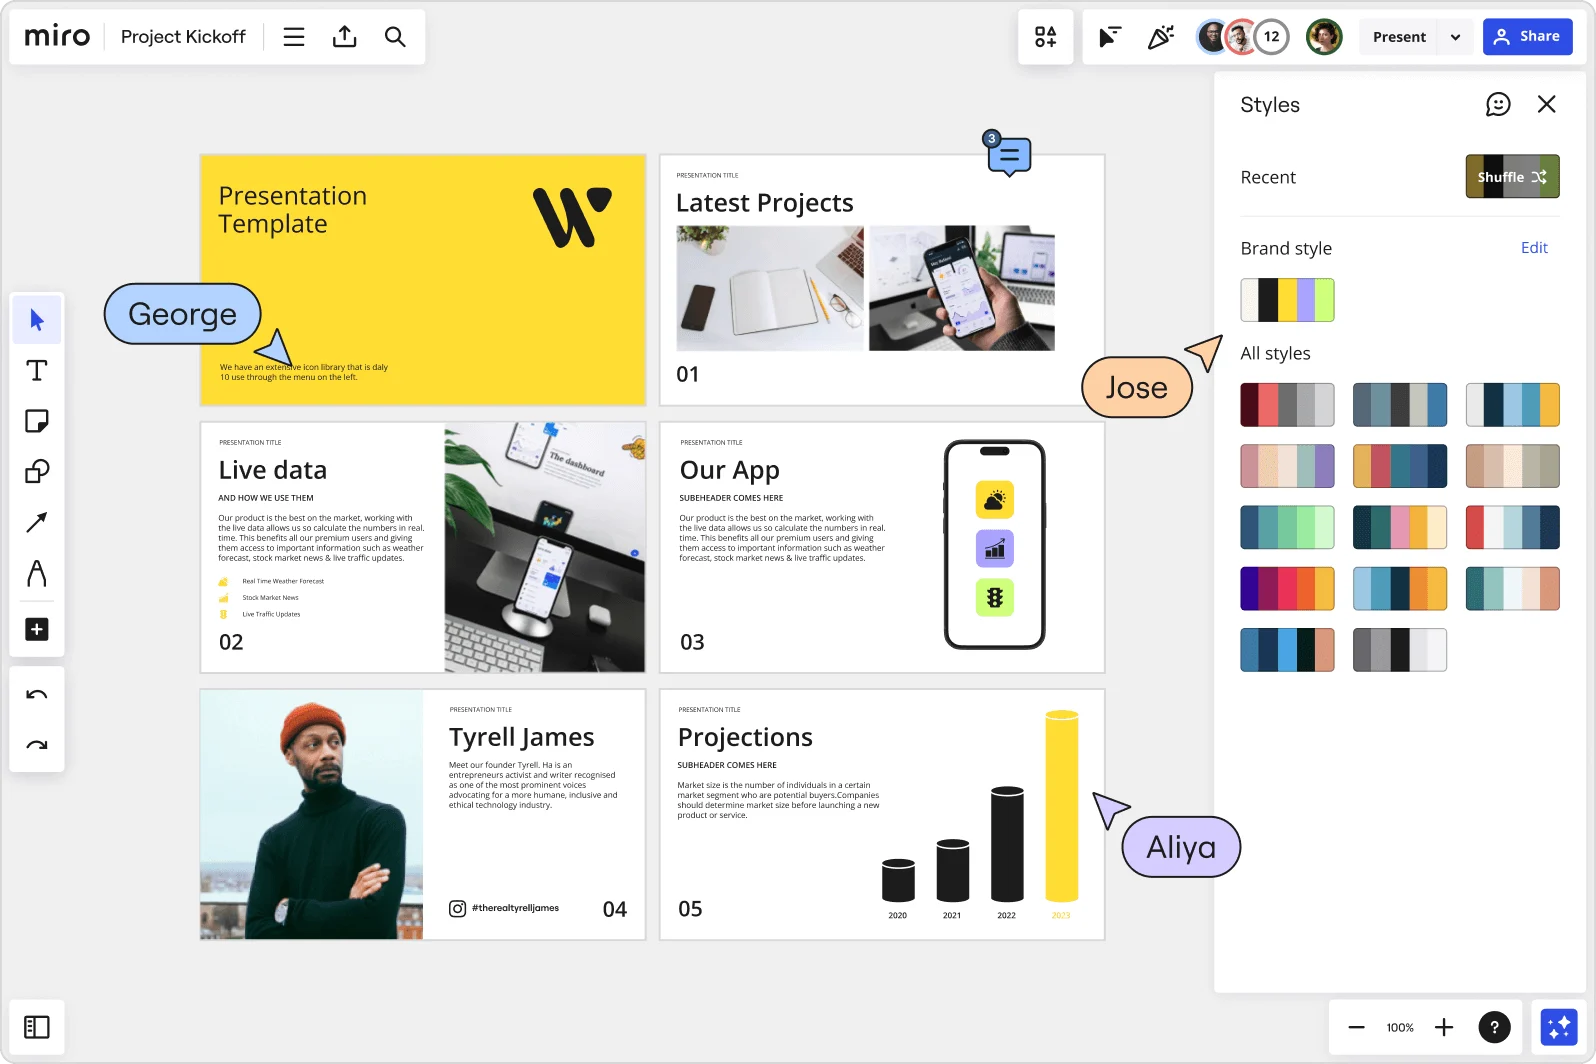
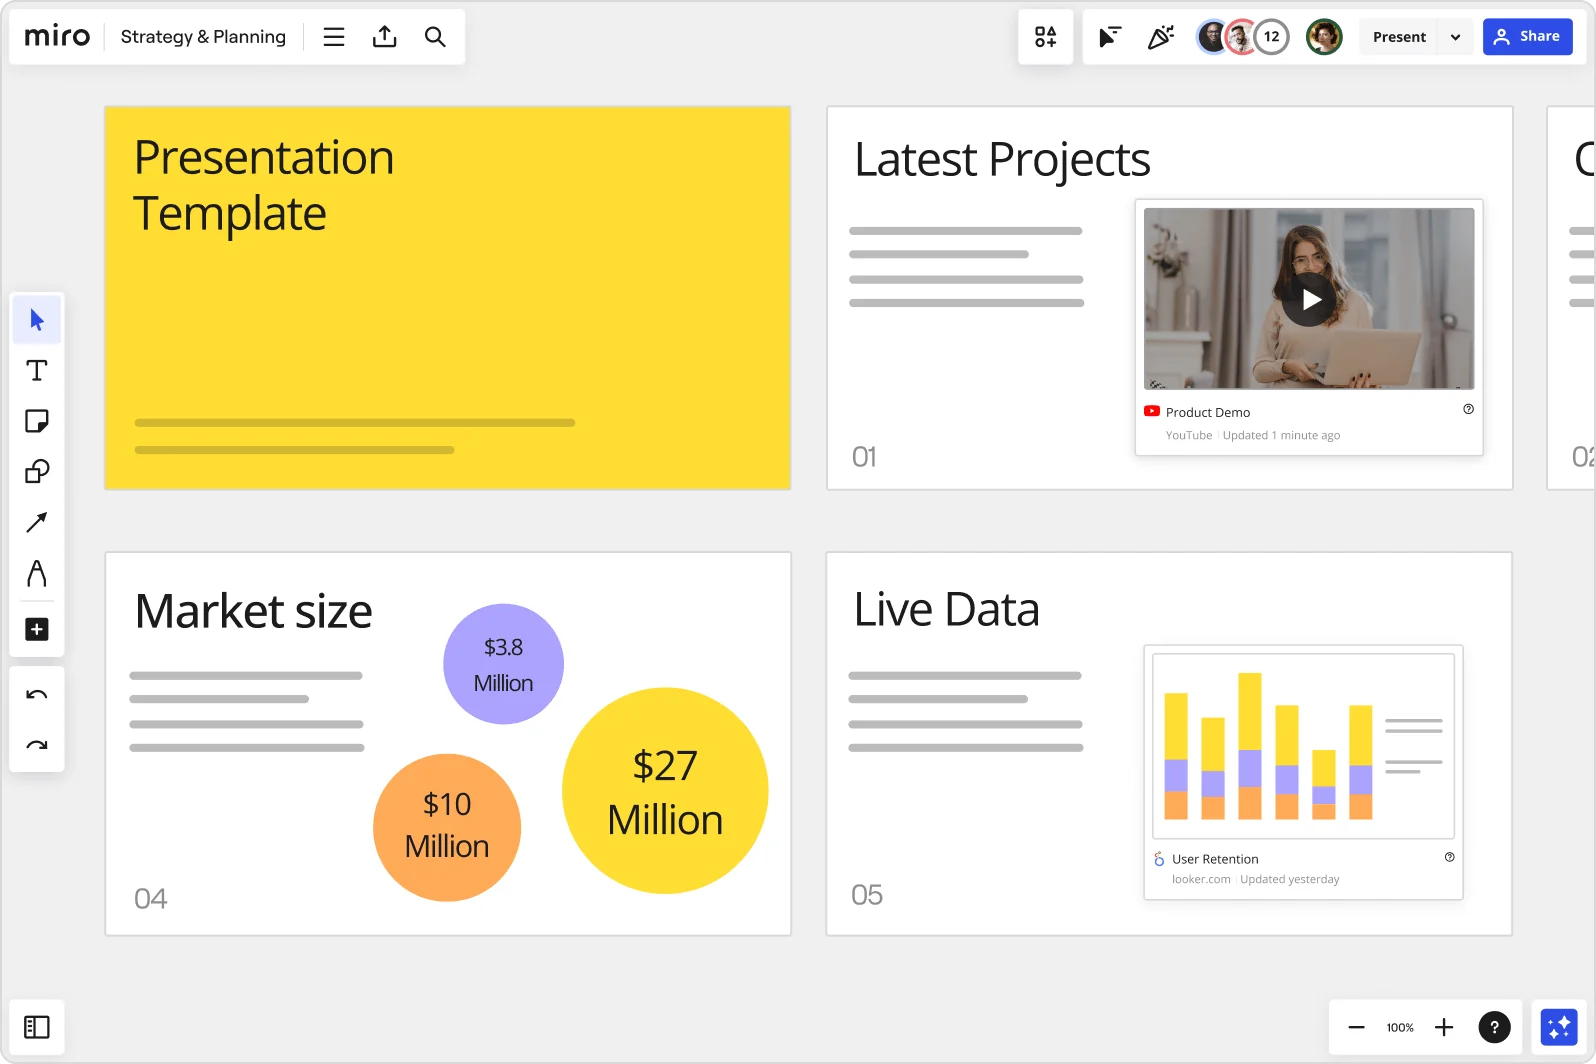
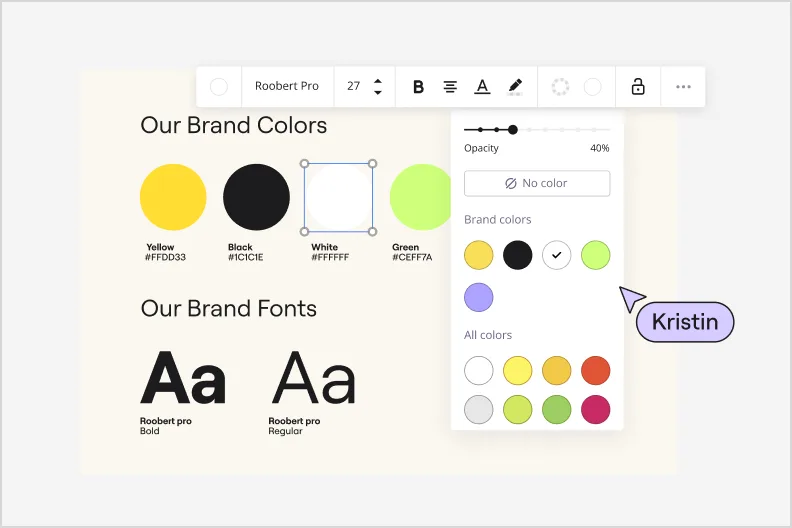
We help you to get started, but you’re welcome to fully customize your presentation. Add your brand colors, fonts, and styles, create graphs, and move frames around to fit your storytelling. Don’t be afraid to explore the many editing tools on the left toolbar and get creative with the presentation maker.
No more boring presentations
Present content and pre-planned activities to facilitate powerful meetings and workshops. Presentations are boring. On Miro, they’re not.
Why Miro is the best presentation maker
Master storytelling.
Miro’s presentation creator has an intuitive UI, making communicating your ideas easier without worrying about tech complications. Use the Presentation mode, and focus your energy on what matters: your content.
Co-creation made simple
Invite others to collaborate with you whenever, wherever. Miro’s robust capabilities allow you to have guests on your board or build a shared team space where everyone comes together to collaborate.
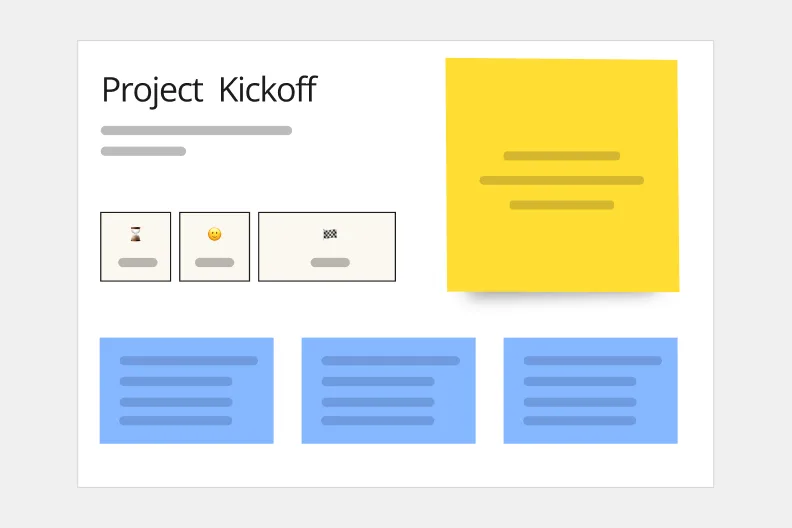
Create dynamic presentations
Use the drag-and-drop feature and effortlessly add images, text, and videos to your presentation frames. Miro’s visual workspace allows you to quickly create professional-looking presentations with just a few clicks.
Easily share your presentation
Engage your stakeholders and get buy-in by creating eye-catching and on-brand presentations. Use Brand Center and presentation templates to improve your bargaining power, influencing decision-making.
Related templates
Presentation Template
Deliver impressive presentations that resonate with your audience.
Logo Presentation Template
Present your design ideas with confidence and make your clients fall in love with their new logo.
Rebranding Presentation
Provide clarity around the reinvention of your brand and your rebranding strategies.
Company Vision Presentation Template
Summarize your company’s goals and describe your path to achieving them using professional-looking slides.
Sales Presentation Template
Shed pre-sales pitch nerves and deliver the speech of a lifetime with the Sales Presentation Template.
Pitch Deck Template
Make people care about your idea and gain supporters everywhere.
Present ideas from anywhere
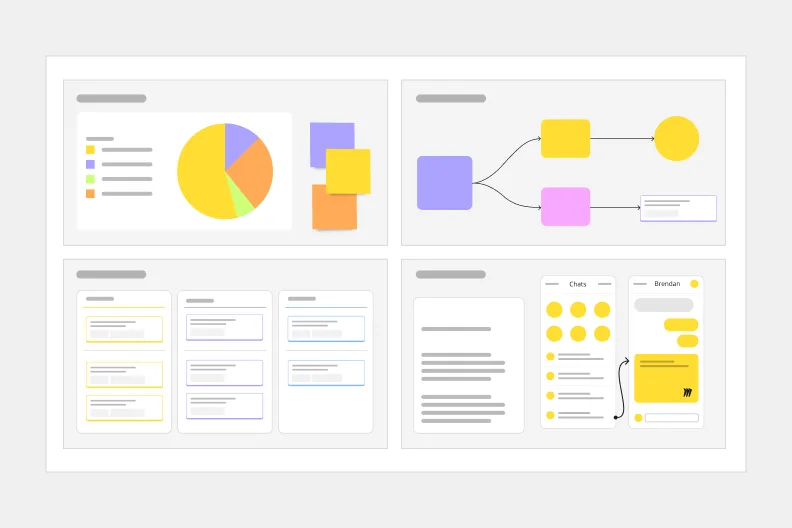
Miro’s visual workspace helps teams to communicate and collaborate across formats, tools, and channels — without the constraints of physical location and meeting space.
Brand management
Make sure your brand looks consistent across all work. With easy access to approved fonts, colors, styles, and templates, anyone can create polished and on-brand boards in just a few minutes.
Meetings and workshops
Creative energy that you can feel, presentations that just flow, and teams that connect and collaborate like humans — bring the in-person experience online with Miro, whether you’re running a brainstorm or facilitating a workshop.
Client work solutions
Miro gives consultants, agencies, freelancers — and their clients — one living, dynamic space to go from project brief to big business breakthrough. Always collaborative, no matter how, where, or when you work.
Hybrid work
How we work has changed. Your tools should too. Experience seamless collaboration, no matter when or where you work, in Miro. Give teams a dynamic and visual way to collaborate, connect, and create.
Project management
Manage complex projects — and their stakeholders — with confidence. Create process alignment and shared understanding between cross-functional teams with a collaborative visual workspace.
Dashboarding & Performance Tracking
Create a shared space for custom dashboards and performance monitoring, pattern identification, and decision-making.

Strategy development
Propel your plans from strategy through execution. Run engaging kickoff sessions, build visual presentations, manage and track progress collaboratively, all in one online planning tool.

Organizational design
Your employees are your greatest asset. Map out your organization to see the big picture and design for the future.
How to make a presentation
Select a ready-made template
Miro has a wide range of presentation templates you can choose from. Or start building from scratch, adding content to your board. Miro’s presentation maker has many features to help you get started.
Structure your presentation
Edit your content, apply your brand fonts and colors, and resize frames if needed.
Share ideas with one click
To present, select Presentation mode on the upper right toolbar. Invite others to join your presentation, and good luck!
Presentation maker FAQs
Where can i make free presentations.
Search for tools that give you free access. Sign up for free for Miro’s visual workspace, and see if it fits your needs.
Which is the best presentation maker?
There are many options out there; choose the one that gives you flexibility and suits your needs. Miro’s presentation maker allows you to create presentations quickly, saving time and effort when designing and crafting your storytelling. Try it for yourself, and see if it works for you.
How to make a good presentation slide?
Miro’s presentation maker allows you to use your board's frames as slides, working exactly as any regular presentation. When creating a presentation with Miro, you have the option to use the Presentation mode, which helps you manage your time and audience on the board, enabling you to facilitate and present at the same time.
10 Miro templates for powerful presentations
How do you design a good presentation?
What you need to know about human perception to be great at presentations
Get on board in seconds
Join thousands of teams using Miro to do their best work yet.
Free online presentation maker .
Choose from our presentation templates to design your own in minutes.
Make captivating presentations with Adobe Express.
Build a presentation that will capture your audience’s attention with Adobe Express. Explore our wide collection of professionally designed presentation templates to get you inspired, then choose one to customize. Drop in your information, add your own images, or even organize information with icons. Send your presentation to team members to collaborate via share link and download whenever you’re finished. It’s as easy as choosing a template, customizing, and sharing.

Template IDs
(To pull in manually curated templates if needed)
Orientation
(Horizontal/Vertical)
( Full, Std, sixcols )
(number of templates to load each pagination. Min. 5)
Most Viewed
Rare & Original
Newest to Oldest
Oldest to Newest
(true, false, all) true or false will limit to premium only or free only.

Discover even more.
Research Poster
Infographic
Slide Background
How to make a presentation.

Create a custom presentation in minutes.
Adobe Express inspires you to think outside the box. Explore professionally designed presentation templates to get you inspired, then have fun getting creative with all the ways you can use Adobe Express to your advantage. Make graphs, charts, and infographics in the same project to add to your presentation. Co-edit with others to shoot and share ideas. Deliver your message succinctly and in style with Adobe Express on your side.

Let Adobe Express be your go-to presentation app.
Establish a theme for your presentation design using photos, icons, logos, personalized fonts, and other customizable elements to make them feel entirely authentic. Duplicate your project to create consistency across future presentations. With Adobe Express, it’s free and easy to make, save, and share your designs within minutes so you can add collaborators, get approval, and showcase your presentation for all to enjoy.
Frequently asked questions.
Looking for adobe express for education.

Use Adobe Express in your classroom
FOR TEACHERS
- Set up an Adobe Express classroom account.
- Create and manage classrooms.
- Securely invite students with a class code.
Available for teachers in the US who have a Google Workspace for Education (Google) account and supported domains. Need help? View the Getting Started Guide
Get started now

Deploy Adobe Express for schools and school districts
FOR ADMINISTRATORS
- Enable school or district-wide access for licensed users.
- Set up through the Adobe Admin Console.
- Manage users and groups.
Available for licensed educational institutions and nonprofit educational organizations. Call for more info. Questions? View the Deployment Guide.
Call for more info. United States: US schools request access | United Kingdom: UK schools request access Australia: 18-0091-0584 | Japan: Japan schools request access

Are you a student interested in Adobe Express?
FOR STUDENTS
- Design stunning presentations, images, and animations.
- Create attention-grabbing web pages.
- Make captivating videos.
Adobe Express offers everything students need to make graphics, photos, presentations, web pages, and videos to express themselves inside and outside the classroom.
K-12 Students
Higher Education
What’s it for?
Make interactive presentations
Create show-stopping presentations and clickable slide decks with Genially’s free online presentation builder. Leave boring behind and tell a story that’s interactive, animated, and beautifully engaging.
INTERACTIVE CONTENT
A presentation that works like a website
Engage your audience with interactive slides that they can click on and explore. Add music, video, hotspots, popup windows, quiz games and interactive data visualizations in a couple of clicks. No coding required!
NO-CODE ANIMATION
Make your slides pop with animation
Bring a touch of movie magic to the screen with incredible visual effects and animated page transitions. Add click-trigger and timed animations to make any topic easy to understand and captivating to watch.

INTEGRATIONS
Live from the world wide web
Embed online content directly in your slides for a media-rich interactive experience. From YouTube and Spotify to Google Maps and Sheets, Genially works seamlessly with over 100 popular apps and websites.

TEMPLATES & TOOLKIT
Genius design tools
With Genially, anyone can create a polished and professional presentation. Choose from over 2000 pre-built templates, or create your own design using the drag-and-drop resources, color palettes, icons, maps and vector graphics.

ONLINE PLATFORM
Safe and sound in the cloud
Because Genially is online, you can relax knowing that your slides are always up-to-date. There’s no risk of forgetting to save changes or accessing the wrong file. Log in from anywhere, collaborate with your team, and make edits in real time.
All-in-one interactive presentation maker
Real-time collaboration.
Co-edit slide decks with others in real time and organize all of your team projects in shared spaces.
Multi format
Present live, share the link, or download as an interactive PDF, MP4 video, JPG, HTML, or SCORM package.
Engagement Analytics
See how many people have viewed and clicked on your slides and keep tabs on learner progress with User Tracking.
Import from PPTX
Give your old decks a new lease of life by importing PowerPoint slides and transforming them with a little Genially magic.
Keep content on-brand with your logo, fonts, colors, brand assets, and team templates at your fingertips.
Quiz & Survey Builder
Use the Interactive Questions feature to add a fun quiz to your slides or gather feedback from your audience.
Beautiful templates
Make your next deck in a flash with Genially’s ready-to-use slides.

OKR Presentation

School Notebook Presentation

Animated Sketch Presentation

Minimal presentation

Land Of Magic Presentation

Onboarding presentation

Visual Presentation

Animated chalkboard presentation

Online Education Guide

Terrazzo presentation

Startup pitch

Historical presentation
THEMES FOR EVERYONE
Interactive presentation ideas
From classroom materials to business pitches, make an impact every day with Genially.

Education presentations

Pitch decks

Business presentations

Thesis defense

Share anywhere
Present live
From the front of the room or behind a screen, you’ll wow your audience with Genially. Heading off grid? Download in HTML to present dynamic slides without WiFi.
Share the link
Every Genially slide deck has its own unique url, just like a website! Share the link so that others can explore at their own pace, or download an MP4 video slideshow or PDF.
Post online
Embed the slides on your website or post them on social media. Upload to Microsoft Teams, Google Classroom, Moodle or any other platform.

The benefits of interactive slides
🗣️ Active participation An interactive slide deck gives your audience cool things to click on and discover, boosting learning and engagement.
👂 Multi-sensory experience Audio, video, animations, and mouse interactions make your content immersive, entertaining and accessible.
🧑🤝🧑 People-friendly format Pop-ups and embeds condense more material into fewer slides so you can break information down into digestible chunks.
🎮 Gamification Games, quizzes and puzzles make information more memorable and enable you to gather feedback and check understanding.
How to make an interactive presentation
With Genially’s easy-to-use presentation platform, anyone can make incredible visual content in moments.
Choose a template or a blank canvas

Get stunning results in less time with a ready-made template. Feeling creative? Design your own slides from scratch.
Customize the design
Add animations and interactions
Resources to become a pro presentation creator

How to create an interactive presentation: Get started in Genially.

How to present data without sending your audience to sleep.

No-code animation: Bring your slides to life with cinematic visual effects.

The art of digital storytelling: Engage and thrill on screen.
Genially in a nutshell
How do I make a presentation interactive and how does Genially work? Find the answers to all of your slide-related questions here!
What’s an interactive presentation?
Interactive slides contain clickable hotspots, links, buttons, and animations that are activated at the touch of a button. Instead of reading or watching passively, your audience can actively interact with the content.
Genially’s interaction presentation software allows you to combine text, photos, video clips, audio and other content in one deck. It’s a great way to condense more information into fewer slides.
If you’re a teacher, you can share multiple materials in one single learning resource. Students can create their own projects using digital media and online maps. For business or training, try embedding spreadsheet data, PDFs, and online content directly in your slides.
An interactive slide deck is more user-friendly than a Microsoft PowerPoint presentation or Google Slides document. That’s because you can break information down into chunks with pop-ups, labels, voiceovers and annotated infographics.
The other benefit of interactive content is increased engagement. It’s easier to keep your audience’s attention when they’re actively participating. Try Genially’s presentation software and free slideshow maker to see how it’s better than other presentation websites. You won’t go back to standard presentation apps!
How do you make a clickable slide?
The best way to make slides clickable is to use Genially’s free interactive presentation program. Design your slide then apply an interaction. In a couple of clicks, you can add popup windows, hyperlinks, close-up images, games, animations, multimedia and other content.
Choose from the library of hotspot buttons and icons to show people what to click on. Go to Presenter View to get a preview and see how your content will appear to your audience.
How do I create presentations that look professional?
You’ve got a deadline looming and you’re staring at the screen with a blank presentation. We’ve all been there! Starting a presentation design from scratch is tricky, especially if you’re short on time.
Genially’s free online presentation maker has over 2000 ready-to-use templates for professional slide presentations, photos slideshows, and more. Each slide design has been created by our team of top graphic designers. No need to worry about fonts, centering images, or designing a matching color scheme. It’s all done for you.
Start by browsing our layouts and themes for education, business and then customize with your own text and images.
How do I share or download my slides?
Because Genially is a cloud based presentation software, you can simply share the link to your slides. Like other online presentation tools, there are no files to download or store on your computer. Everything is saved online.
When you publish your slide deck, it gets its own unique url, just like a website. Share the link with others to let them explore the content in their own time. If you’re presenting live, just click the Present button.
You can also embed your presentation on your website, company wiki, or social media. Genially is compatible with WordPress, Moodle, Google Classroom, and other platforms. If you use an LMS, you can also download your interactive design slides in SCORM format.
For slideshow videos and slideshows with music, share online or download as an MP4 video. Check out our free slideshow templates for ideas.
Can I make a free presentation in Genially?
You bet! Genially is an easy-to-use slide maker, with a free version and paid plans. The free plan allows you to create unlimited slides with interactions and animations. Subscribe to one of our paid plans for more advanced features.

Discover a world of interactive content
Join the 25 million people designing incredible interactive experiences with Genially.
Free Site Analysis Checklist
Every design project begins with site analysis … start it with confidence for free!
How to Create a Successful Architecture Presentation Board
- Updated: December 31, 2023
Architecture is as much about effective communication as it is about innovative design. At the heart of this communicative process lies the architecture presentation board, a tool quintessential for architects to convey their vision, ideas, and concepts.
These boards are more than mere visual aids; they are the narrative bridge between an architect’s imaginative conception and the practical world where these ideas may take shape. They are not just a requirement for academic submissions or professional proposals but are a fundamental aspect of the architectural design process.
They serve as a canvas where ideas are visualized, concepts are explained, and designs are brought to life for various audiences, be it clients, peers, competition judges, or the general public.
Understanding how to effectively create and present these boards is crucial, as a well-crafted presentation not only showcases a finished scheme but also reflects the thought process, attention to detail, and the authors ability to communicate complex ideas succinctly and visually.
What are architecture presentation boards used for?
Architecture presentation boards serve several different purposes:
- Students use them to present work to their professors and peers.
- Professionals use them to present designs to clients, committees, shareholders, and exhibitions.
- They may be a means to win a commission, or they may help to take a project into the next stage.
What is the purpose of an architecture presentation board?
Architecture presentation boards are a tool to showcase your work. They are a way to draw your viewers into your design process and methods, providing an overall summary and vision for the project. You are communicating your design and showcasing your artistic skills, and your sense as a designer.
Every successful project has a central concept, a “big picture” theme that gives it purpose. When you look at your project, what is that big idea?
As it is central to your whole project, this will guide you as you prioritize your work and determine the flow of your ideas. The primary purpose of your project is to communicate this central concept in the best way possible.

AutoCAD Template Kit
Format your drawings with the correct set of tools. This CAD template enables you as a designer to spend your time on what matters – the design!

Stop searching for CAD blocks!
How do you layout an architecture presentation board, 01 – structure/order.
Before you begin laying out your presentation board, think about the main points you want to convey. From there, determine what images and graphics will best represent those ideas. Gather all of the information you will need, making a note of what graphics and text you will need to communicate your ideas.
Remember, you are essentially telling a story, so pay close attention to the flow of the narrative as you arrange your elements. Consider the beginning, middle, and end of the story you want to tell.
Depending on the guidelines you are given, you may present your boards side-by-side, as separate boards presented in a sequence, or as one big poster. If no strict parameters are in place, figure out what structure and layout will tell your story the best. While a series of boards will logically convey your story, one big board is often the easiest option.

02 – Orientation
Will your presentation board be oriented in portrait or landscape? Sometimes you will get to make that call, but many times it will be determined for you by your director, client, or professor. Make sure you know beforehand what the parameters are.
If you get to choose, give it some careful thought. Which orientation will give your graphics the room they need to be the most impactful? Which orientation gives your whole project a natural flow for your narrative?
03 – Size
Much like orientation, you may or may not get to decide what size your presentation boards will be. You will often have restrictions that limit you to a specific board size and a certain number of boards.
Make sure you know your limitations before you start working on your layout. Your boards should all be the same size to achieve continuity.
You can use a combination of different sizes to produce a board of equivalent size. For example, a combination of two A1 boards will add up to an A0 board.

04 – Layout
The most common way to organize your layout is by using a grid. Using a grid will help keep the boards in your project consistent.
If you are using InDesign , you can achieve this uniformity by creating a master page that acts as a template for your whole project.
Templates are useful because they can save you a great deal of time, and they ensure uniformity throughout your project. Your grid should include spaces for titles, numbering, your name, and any other information that will repeat on each board.
Before you start laying out your actual boards, sketch out various configurations so you can determine what will work best. You can do a small-scale sketch to get the basic idea of the flow of each board. This allows you to change the arrangement of the elements before you commit to anything on your boards.
You can do this initial phase using software or sketching it out on paper.
After you have determined what type of layout you want to use, estimate how much space you will need for each element on the page. Each graphic needs to be large enough to have an impact. Determine how much space you would like to leave in between each graphic.
Use equal spacing throughout your project to create continuity. Here is an excellent tutorial on planning your layout using Indesign:
The layout of each board should show the relationship between all of the elements. It should be clear to read and follow a logical left-to-right and top-to-bottom progression.
Imagine a viewer looking at your presentation. What do you want them to see first? What is the best way to make them understand your project? Does your layout achieve this?
You should also pay attention to the relationship between each board. Is there a logical progression from one board to the next? Does the sequence make sense? If you will not display the boards in a configuration that makes them all visible at once, make sure you number them, so your viewers follow the correct sequence.
Don’t feel the need to fill every square inch of your presentation board. Leave enough space so that it doesn’t look too busy or cluttered. On the other hand, don’t leave too much space either, or it will look like you didn’t finish the board, didn’t have enough material for the board, or that you didn’t work very hard.
05 – Visual Hierarchy
Some of your images need to garner more attention than others. Consider all of the graphics and text you will be using. Which images are central to your main idea?
The images that are essential for communicating your vision should take up more space in the grid. You should have an image that people can see from a distance and other images that they can see from up close. This creates a visual hierarchy.
What is the most important aspect of your project? Make that the element people can see from a distance. There are ways to accomplish this in addition to making it the largest element on the board. For example, you can use color to draw the viewer’s eye to a particular graphic, especially if the rest of the board is monochromatic.

06 – Background
The background of your presentation board should be simple. This allows the viewer to see all of the elements without the distraction of a busy background. You don’t want anything to detract from the critical details of the board. Your graphics and text should be the primary focus; don’t use bold colors or textures that will detract from that.
A white, or even light gray, background will make your graphics and text stand out. It will give your presentation a professional look that isn’t too busy. You can use other colors if they help convey your central concept; just make sure the background is plain enough that the viewer focuses on the design, not the background.
Be very selective when using a black background, as it may make the text harder to read, and your graphics may not stand out as much as you would like them to.
Whatever color you choose for your background, use it to your advantage. Effective use of negative space can make your design look clean and professional.

07 – Color Scheme
Many professionals and students stick with black, white, and gray for presentation boards. While this can give your boards a professional look, don’t be afraid to add a pop of color. While sticking with greyscale may seem like a safe choice, there is a risk of blacks and greys making your design seem cold and lifeless.
Think about ways you can use color to bring life to your design. You may opt to add just one color, such as green for landscaping, to provide contrast to an otherwise monochromatic presentation. You could also bring in an additional color to represent a particular building material (brick, glass, wood, etc.).
You can also choose a brighter, more eye-catching color, such as yellow or orange, as a feature in your diagrams . Whatever you choose, use the same color across all of your boards to maintain a consistent flow.
If color is one of the main focuses of your project, or if there are details that you cannot adequately represent in greyscale, then you should feel free to delve deeper into the world of color. Don’t limit yourself to merely an accent color in this case, but don’t take it too far and make the mistake of overusing color to the point where it is a distraction.
08 – Font
All of the text throughout your project should be in one font. Don’t use font style as an avenue for creativity; it is more important to make sure the font style and size produce a readable, consistent product.
Sans serif fonts, such as Helvetica or Futura, will give your presentation a clean, minimalist look.
Avoid script or handwriting fonts, as they will not give your boards a clean, professional look. Keep the color of your font dark (black or dark grey work well) to provide contrast to a light background.
Whichever font you select, make sure the style and size are readable for your viewers before you finalize your boards. The best way to do this is to print out your text on an A3 paper, pin it up somewhere, and stand back to see how it will look when it is displayed.

A full breakdown, list, and description of the most popular fonts for architecture can be found here .
09 – Title
The most common placement for a title bar is the top left since your board will most likely follow a left-to-right and top-to-bottom progression. Many successful and professional-looking boards have titles at the top right, at the bottom, or somewhere in the middle.
Choose the position that makes the most sense for your project. As with other design decisions, make sure it does not distract the viewer from seeing the big picture.
Make sure the title placement is consistent from board to board. This consistency will be both visually appealing and professional.
10 – Text
Keep your explanations concise. People are not going to spend much time reading lengthy descriptions, so only include relevant information and keep it short. Remember that your text boxes are part of your visual hierarchy, so utilize the size and alignment to complement your graphics. Consider the various ways you can align the text within the text box. What flows best? What is pleasing to the eye?
Aside from your title, do not use all capitals in your text. Your work will look more professional and be easier to read if you stick with the standard rules of capitalization.
Whenever possible, use a graphic or a sketch, rather than an explanation, to portray an idea. Since this is a graphic presentation, you want your graphics to tell the story, not your text. Include a concise statement that highlights the features of your design. This is basically your sales pitch; lengthy explanations will make you lose your audience.
11 – Image Selection
The selection of images is a critical part of putting your presentation board together. The graphics you choose can make or break your entire design presentation.
You want to select the images that best convey the important details of your project. If you use too many images, your presentation may appear cluttered and confusing. If you use too few images, it may look like you did not put much effort into your presentation.
Over the course of your project, you have generated countless sketches, renderings, models, and drawings. Resist the temptation to include everything just to show how hard you worked. Keep your big picture in mind and determine which images will directly show or best support that idea.

12 – Models
On occasion, a physical model, or even several models showing different aspects of your design, may be required for your presentation board. This is an additional means of communicating your vision to your viewers.
There are several materials you can choose for your model. Card and cardboard are inexpensive and come in various weights, finishes, and colors.
Foam board is also available in various widths and thicknesses. It is generally white, but it also comes in other colors. It is very lightweight and sturdy, making it an ideal material for your presentation board.
Balsawood is another good option. It is easy to work with and comes in varying weights. The material you choose will depend on the look you are trying to achieve as well as how much weight you can adhere to your presentation board.
Your model pieces can be cut by hand with tools such as an X-Acto knife or a scalpel. If you have access to a laser cutter, it will save you some time and give you more precision.

13 – Time Constraints
Give yourself enough time to produce a well-thought-out, effective, visually appealing presentation. You spent a considerable amount of time on your design; it would be a shame to rush through your presentation boards. Give each part of the process enough attention so that your final product really showcases and highlights your talent and hard work.
Time management is critical when working on a big project like this. It can seem overwhelming at first, so split the project into smaller sub-tasks to make it more manageable. Give yourself a deadline for each of those smaller tasks. Make a schedule that shows which tasks you will accomplish each day. Make sure you leave yourself a little wiggle room in case anything unexpected comes up.
What should be included in an architecture presentation board?
Unless you receive explicit instructions regarding what to include in your presentation boards, it is up to you which elements make the cut. When you are deciding what elements to incorporate into your project, reflect on what will best explain your design.
When someone completely unfamiliar with your project is looking at your boards, what do you want them to see?
When deciding what text to include in your project, make sure you include an introduction, your design brief, and any applicable precedents. In addition, you will want to include concise textual explanations as needed throughout your presentation.
For your graphic representations, you want to include the basics: elevations, floor plans, and sections. You can represent these with 3d drawings, perspectives, or renders. You may also include some key features of your design that make it unique, and in addition to highlighting the finished product, select elements that show your concept and design development.
Some additional tips:
- When choosing a perspective view, select one that highlights the best aspects of your design. This graphic is usually the most prominent picture on the presentation board. The hero image!
- You will want to include at least two different elevation views so your viewers can get a sense of the bigger picture.
- Don’t be afraid to include sketches. If you include some sketches that show the progression from a simple idea to the final product, you can communicate your vision as well as your process.
When you are adding all of these elements to your presentation board, make sure each graphic representation of the plan has the same orientation. If one picture has north pointed in one direction and another picture has north pointed in a different direction, it can be disorienting for the viewer.
Likewise, each graphic should use the same scale unless there is one picture that is bigger than the others for the purpose of visual hierarchy.
There is one obvious detail that you may inadvertently overlook. Make sure your name is on your presentation board. If you have more than one board, put your name on each one. The name is in the bottom right-hand corner, but it can also appear in the title bar.

Types of Architectural Presentation Boards
Organizing your architectural presentation sheets into specific categories can be a very effective way to present your projects. There are several types of architectural presentation boards, and the following tips can help you present your project at different stages:
C onceptual board
Concept sheets are a type of presentation board that showcase your initial ideas and approach to a project. They typically include information about the concept behind the project and how design decisions were made. It is important to submit concept sheets before presenting your architectural drawings and renderings.
When creating concept sheets, you may want to include conceptual collages and diagrams to help explain your ideas to the audience. These can be created using 3D modeling software or programs like Adobe Photoshop or Illustrator. The goal of concept sheets is to clearly and simply present the various stages of your project to the review panel.
Site a nalysis board
Before beginning a project, architects perform thorough analyses to determine the needs, conditions, and limitations of the site. This analysis serves as the foundation for the concept development. Site analysis boards may include site analysis, urban scale analysis, sociocultural analysis, analysis of physical conditions, and environmental analysis.
It is important to conduct extensive research and present your findings in a clear and organized way, as analysis boards can help reinforce the concepts presented in your architectural drawings.
It is also important to keep in mind that the jury members may have difficulty understanding analysis presented alongside the architectural drawings.
Technical / Detail Board
Technical drawings are a crucial aspect of architectural projects, as they help to depict the structural elements of a design and guide the construction process. It is important to present technical drawings in a clear and organized manner, particularly in application projects and student projects.
Technical drawing boards should typically include a master plan at a scale of 1/5000 or 1/1000, as well as site plans and floor plans at a scale of 1/500, and sections and elevations at a scale of 1/200. Detail drawings, including system sections and details at scales of 1/20, 1/10, and 1/5, should also be included on the technical drawing boards.
These drawings will help to provide a more complete understanding of the project to the review panel.

Professional Boards
While student projects and competition entries are evaluated by a panel of judges, in professional practice, the client serves as the “jury” for your work. Instead of preparing presentation boards in the same way you would for school or competition projects, it is important to create presentations that will appeal to clients.
The most important factor for most clients is the design of the living space, so it can be helpful to focus on renderings and plain plans rather than technical drawings. The visual appeal of your presentation boards, including the color scheme and atmosphere in the renderings, as well as your ability to effectively present and explain your ideas to the client, will also be important factors in their evaluation of your work.
Programs, Software, and Tools
There are several software applications you can use to build your presentation board. Choose one that you are already familiar with, so you aren’t trying to learn new software while you are doing your layout. That is an added stressor that you just don’t need!
InDesign, Illustrator, and Photoshop are excellent programs, but if you need something a bit more simple, Microsoft Word, Pages, Powerpoint, or Keynote will also work.
InDesign was designed for making presentations. AutoCAD was designed for constructing plans. Photoshop was designed for editing raster images. Illustrator was designed for creating vector art. While some people are able to make their whole presentation using Illustrator, Photoshop, or even PowerPoint, it makes more sense to use each piece of software in a way that takes advantage of its strengths.
You can import files from AutoCAD, Photoshop, and Illustrator into InDesign and take advantage of the strengths of each application.
Before you delve into your own presentation board, do some research. Look online for examples and make a note of the elements you like. Combine that inspiration with your creativity to produce a stunning presentation.
Here are some websites you can use for inspiration:
The President’s Medals Winners
Pinterest – Architectural Presentation Boards
World Architecture Students Community – Presentation Boards
FAQ’s about architecture presentation boards
How do you present an architecture presentation.
Here are some general guidelines for presenting an architecture presentation:
- Define your objective : Clearly define the purpose of your presentation and the main ideas or arguments you want to convey.
- Organize your material : Gather and organize your material in a logical and coherent manner that supports your objectives. This may include drawings, images, models, diagrams, and text.
- Create a clear and visually appealing layout : Use a layout that is easy to follow and that effectively presents your material. Consider using contrast, hierarchy, and balance to guide the viewer’s eye.
- Practice your presentation : Practice your presentation to ensure that you are comfortable with your material and can deliver it in a clear and confident manner.
- Use visual aids effectively : Use visual aids such as slides, drawings, and models to supplement your presentation and help illustrate your points. Avoid overloading the viewer with too much information and focus on presenting the most important ideas.
- Engage your audience : Engage your audience by using a variety of presentation techniques, such as asking questions, using storytelling, and using interactive elements.
- Conclude with a summary : Recap the main points of your presentation and conclude with a clear and concise summary.
Why do architects use presentation boards?
As explained above, architecture presentation boards are commonly used by architects and designers to visually communicate their ideas and designs.
Presentation boards typically consist of a series of large format panels that can be mounted on a wall or a stand. These panels can be used to display a variety of materials, such as drawings, images, models, diagrams, and text.
Presentation boards are an effective way to present a comprehensive overview of a project or design concept, and they can be used to showcase the key features and characteristics of a project.
They are often used in design reviews, presentations, exhibitions, and competitions , and can be a useful tool for architects and designers to communicate their ideas to a variety of audiences, including clients, stakeholders, and reviewers.
Presentation boards can be customized to suit the specific needs of the project and can be designed to effectively convey the key ideas and concepts of the design, enabling architects and designers to effectively present and showcase their work in a clear and visually appealing manner.
To Sum Up…
Even the most exceptional design concept can appear uninspired if you do not present it well.
You have spent weeks, maybe even months, on your design. Don’t sell yourself short by not communicating your vision well. The professional, creative, and aesthetic quality of your presentation will affect how your work is received.

Every design project begins with site analysis … start it with confidence for free!.

19 Awesome Architecture Blogs To Follow
Keeping up to date with what’s occurring is an important part of our professional development…

Restaurant Design Concepts: Architecture guide
…this is far more than mere decoration or architectural indulgence.

Architectural Lighting Concepts – Illuminating spaces
Beyond its fundamental role in visibility, lighting shapes our experiences, influences our emotions, and defines the essence of architectural itself…

Understanding Forced Perspective in Architecture
By tricking the eye, architects have harnessed forced perspective to enhance, distort, or subtly guide the viewer’s experience of a space…

Free Architecture Detail Drawings: The best online construction resources
Accessing high-quality construction and architecture detail drawings can often come with a high cost…

How To Improve Your Architecture Detailing
Mastering the art of architectural detailing is no small feat. It requires a deep understanding of materials, construction methods, and design principles…
Leave a Reply Cancel reply
You must be logged in to post a comment.
As seen on:

Unlock access to all our new and current products for life .
Providing a general introduction and overview into the subject, and life as a student and professional.
Study aid for both students and young architects, offering tutorials, tips, guides and resources.
Information and resources addressing the professional architectural environment and industry.
- Concept Design Skills
- Portfolio Creation
- Meet The Team
Where can we send the Checklist?
By entering your email address, you agree to receive emails from archisoup. We’ll respect your privacy, and you can unsubscribe anytime.

Integrations
Inspiration
Consideration

Go hybrid with Prezi
It’s a new world. Are you ready? Here’s how Prezi helps your team thrive in today’s hybrid workplace.

Prezi Video explained
We’ve compiled these quick, easy-to-follow tutorials to make you a Prezi Video master in no time.

The science
Learn to grab their attention and keep it with presentation advice from the pros.
Create moving, zooming presentations that grab attention and keep it.
Appear right alongside your content while presenting to your audience.
Make stunning interactive charts, reports, maps, infographics, and more.
Online presentation tools that help you stand out
Engage your audience no matter where you are. Prezi’s online presentation tools help you connect with your audience and create conversational presentations that come with you on-screen to any video call. With professionally-designed templates, branding solutions, immersive views, and more, it’s never been easier to create and present online.
1-844-773-9449 8:30 am–5 pm PST

Trusted by business both large and small

Do more than talk at your audience. Prezi makes every presentation a personal and engaging conversation. Use the open canvas of Prezi Present to view your whole presentation, then jump into topics in any order as your audience shows interest. No need to search through slides or bore your audience. Engage everyone even more with interactive elements like charts, maps, and tables made in Prezi Design.
Take your presentations online with Prezi Video . Display your presentations next to you on screen so you can stay face-to-face with your audience instead of being blocked by a shared screen. Get even more online presentation features like immersive views, branding solutions, and name tags with a Teams license. Create your presentation online with Prezi Present, then take it to a virtual meeting with Prezi Video for a truly personal and professional online presentation.
Find the perfect template for your presentation
Creating a presentation is simple with the right starting blocks. Use Prezi’s online presentation templates to make a winning sales pitch, product demo, or training session. With a Teams license, any presentation template can be branded with your own colors, fonts, and logo to make your message more memorable.

Check out more online presentation templates
- Create a Prezi account and open Prezi Video in your dashboard.
- Get started with quick record or choose any of our professionally-designed video templates .
- Upload your own images, GIFs, and videos, or select free visuals from our Unsplash and Giphy right in Prezi.
- Add your presenter notes to track your main ideas or speaking points.
- Practice your presentation and get ready to present in a video call or record your video for later.
- Share your video. You can trim the video, add a description, edit the transcript, choose the thumbnail, adjust privacy settings, and present your video right in Prezi Video .
Create an oline presentation with Prezi Video
Get inspired by the top presenters in the biz
Some of the best online presentations out there are available on Prezi. Look through our gallery of presentation examples, curated by Prezi’s editors, for some of our favorites. You can take notes, get inspired, and you can even re-use an existing presentation for your own purposes. Just look for the green symbol, then customize the presentation with your own content.

Explore online presentation examples
More features that make online presentations with Prezi great

You’re in the driver’s seat
License management Add or remove team members, and transfer licenses with ease.
Content ownership Keep control of your team’s content, even when someone leaves.
Privacy control Publishing settings and overviews let you manage who sees what.
MSI Installation Remote software deployment gets everyone the latest versions fast.

We’re your biggest supporters
Phone and chat support Our customer support experts are standing by to help.
Dedicated success manager Let your personal guide get your team up and running.
Branded templates Get your own template with your fonts, logo, and colors.
Advanced training* Get personalized trainings and webinars, plus the option to get Prezi-certified. *Available with software commitment minimum

Your security is our priority
SOC2 compliance We stay compliant and constantly up-to-date with SOC2 requirements.
Continuous monitoring We constantly scan and test our infrastructure and application.
Cross-team integration Our security, engineering, and product teams partner with each other closely. Learn more about our security measures
Discover resources for better presentations online

Frequently asked questions
Can i convert my google slides, powerpoint, or keynote presentations to prezi.
You sure can! Upload any existing sales deck from PowerPoint or Google Slides to Prezi to convert it to a Prezi presentation online. You can also use a Keynote presentation by exporting it as a PDF and importing that.
How do you present online with Prezi?
Use Prezi Video to take your presentation to a virtual meeting and present online. Your presentation will appear next to you on screen, so you can more easily interact with the content while maintaining a face-to-face connection with your audience.
What video conferencing tools does Prezi Video work with?
Prezi Video connects to the top video conferencing platforms out there. Select “Prezi Camera” from your camera settings to view your presentation in your virtual meeting.
Am I able to import my own branded assets into Prezi?
Setting up your brand kit in Prezi lets you upload your logo, fonts, colors, and any other asset, so they’re preloaded and ready to be used in any project you create.
What types of assets or images are available within Prezi?
You don’t need to prepare all your images before creating a presentation in Prezi. Get access to the huge Unsplash and Giphy libraries directly within the Prezi editor, perfect for finishing up presentations on the fly.
Your team creates better presentations online with Prezi
Prezi helps you create stunning and highly engaging presentations online that are perfect for sales, marketing, training, or internal communication, and there’s so much more you can do when you get your team on Prezi. Discover other cool features purpose-built to help hybrid and virtual teams succeed, such as the Prezi brand kit, enhanced collaboration tools, and more when you get a demo or sign up for a free trial.
- Start diagramming Start diagramming
Figma design
Design and prototype in one place
Collaborate with a digital whiteboard
Translate designs into code
Get the desktop, mobile, and font installer apps
See the latest features and releases
- Prototyping
- Design systems
- Wireframing
- Online whiteboard
- Team meetings
- Strategic planning
- Brainstorming
- Diagramming
- Product development
- Web development
- Design handoff
- Product managers
Organizations
Config 2024
Register to attend in person or online — June 26–27

Creator fund
Build and sell what you love
User groups
Join a local Friends of Figma group
Learn best practices at virtual events
Customer stories
Read about leading product teams
Stories about bringing new ideas to life
Get started
- Developer docs
- Best practices
- Reports & insights
- Resource library
- Help center
FigJam You’ll never be bored with this bulletin board template
Create eye-catching visuals for any meeting, meet-up, or presentation with FigJam’s collection of diagrams and graphic organizers.

Bulletin board template
Lay out your vision on your own, or fill out this bulletin template with your colleagues and co-creatives.
A bulletin board fit for a boardroom
Like an upgraded version of the vision board in your old bedroom, a virtual bulletin board template gives you the freedom to express yourself through text, imagery, graphics, videos, color, and more.
Delight the sense of sight: Represent your talking points, key takeaways, and overarching goals as visuals for improved understanding.
Condense your concepts: Present a variety of related (or unrelated) ideas on one compact canvas.
Blast to the past: Appeal to their sense of nostalgia with the classic bulletin board format.

FigJam Bring everyone on board
Develop a cohesive bulletin board on an infinite whiteboard, alongside your bosses or BFFs. All participants can pitch their ideas via talk or text, drag around icons, images, and infographics as needed, and let their preferences be known through Vote, Anonymous Thoughts, and Alignment Scale widgets.
All aboard the train to success
A breathtaking bulletin board is just the beginning. For pitch-perfect presentations, productive project sprints, and more, use free resources from our community.

Huddle board
Create a rough ‘n’ ready bulletin board from every morning meeting.

Presentation template
Turn your beautiful board into an audience-ready presentation.
Other templates from the community
Look for all kinds of other diagrams and doodle pads to realize your dreams.
What is an interactive bulletin board?
An interactive bulletin board is a virtual representation of the cork boards that adorn so many bedrooms, classrooms, and community centers. Because it’s online and editable, anyone with access can add, shift around the layout, and remove content from the shared board.
Interactive bulletin board templates have countless potential uses. They can act as one-page presentations, brainstorming settings, online community forums, and more.
How do online bulletin boards work?
Online bulletin boards combine the familiarity of the physical bulletin board with the collaborative aspects of the Internet’s shared online spaces. In essence, a virtual bulletin board is like any other shared online document; those invited to collaborate can add whatever they want to the board, comment on what’s currently posted, and share it with people in their network.
How do you create a virtual bulletin board?
Start by opening one of our free bulletin templates, complete with that oh-so-familiar cork board texture and colorful digital push pins. Then, either on your own or with your collaborators, choose a topic to brainstorm around or a presentation to prepare.
Place your central idea in a prominent spot and add corresponding images, text excerpts, videos, graphs, hyperlinks, and more. Move around each asset to create a cohesive visual diagram, then feel free to share it with a larger network to solicit constructive feedback on your idea or pitch. With an easily editable bulletin board at your disposal, you can further edityour layout for various uses and as your project or problem evolves.
Other templates you might like

Explore 1,000+ templates on the Figma community
Explore even more templates, widgets, and plugins—all built by the Figma community.

10 Best Mood Board Apps and Software for Interior Designers
13 Mins Read
January 21st, 2024
Abbie Downey
Abbie is the Owner of Feather&Fossil and specialises in Maximalist Interior Design schemes for residential clients. Abbie has experience and qualifications in Interior Design and Project Management.
Currently at
Jump ahead to:
Mood Board Apps and Software
It is the first step to every project, the point where it all starts feeling real, and ideas start translating to visuals – a mood board. While there are one too many ways for you to make a mood board, finding the right tool for you can help save time and frustration.
As an interior designer, you know that not all mood board software can accommodate your specific needs. You need something that is built for you. We are counting down the 10 best mood board apps and software for interior designers so you can save the time you would spend filtering through the crowd.
We will go over the pros and cons of each mood board software, how much they will set you back (Psst! Some free ones too), and how you can download them or sign up (iOS, Android, Website).
Read also – 14 Pro Tips To Create Mood Boards for Interior Design
What is a Mood Board?
A mood board is a visual presentation that sets the tone for a project. Mood boards can convey concepts, ideas, or even general feelings and emotions. A mood board can consist of photographs, graphics, color swatches, typography, and any other visual element that evokes the desired sentiment.
Mood boards can be used by individuals and teams to put into visual what words fail to describe precisely. They help get your design ideas and vision streamlined and can also aid in explaining your concept to clients or co-workers.
Interior designers, graphic designers, illustrators, animators, filmmakers, costume designers, and nearly every artistic profession that works with visuals use mood boards.
Read also – 9 Best Interior Design Apps for Home Interiors

Image Credit: vevano.com
Mood Boards in Interior Design
Beyond being a visual guide for a given project, mood boards serve many distinct roles in interior design.
Generally, interior designers use mood boards to collate the different elements they wish to add to the room. This can include paint swatches, molding references, and even actual products like lighting, art, or rugs.
Assembling all your ideas in one inspiration board helps you see if all the components work together. You can also judge if they manage to accomplish the vision you had in mind.
Read also – 20 Best Home Design Apps for Interior Designers
How to Make a Mood Board for Interior Design?
First, let us get this out of the way. There is no cardinal rule as to how one should create a mood board. Everyone has their own process, and none is wrong until it gets the job done. However, everyone could use some structure sometimes – especially beginners.
If your current mood boarding method is not working for you, or you have never made an interior design mood board before – use our easy 3-step outline.

Image Credit: pinterest.com
Step 1: Bring In What Is Not Going Out
Every project may have an element or two that have personality and are just, well, not going anywhere. Whether it is a window, beams, or even flooring that your client does not want to get rid of, you should add them to your mood board first.
Getting the non-negotiable components in early helps you keep them in mind while designing the room. This way, the permanents don’t stick out like a sore thumb once you are all done.
Step 2: Look for Pictures
Browse through the places you find your inspiration- Pinterest, Behance, Dribble, or social media. Your favorite e-commerce platforms make for good spots to find pictures too. Download all that fits your vision.
You are not necessarily looking for fully-done rooms to add to your mood board. Here are some elements you can look for:
- Paint swatches
- Furniture (chairs, tables, sofas)
- Furnishings (sheets, throw pillows, throw blankets)
- Art (paintings, frames, sculptures)
- Decor (baskets, trinkets, plants)
Step 3: Arrange & Experiment
Now that you have your ammunition, you can start putting it on your canvas. Some mood board apps allow you to drag and drop your images and remove backgrounds. Leverage the features of your interior design mood board maker to the fullest.
Remember to mix and match and try out different options and combinations so you can test out what will work best.
Read also – 20 Best Floor Plan Apps To Create Your Floor Plans
Importance of Mood Boards for Interior Designers
Here are some benefits of using mood boards as an interior designer:
- Stimulates ideas and creativity
- Brings your vision to life
- Helps convey your idea to clients & teams
- Fosters healthy client relationships
- Serves as a reference point
- Makes collaborations simpler
- Keeps you on track
Types of Mood Boards
For efficiency, we will discuss two types of digital mood boards.
Don’t get us wrong; physical mood boards are awesome! That little vision board in your bedroom is hella cute, and there is nothing like being able to play around with your ideas physically. However, digital mood boards take the cake when it comes to professional mood boarding.
Digital mood boards are easy to edit, make teamwork comfortable, and are painless to share – let alone the massive savings in terms of time and effort.
1. Collage Mood Boards
Collage mood boards are the most commonly seen and used type of mood board. They are, as the name suggests, a collage of images and text. Collage mood boards are easy to make, time-efficient, and can be made in readily accessible software.
A lot of mood board apps for interior designers use the collage format. Collage mood boards are simple, effective, and beginner-friendly.

Image Credit: cloudinary.com
2. 3D Renders
3D renders serve one ultimate purpose taking the humble collage mood board one step further. Creating a replica of the space you are working on and adding the components in 3D can help you make a very realistic judgment on whether what you have in mind will work.
Nothing works as phenomenally as a 3D render to give your client an accurate representation of your concept.
You can use some of the best mood board apps we have listed below to create realistic 3D renders in simple steps.
Read also – How 3D Rendering Can Increase Profits in Your Interior Design Business?
The options for mood board apps are many, but only a few make the cut for the best mood board apps for interior designers. These are our top picks.
1. Foyr Neo
Making 3D renders accessible for all, Foyr Neo takes the first spot in our list of best mood board apps for interior design. What gives it the edge? Foyr Neo is specifically built for interior designers and their needs. Pros
- AI-Assisted
- No CAD knowledge required
- Drag and drop interface
- 360-degree walkthroughs
- Time-saving
- No plug-ins needed
- Small learning curve
- Desktop only
Link – Foyr Neo
Cost – $25/month. 14-day free trial available.

2. PowerPoint, Keynote, or Google Slides
These are the best free mood board apps there are. PowerPoint, Keynote, and Google Slides are apps nearly everyone is familiar with and has access to. You can use these trusty apps to create your collage mood boards. Pros
- Easy-to-use
- Good for beginners
- Use across devices
- Limited features
PowerPoint: Desktop | iOS | Android
Keynote: Desktop | iOS
Google Slides: Desktop | iOS | Android
Cost – Free
Powerpoint: App Store 4.7 · 284,543 reviews | Play Store 4.3 · 2,024,081 votes
Keynote: App Store 3.5 · 15,664 reviews
Google Slides: App Store 4.6 · 230,728 reviews | 4.1 · 560,344 votes
Read also – 15 Best Free Home Design Software and Tools

3. Pinterest
Pinterest is every creative’s favorite place to find inspiration. However, few have explored the wonderful world of Pinterest boards. You can effortlessly make mood boards on Pinterest and even organize your projects into multiple boards. No editing, no frills! Pros
- Beginner-friendly
- Stays saved
Links – Desktop | iOS | Android
App Store 4.8 · 4,178,962 reviews | Play Store 4.6 · 9,043,537 votes
Read also – 15 Best Free Floor Plan Creator

4. Milanote
Milanote squeezes most apps you would need to create a mood board into one powerful tool. It offers templates you can choose from and even integrates with Unsplash to offer high-quality images to add to your board. You can organize multiple projects, collaborate with your team (even leave notes), and share the boards. Pros
- Good for teams
- Low rating for Android app
Cost -$9.99/ month for individuals. Limited free version available.
App Store 4.6 · 762 reviews | Play Store 3.2 · 500 votes
Read also – 15 Best Free Interior Design Software and Tools

5. Evernote
Evernote is an organization app that allows you to make quick, functional mood boards. You can create notebooks for different projects and add images to the notebook to make your own mood board. Evernote, too, allows for collaboration with teams and quite a few customizations. Pros
- Limited design control
Cost -$3/month for individuals. Limited free version available.
App Store 4.4 · 2,763 reviews | Play Store 4 · 1,696,910 votes
Read also – 15 Best Free Kitchen Design Software

If you have been sleeping in Canva, you are missing out. The mighty app is one of the best mood board software for interior designers . The many templates and stickers make it easy to create aesthetically pleasing, beautiful mood boards. You can also search for images within Canva and add them to your collage mood board. Pros
- Extensive design flexibility
- No interior-design specific features
Links – Desktop | iOS | Android
Cost – Free for individuals. $51/year for teams
App Store 4.9 · 1,038,540 reviews | Play Store 4.8 · 8,035,695 votes
Read also – 15 Best 3D Rendering Software Alternatives

7. Adobe Illustrator
If you have access to the Adobe Creative Cloud and are familiar with Illustrator, it is, hands down, one of the simplest ways to make a mood board. While it may be a little complex for beginners, the software gives you complete control over what your mood board looks like. Pros
- Not beginner-friendly
- Time-consuming
- Limited functionality with mobile apps
Cost – $30/month for Creative Cloud Apps (Photoshop, Illustrator, InDesign, Premiere Pro, and Acrobat Pro)
App Store 4.6 · 20,810 reviews | Play Store 3.9 · 123,817 votes
Read also – 10 Best Free 3D Modeling Software

8. Moodboard
Making and publishing a mood board does not get simpler than this. Moodboard is one of the best free mood board apps there really is. It is a straightforward interface that offers you templates or starter mood boards to choose from. You can quickly add images to your canvas and get beautiful mood boards. Pros
- No download needed
Link – Desktop
Read also – 15 Best Floor Plan Software Tools

With a focus on teams, making collaborations easier, and simplifying workflow, Mural calls itself a digital whiteboard. You can use Mural to create a mood board with images, notes, and tasks. The best part is that Mural’s limited plan allows you to test the software with your team. Pros
- Organization tools
- Limited design flexibility
- Low rating for mobile apps
Cost – $9.99/month/per member. Limited free version available.
App Store 2.5 · 82 reviews | Play Store 1.7 · 245 votes
Read also – 10 Best Free Bathroom Design Apps and Software

Image Credit: mural.co
10. InVision
“Not a whiteboard, a workboard,” InVision focuses on empowering teams to collaborate and work faster. InVision’s Boards are perfect for mood boarding. You can use the app on your iPad or iPhone. Opt for templates to get started and create and share interior design mood boards simply. Pros
- No Android app
Links – Desktop | iOS
Cost – $7.95 per active user/month. Limited free team plan available.
App Store 4.3 · 2,549 reviews
Read also – 20 Best Home Renovation Apps and Software

Why is Foyr Neo the Best Mood Board Software for Interior Designers?
Collage mood boards are easy to make and have a DIY feel to them. However, if you are an interior design professional looking to make your mark in the industry and impress your clients- choose 2D or 3D floor plans.
Foyr Neo makes it possible for you to get started with no prior CAD or 3D Modeling experience. The tool is made for interior designers, and adapting to it will be an intuitive breeze for you.
Create photorealistic renders in minutes to improve your workflow and help clients see your vision. Get started with a 14-day free trial today.
No matter your years of experience or the size of your team, mood boards are a utility for all interior designers. Your process of making a digital mood board can be made more effective if you opt for mood board software for interior designers.
Mood board apps make it easy to translate your vision into visuals and share them with your team and clients. They help you save time and serve as a reference point whenever you need to look back.
Choose an app that works best for you and your team!
1. Are free mood board apps good?
Absolutely! If you are a beginner looking to create simple mood boards, there are plenty of free apps you can use. The free presentation and note apps on your phone or desktop do great.
2. What should I look for in mood board software?
A mood board software needs to work for you. Consider your requirements, your team strength, and your budget first. Then browse through the features of the mood board software available, read some reviews online and on social media, and shortlist the ones you think are best for you.
We always recommend taking free trials, if available, before you finalize a mood board maker.

Nichole Samuel
Interior Designer
Blog Reviewed By

Subscribe and follow
You might also like.

Design Software & Tools
15 Best Floor Plan Creator for 2023 [Free + Paid]
February 3rd, 2024

20 Best Home Renovation Apps & Software To Remodel Your House

How can interior designers choose the best virtual design studio?
January 24th, 2024

Best Free Architectural Design Software
January 31st, 2024
Join 50,000+ designers and teams
Using Foyr Neo is as easy as 1, 2, 3. First, upload a floor plan or create one from scratch. Then drag and drop from over 60K 3D models to fill your rooms. Lastly, just set the shot and let the AI create stunning 4K renders for you in less than 10 minutes.
No Credit Card Or Download Required

Specially built for Interior Designers
Get started for free

13 Tips on How To Nail a Presentation To the Board of Directors
Published: January 13, 2021
In college, I always made it a point to listen intently to presentations. I knew how stressful and nerve-racking it was to present in a room of peers and authority figures.

I would nod feverishly to let presenters know I was invested in their presentation. And they knew it too. They often zeroed in on me as I became their focus point and silent motivator. The fixation felt awkward at times, but that felt like one of my small contributions to society. That, and an endless supply of cat videos.
![→ Free Download: 10 PowerPoint Presentation Templates [Access Now]](https://no-cache.hubspot.com/cta/default/53/2d0b5298-2daa-4812-b2d4-fa65cd354a8e.png "presentation board creator")
Back then, the stakes were relatively low. But when you’re tasked with putting together a presentation to a board of directors, the pressure’s on.
But with a few tricks in your arsenal, you won’t need a sympathetic audience member to gauge how well you’re doing.
Let’s walk through some tips to prepare for your presentation and review some things to avoid.
How To Make a Presentation To the Board
- Know your audience.
- Plan ahead.
- Structure your presentation.
- Keep it concise.
- Set up early.
- Incorporate visuals into your presentation.
- Focus on results.
- Send materials beforehand.
- Build confidence with your power outfit.
- Rehearse your script.
- Don't fall into the PowerPoint Trap.
- Read the room.
- Include time for questions.
1. Know your audience.
Knowing your listeners is as important as the content of your presentation. When you understand their priorities, you can put together a presentation that speaks directly to them.
If you don't know the board well, do some research and get answers to these questions:
What does the board care about?
This will help you see from what lens they look at things. For instance, a board keen on community impact may not be drawn to a presentation focused on return on investment (ROI).
There are a few ways to find this out. You can start by looking into each board member’s professional background. If most members have a finance background, for instance, you’ll want to make sure you cover any financials as it relates to your presentation. This could be cost, expected ROI, or operating margins.
You can also get some insight into what the board cares about by looking back at your interactions with its members. Think about the conversations you’ve had: What comes up most often? Is it company culture, profit, philanthropy, innovation, or something else?
What are their main concerns?
A board of directors is responsible for making decisions that will ensure the growth and sustainability of a company. So naturally, they will be looking out for anything that may impede that process.
Common concerns a board may have are:
- Costs: How much time and money will it require?
- Timeline: How long will this project take and is that timeline feasible?
- Risks: How risky is your proposal and what is the risk-to-return ratio?
You may find that each board member has a different focus, which means your presentation should be well-rounded to tackle these issues.
Once you know this answer, you can subtly handle each concern throughout your presentation. Getting those answers will help you create a presentation that not only interests your audience but also aligns with their goals. This, in turn, will bring you much closer to accomplishing the plans laid out in your presentation.
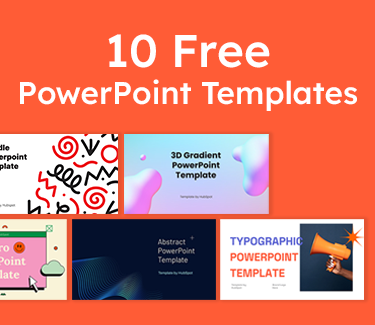
10 Free PowerPoint Templates
Download ten free PowerPoint templates for a better presentation.
- Creative templates.
- Data-driven templates.
- Professional templates.
You're all set!
Click this link to access this resource at any time.
2. Plan ahead.
The next step in delivering a great presentation is making a plan. This means figuring out the focus of your presentation, what you’ll cover, and what you’ll leave out.
A presentation should follow the structure of any good movie, with a beginning, middle, and an end. Here’s an example outline for a presentation where the head of the marketing team is proposing course offerings as a new lead generation channel.

The middle is the meat and potatoes of your presentation. You'll likely spend time providing data, contextualizing it, and explaining your approach.
Your ending should bring together your key points and leave your audience with actionable steps. Because what good is providing the information if you have no plan for what to do moving forward?
3. Structure your presentation based on the board’s process.
Not every board of directors operates in the same way. Sure, there are standard guidelines for every meeting. However, the approach may vary for presentations.
Some may operate more like a town hall, pausing periodically to discuss the points as they come up. In this case, leave room after each section of your presentation to discuss what was covered.
Others may follow the more standard approach: presentation followed by a discussion. Studies show that humans remember best the beginning and end of what they read, hear, and see. What’s in the middle tends to get lost. With that in mind, consider sharing your most pertinent information toward the beginning and end of your presentation.
4. Keep it concise.
One thing board members aren’t known for is open availability. That said, you want to make the most of your time with them. How do you do that? Stick to the scope of the presentation.
While it’s great to incorporate storytelling, avoid getting sidetracked and wasting time. Be clear and keep it simple.
If you’re showing data, only share one highlight per data graph. There are several reasons for this:
- Data itself doesn’t tell a story. You, as the presenter, do. As such, you have to explain what it means and why it matters. Let’s say lead generation at your company has plateaued in the past year across all channels. That’s all the data says. But during your research, you realize it’s due to a shift in how your audience is consuming information. Your role is to present the data and explain the "why" behind the plateau along with a solution.
- You want to prevent information overload. Share the piece of data that best supports your points and has the most impact. For instance, if a new lead generation channel is the focus of your presentation, diving into the specifics of another channel may not be worth your time.
If you leave it to your audience to make sense of the data, they might reach a conclusion that doesn’t align with your message.
5. Set up early.
There’s nothing more awkward than silence during a technical difficulty.
Everyone’s looking at you while you’re figuring out why technology has forsaken you. The more time the issue takes to resolve, the more panicked you get. We’ve all been there.
To avoid this, set up early and do a run-through before your scheduled presentation time. It’ll give you time to get familiar with the space and any technology you’ll need to run during your presentation.
6. Incorporate visuals into your presentation.
When choosing between words and media, pick the latter.
Visuals help us make sense of information at a much quicker pace than words do. We’re also better at remembering what we see versus what we hear by 55% – it’s called pictorial superiority .
It’s also beneficial to keep your visuals simple. If you have too much going on, your audience will be confused. But if it’s too bare, it will take too many visuals to paint the picture. So, pull your most significant data and use data visualization tools to design intuitive graphics.
7. Focus on results.
A board of directors typically focuses on big-picture decisions that will have a long-term impact on the company.
In this vein, every piece of your presentation should get you closer to answering these questions:
- " Why does this matter? "
- " What is the long-term impact? "
- " How does this bring the company closer to its goals? "
- " Any potential roadblocks? How will you address them? "
Incorporating these answers into your presentation will set you up for a smoother Q&A session.
8. Send materials beforehand.
Depending on what you’ll be covering in your presentation, it may be helpful to send the board materials to review in advance. This should only be supplemental information that would be too time-consuming or distracting to cover in a presentation, like reports and demos. This way, the focus during the presentation will be on the "why" and not the "how."
The one material you don’t want to send is your presentation, as you want to be the one to contextualize it. Otherwise, the board might form an opinion based on limited information.
A week before the meeting is a good rule of thumb, leaving room for you to respond to initial comments or feedback.
Think of this process as an advantage. You get insight into what the board members may bring up during the meeting and more context to prep. Secondly, it ensures everyone is on the same page ahead of the meeting. That way, you can dive straight into key points during your presentation without covering minute details.
9. Build confidence with your power outfit.
Building confidence is one of the less concrete tips on the list to implement. But the good news is, there are research-backed techniques you can use to achieve it. One of them is right within your reach: clothing.
Many of us can relate to the feeling of trying on clothes in a fitting room and feeling like a million bucks. It tends to put us in a better mood and shift our perspective.
Well, turns out there’s a reason for this. In 2012, two researchers coined the term " enclothed cognition " to refer to the impact clothes can have on the psyche. They found that the clothes we wear can shift our perspective.
In that spirit, put on your best blazer or suit the day of your presentation. That outfit may be just the boost you need.
10. Rehearse your script.
During a presentation with a board of directors, you want to avoid the Michael Scott approach at all costs.
Instead, go the exact opposite route: practice. Practice is the cure to presentation jitters and the formula for seamless delivery. The more familiar you become with your content, the better the presentation will be.
If it’s been a while since your last presentation, start by practicing in the mirror. You’ll immediately notice any mannerisms that may be distracting to your audience. Recording yourself also works great.
Then, practice in front of an audience. And, unfortunately, your dog won’t cut it for this one. Practice with family or friends who can give you feedback on how to improve.
And remember: You’re the only one who knows your speech and presentation. So, if you mess up or forget to mention something, you’re likely the only one who noticed.
11. Don’t fall into the PowerPoint trap.
You’ll likely use a tool like PowerPoint to guide you during your presentation. Yet, it’s important that you don’t overly depend on it.
For instance, packing your slides with heavy text or bullet points is a surefire way to lose your audience. In fact, 40% of respondents in a 2018 study by Prezi said it caused disengagement and made it harder to retain information.
So, stick to one key point on each slide. It’s easier for your audience to remember and prevents information overload.
12. Read the room.
Even if you follow every tip listed above, you might hit a point in your presentation where there’s a disconnect between you and your audience. You might notice confused looks or a shift in body language. If that happens, that’s your cue to pivot.
If your audience seems confused, dive in a little bit deeper on your point. If you sense disagreement, tackle those concerns head-on.
Let’s say you’re proposing a new initiative for the company, and you sense some pushback on the timeline.
You can address it by saying something along the lines of, " You may have some concern regarding the timeline and whether it’s feasible given our current projects. While the timeline may seem tight, we have factored in X, Y, and Z, and, given our past initiatives, we believe this timeline will account for A, B, and C ."
A response like this can mitigate the situation while still keeping you on track.
13. Include time for questions.
As a foodie, dinner for me isn’t complete without a good piece of chocolate. Whether it’s a KitKat or a chocolate cake, having chocolate after dinner feels like the perfect ending. Q&A sessions are kind of like that. It’s the audience’s chance to ask questions and discuss the presentation.
Be ready for questions regarding the data and solutions you presented. The length of the Q&A session will vary depending on the length of your presentation, the size of the board, and other factors.
Additionally, it’s your opportunity to address any looming concerns and re-emphasize your key points. Not sure what to do if you don’t have an answer to something? Here are a few responses:
- "That’s a great question. I don’t have an answer for you at the moment, but I will follow up over email by end of day."
- "I don’t have much experience in that X [topic/department/]. However, I will reach out to X and get back to you within a week."
- "We haven’t explored that yet, but what I can tell you is …"
- "That’s a great point we hadn’t considered before. My team and I will reconvene and strategize on the best way to approach this."
When the stakes are so high, a presentation to the board can seem daunting. By incorporating these tips into your strategy, you can remove the stress and focus instead on your delivery.
Don't forget to share this post!
Marketing software that helps you drive revenue, save time and resources, and measure and optimize your investments — all on one easy-to-use platform
FEATURES / create / Image Generator
Online AI Storyboard Generator

Create your Script and Storyboard with AI
From script to storyboard.
Get an entire storyboard script generated from one story online in a matter of seconds. Streamline your storyboard creation process by describing the direction of your story and let our AI storyboard generator take care of the rest.
From Script to Image
Our text-to-image feature powered by AI transforms your script into captivating visuals while effectively capturing camera angles, diverse scenes, and other visual elements you want.
Plus, our one-of-a-kind character guidelines feature allows you to reuse the same character frame to frame, made with your character specifications.
Vizualise Your Video
Instantly convert storyboards into animatics with subtitles and sound, then edit frame timings with the integrated timeline. Perfect for communicating your creative vision.
Creativity-Enabling AI Tools

Build Characters
Create custom AI-generated characters to use across multiple storyboard frames.

Plan Your Video
Describe storyboard scenes to quickly generate expressive, character-driven images.

Create Variations
Create subtle variations of existing images to build out storyboard sequences fast.

Packed with features for your most collaborative work

Download & Export
Download and export your storyboards as presentation-ready PDFs, PNGs, and even MP4 animatics.

Shareable Link
A shareable link lets you share password-protected storyboards & animatics with guests to receive feedback.

Simple Versioning
Easily save and compare storyboard versions for fast iterations with full change history.

Frequently Asked Questions
I'm not sure where to start - is there a sample storyboard, what sets this apart from other ai storyboard generators, what is the best free ai storyboard generator, can i use my own images, do i need drawing skills, what platforms does boords work on.

Online storyboarding software
The Shortcut to Effective Storyboards
Boords is the modern storyboarding tool that helps video professionals create client-ready storyboards 10x faster.
Display Board
- View history
- 1.1 Crafting
- 2.1 Placement
Obtaining [ ]
Crafting [ ].
Placement [ ]
Similarly to Nixie Tubes , Display Boards can be aligned to share text. Display Boards can be expanded up to 32 blocks above, below, and to either side, allowing a maximum Display Board size of 32x32. More Display Boards can be placed beyond the limit, however they will not function as part of the main board.
The Display Board must be powered at an RPM of 30+ to display text. Faster RPMs will reduce the time between updates to the Display Board. The Display Board has no stress impact. Use a Clipboard or a Name Tag on a line of the Display Board to write the item's contents to it. Each Display Board block can hold 2 lines of text. Lines can be erased using an empty hand. Lines can also be colored by using Dye s or illuminated with Glow Inc Sac s. Items will not be consumed on use.
Display Links can write information to Display Boards.
History [ ]
- 0.5 : Introduced.
- 1 Create Addon Mods
Top searches
Trending searches

solar eclipse
25 templates

education technology
180 templates

32 templates

28 templates

thanksgiving
38 templates

Create your presentation
Writing tone, number of slides.

AI presentation maker
When lack of inspiration or time constraints are something you’re worried about, it’s a good idea to seek help. Slidesgo comes to the rescue with its latest functionality—the AI presentation maker! With a few clicks, you’ll have wonderful slideshows that suit your own needs . And it’s totally free!

Generate presentations in minutes
We humans make the world move, but we need to sleep, rest and so on. What if there were someone available 24/7 for you? It’s time to get out of your comfort zone and ask the AI presentation maker to give you a hand. The possibilities are endless : you choose the topic, the tone and the style, and the AI will do the rest. Now we’re talking!
Customize your AI-generated presentation online
Alright, your robotic pal has generated a presentation for you. But, for the time being, AIs can’t read minds, so it’s likely that you’ll want to modify the slides. Please do! We didn’t forget about those time constraints you’re facing, so thanks to the editing tools provided by one of our sister projects —shoutouts to Wepik — you can make changes on the fly without resorting to other programs or software. Add text, choose your own colors, rearrange elements, it’s up to you! Oh, and since we are a big family, you’ll be able to access many resources from big names, that is, Freepik and Flaticon . That means having a lot of images and icons at your disposal!

How does it work?
Think of your topic.
First things first, you’ll be talking about something in particular, right? A business meeting, a new medical breakthrough, the weather, your favorite songs, a basketball game, a pink elephant you saw last Sunday—you name it. Just type it out and let the AI know what the topic is.
Choose your preferred style and tone
They say that variety is the spice of life. That’s why we let you choose between different design styles, including doodle, simple, abstract, geometric, and elegant . What about the tone? Several of them: fun, creative, casual, professional, and formal. Each one will give you something unique, so which way of impressing your audience will it be this time? Mix and match!
Make any desired changes
You’ve got freshly generated slides. Oh, you wish they were in a different color? That text box would look better if it were placed on the right side? Run the online editor and use the tools to have the slides exactly your way.
Download the final result for free
Yes, just as envisioned those slides deserve to be on your storage device at once! You can export the presentation in .pdf format and download it for free . Can’t wait to show it to your best friend because you think they will love it? Generate a shareable link!
What is an AI-generated presentation?
It’s exactly “what it says on the cover”. AIs, or artificial intelligences, are in constant evolution, and they are now able to generate presentations in a short time, based on inputs from the user. This technology allows you to get a satisfactory presentation much faster by doing a big chunk of the work.
Can I customize the presentation generated by the AI?
Of course! That’s the point! Slidesgo is all for customization since day one, so you’ll be able to make any changes to presentations generated by the AI. We humans are irreplaceable, after all! Thanks to the online editor, you can do whatever modifications you may need, without having to install any software. Colors, text, images, icons, placement, the final decision concerning all of the elements is up to you.
Can I add my own images?
Absolutely. That’s a basic function, and we made sure to have it available. Would it make sense to have a portfolio template generated by an AI without a single picture of your own work? In any case, we also offer the possibility of asking the AI to generate images for you via prompts. Additionally, you can also check out the integrated gallery of images from Freepik and use them. If making an impression is your goal, you’ll have an easy time!
Is this new functionality free? As in “free of charge”? Do you mean it?
Yes, it is, and we mean it. We even asked our buddies at Wepik, who are the ones hosting this AI presentation maker, and they told us “yup, it’s on the house”.
Are there more presentation designs available?
From time to time, we’ll be adding more designs. The cool thing is that you’ll have at your disposal a lot of content from Freepik and Flaticon when using the AI presentation maker. Oh, and just as a reminder, if you feel like you want to do things yourself and don’t want to rely on an AI, you’re on Slidesgo, the leading website when it comes to presentation templates. We have thousands of them, and counting!.
How can I download my presentation?
The easiest way is to click on “Download” to get your presentation in .pdf format. But there are other options! You can click on “Present” to enter the presenter view and start presenting right away! There’s also the “Share” option, which gives you a shareable link. This way, any friend, relative, colleague—anyone, really—will be able to access your presentation in a moment.
Discover more content
This is just the beginning! Slidesgo has thousands of customizable templates for Google Slides and PowerPoint. Our designers have created them with much care and love, and the variety of topics, themes and styles is, how to put it, immense! We also have a blog, in which we post articles for those who want to find inspiration or need to learn a bit more about Google Slides or PowerPoint. Do you have kids? We’ve got a section dedicated to printable coloring pages! Have a look around and make the most of our site!
IMAGES
VIDEO
COMMENTS
Take Presentation Designs To The Next Level With Animation, Video & Audio. Quick & Easy To Use Presentation Maker. Design, Download, Print Or Share.
Miro's presentation maker allows you to use your board's frames as slides, working exactly as any regular presentation. When creating a presentation with Miro, you have the option to use the Presentation mode, which helps you manage your time and audience on the board, enabling you to facilitate and present at the same time.
Design, present, inspire with Canva Presentations. Reimagine Presentations with cinematic visuals that captivate your audience - no matter how or where you're presenting. With features to collaborate smarter, create stunning data visualizations, and deliver confidently, Canva Presentations bring impact to your ideas. Create a presentation.
Design your mood board with Canva's library of millions of professional elements and graphics. You can add text boxes with different background colors and font styles that complement your design. Keep customizing. Your mood board is as unique as you are. Upload your own art, rearrange illustrations and change font styles.
With Visme's Presenter Studio, you can record your presentation and share it with your audience. Record your screen, audio, and video, or switch off your camera for an audio-only presentation. Present asynchronously on your own time, at your own pace. Let your colleagues watch it at their convenience. Create Your Presentation.
Let Adobe Express be your go-to presentation app. Establish a theme for your presentation design using photos, icons, logos, personalized fonts, and other customizable elements to make them feel entirely authentic. Duplicate your project to create consistency across future presentations. With Adobe Express, it's free and easy to make, save ...
Free Vision Board Maker. Create a vision board. 100% fully customizable. Beautifully designed templates. Millions of photos, icons and illustrations. Easily download or share. Craft a stunning vision board for every area of your life — from health and career to relationships. Drag and drop images, quotes, affirmations, and other vision board ...
Create Presentations, Infographics, Design & Video | Visme. Create anything. Make it engaging. The all-in-one marketing and design platform to stand out from the crowd with beautiful engaging on-brand content with the power of AI. Used by 27,500,000 people in 133 countries and counting.
Make interactive presentations. Create show-stopping presentations and clickable slide decks with Genially's free online presentation builder. Leave boring behind and tell a story that's interactive, animated, and beautifully engaging. Make an interactive presentation.
Architecture presentation boards are a tool to showcase your work. They are a way to draw your viewers into your design process and methods, providing an overall summary and vision for the project. You are communicating your design and showcasing your artistic skills, and your sense as a designer. Every successful project has a central concept ...
AI presentation generator: Jump-start your deck with AI. Just write a prompt and watch your slides magically appear. After picking initial fonts and colors, you can start editing the deck to ...
Prezi's online presentation tools help you connect with your audience and create conversational presentations that come with you on-screen to any video call. With professionally-designed templates, branding solutions, immersive views, and more, it's never been easier to create and present online. Try for FREE. Let's talk!
A bulletin board fit for a boardroom. Like an upgraded version of the vision board in your old bedroom, a virtual bulletin board template gives you the freedom to express yourself through text, imagery, graphics, videos, color, and more. Delight the sense of sight: Represent your talking points, key takeaways, and overarching goals as visuals ...
Some of the best presentation software include Visme, Haiku Deck, Prezi, Microsoft Powerpoint, Canva and Google Slides. In this comparison guide, we'll analyze each of these tools and many more to understand what the difference is between them so you can choose the best presentation maker for your business.
Create unlimited boards with Canva's Free Online Whiteboard. Brainstorm ideas, teach & collaborate with free editable templates. ... Add a Whiteboard to your Presentation in just one click, by expanding a presentation slide into an interactive Whiteboard. Transform Presentations from a one person show into a collaborative session.
5. Evernote. Evernote is an organization app that allows you to make quick, functional mood boards. You can create notebooks for different projects and add images to the notebook to make your own mood board. Evernote, too, allows for collaboration with teams and quite a few customizations. Pros.
This may sound too good to be true, but you don't need any design skills to create a top-notch animation! With Renderforest whiteboard video maker, all the tools you need to design a high-end whiteboard presentation are at your fingertips, and the best part is it's fuss-free! Let's walk through the simple three steps to bring your vision to life:
That way, you can dive straight into key points during your presentation without covering minute details. 9. Build confidence with your power outfit. Building confidence is one of the less concrete tips on the list to implement. But the good news is, there are research-backed techniques you can use to achieve it.
2. Create a detailed plan of your project and board. Before you can create your project board, you need to decide what items you're going to display on it, and how you're going to display those items. This part of your plan will depend on the type of project you're working on.
Free AI Presentation Maker for Generating Projects in Minutes. Generate ready-to-use presentations from a text prompt. Select a style and Visme's AI Presentation Maker will generate text, images, and icon. Customize your presentation with a library of royalty-free photos, videos, & graphics. Generate a presentation with AI.
Try The Best AI Storyboard Generator. Create storyboards and generate scripts in just a few clicks. Try the storyboarding tool that empowers storytellers and video creators everywhere. Create storyboards from text scripts fast with our online AI storyboard generator. No drawing skills needed - ideal for busy creators and businesses.
Display Boards are a scalable alternative to the Sign. Similarly to Nixie Tubes, Display Boards can be aligned to share text. Display Boards can be expanded up to 32 blocks above, below, and to either side, allowing a maximum Display Board size of 32x32. More Display Boards can be placed beyond the limit, however they will not function as part of the main board. The Display Board must be ...
AI presentation maker. When lack of inspiration or time constraints are something you're worried about, it's a good idea to seek help. Slidesgo comes to the rescue with its latest functionality—the AI presentation maker! With a few clicks, you'll have wonderful slideshows that suit your own needs. And it's totally free!